Properly winterize your outdoor cold plunge tub for home use before temperatures drop below freezing to prevent pipe damage. Completely drain and clean the tub, plumbing, and chiller, then blow out all lines using a wet/dry vacuum. Finally, cover your best cold plunge tubs with an insulated, secure cover to protect against frost, ensuring your investment is safe for spring.
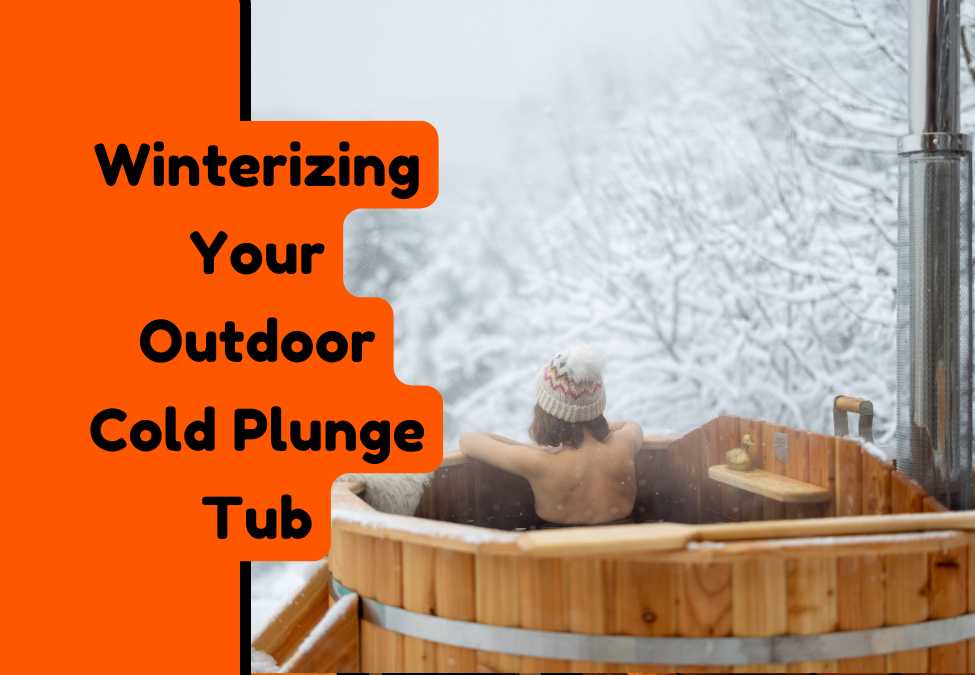
Winterizing Your Outdoor Cold Plunge Tub
Key Takeaways
· Start winterizing before temperatures drop below freezing to prevent trapped water from expanding and cracking pipes, ensuring your cold plunge tub for home use stays safe.
· Completely drain water from the tub, plumbing lines, and filtration system, using a wet/dry vacuum to blow out jets and prevent hidden ice damage.
· Clean and sanitize all interior surfaces, including headrests and filter housings, to prevent mold, mildew, and odors from developing while the tub sits dormant.
· Protect seals by applying silicone lubricant to gaskets and O-rings, preventing them from drying out or cracking in harsh winter weather.
· If using your cold plunge through winter, keep water moving with a circulation pump, insulate plumbing lines, and use a thermal cover to prevent freezing and heat loss.
As temperatures drop and frost begins to settle in, it becomes crucial to think ahead and prepare your outdoor cold plunge tub for winter. Proper winterization ensures the longevity of your equipment, prevents costly repairs, and keeps your unit in perfect condition for when you are ready to plunge again in the warmer months.
Let us discuss what you need to know about winterizing your cold plunge tub effectively, safely, and efficiently.
Why Winterizing Is Important
Winter weather can be harsh on outdoor fixtures, and your cold plunge tub is no exception. If not correctly addressed, freezing temperatures can damage pipes, crack components, and lead to electrical problems. Unlike indoor tubs or pools, outdoor setups are exposed to direct snow, wind, ice, and moisture, which can wreak havoc on a system that is not protected.
Even when you plan to use your cold plunge occasionally during winter, you will still need a modified winter care routine to keep everything functioning smoothly. Here is a step-by-step guide to help you winterize the best cold plunge tubs.
Step 1: Plan Before Winter Starts
The best time to begin winterizing is before temperatures drop below freezing. Waiting too long can result in frozen water inside the system, which can cause permanent damage. Choose a dry, sunny day with temperatures above 4°C. Prepare a checklist of supplies you will need in advance, such as:
· Wet/dry shop vacuum
· Non-toxic RV antifreeze
· Soft cleaning cloths
· Gentle tub-safe cleaner
· Water testing strips
· Weather-resistant vinyl or insulated cover
· Socket wrench or pliers for removing fittings or drain plugs
· Silicone lubricant for gaskets and seals
Tip: Even if you aren't draining it fully, covering the cold plunge tub for home unit with insulated accessories can save significant energy as temperatures drop.
Step 2: Disconnect Power

Disconnect the power to your cold plunge tub before conducting any maintenance. This step is crucial for safety, especially when dealing with electric chillers or heaters. Identify the breaker that powers your tub and switch it off. Unplug any exterior equipment, such as chillers, filtration units, or circulation pumps. If your tub has a digital control panel, cover it with a waterproof protector or remove it, if possible, to avoid condensation damage.
Step 3: Drain the Outdoor Cold Plunge Tub Completely
Leaving water in the tub over winter is a recipe for disaster. Ensure all residual water is removed. Ice expands as it freezes, so even a small pool of water left behind could cause cracks in the plumbing lines or structure, leading to costly repairs come spring.
Start by draining the tub using its built-in drain valve or a submersible pump. After removing the bulk of the water, use a wet/dry vacuum to remove any remaining water from the:
· Jets and nozzles: Blow out trapped water from each jet to prevent internal damage from freezing and expanding ice.
· Plumbing lines: Ensure they are completely dry to avoid clogs or burst pipes from ice formation.
· Filtration system: Water left here can harbor bacteria and freeze, damaging internal components.
· Chiller and pump units: Repairing these parts in case of damage can be expensive.
Related reading: How to Maintain a Cold Plunge Tub: Cleaning & Water Care
Step 4: Clean and Sanitize Thoroughly
Once the tub is empty and dry, clean it thoroughly to prevent algae, mold, and unpleasant odors from developing during its dormant period. Use a soft cloth and a non-abrasive, tub-safe cleaner to wipe down all surfaces. Avoid bleach or harsh chemicals that can corrode materials over time. Clean the:
· Interior surfaces and seats: These areas can accumulate grime and bacteria. A deep clean ensures the best cold plunge remains fresh during its dormant period.
· Headrests or cushions: If your tub has headrests and cushions, ensure they are dry and sanitized to prevent mildew.
· Filter housings: While many homeowners often overlook these areas, any buildup can reduce performance and introduce contaminants later.
· Tub cover: A clean cover prevents external dirt from contaminating the interior once placed back on the tub.
Tip: This is also the perfect time to inspect your cold plunge tub for any cracks or wear that might worsen in freezing temperatures. Related: Seasonal Maintenance Tips for Outdoor Cold Plunge Pools
Step 5: Blow Out the Plumbing Lines
If your outdoor cold plunge tub has built-in jet systems or plumbing, blow out the lines to remove any trapped water. An air compressor or a wet/dry vacuum works well. Attach the hose to each jet or inlet and force air through until no water is visible. Repeat the process for all inlets, outlets, and drain lines.
Step 6: Add Non-Toxic Antifreeze for Extra Protection
If you live in areas with extreme winters, consider using non-toxic RV antifreeze. Pour a small amount into the plumbing lines, pump, and chiller, especially if you are not confident that you have removed all residual water. This step acts as a safeguard against unforeseen freeze-thaw cycles.
Step 7: Lubricate Gaskets and Seals
Freezing weather can cause rubber and silicone gaskets to dry out, crack, or lose elasticity. Apply a thin layer of silicone lubricant to all seals, O-rings, and gaskets. Doing so helps keep them pliable and ready for use once you reopen your tub in the spring. If you store any components like filters, hoses, or small fittings indoors, pack and label them properly so nothing gets lost.
Step 8: Secure a Weather-Resistant Cover
Purchase a high-quality, insulated cover that can handle winter conditions. Choose a cover designed specifically for outdoor use, preferably waterproof, UV-resistant, and heavy enough to resist wind. Here are tips to help you set up the cover securely.
· Ensure a tight fit to prevent animals or debris from entering
· Add bungee cords or straps to hold it in place
· Place a small object like a beach ball or foam under the cover to create a dome that prevents water or snow accumulation
Tip: Learning how to use a cold plunge safely at home includes knowing how to secure it properly when not in use, protecting both the equipment and curious pets or children.
Using Your Cold Plunge in Winter

Do you plan to use your best cold plunge during winter? Then, your winterizing routine will look different. You must maintain a balance between use and protection with the following tips.
· Keep the water moving to prevent freezing. Stagnant water is more likely to freeze. However, running a small circulation pump intermittently can make a big difference.
· Insulate plumbing lines and pumps with foam insulation or thermal blankets to retain warmth.
· Use a thermal cover when not in use. Thermal covers trap heat and prevent temperature loss, especially overnight.
· Check water levels and chemistry frequently.
· Have a backup power plan in case of outages to ensure your system can keep running if there is a power failure.
Tip: Maintaining your setup through the colder months ensures you don’t miss out on year-round home cold plunge system benefits, like boosted immunity and faster recovery.
Maintenance Throughout the Cold Season
Even if you have winterized your plunge tub completely, make it a habit to check on it periodically throughout the season. Look for any pooling water, animal activity, or shifting of the cover. After heavy snowfall, brush off the lid to relieve pressure and prevent sagging. Regular visual checks help catch minor issues before they become bigger and costlier to repair.
Spring Reopening Tips
When winter is over, the ice thaws and you are ready to reopen your outdoor cold plunge tub. You will need to reverse the steps you took during winterization. Start by removing the cover and inspecting it for any visible damage. Check all the components thoroughly before powering the unit back on.
If there are no signs of cracking, loose fittings, or wear, reinstall and reconnect all equipment, refill the tub, and run a full water chemistry check. Your outdoor cold plunge tub will then be ready for use.
Tip: Learn more about cold plunge therapy health benefits: Cold Plunge Guide: Benefits, Risks & How to Start Safely
Finally
Properly winterizing your outdoor cold plunge tub might feel like much work upfront. But it pays dividends in equipment longevity, cost savings, and peace of mind. It protects your investment and ensures that your plunge tub is clean, intact, and ready for use when warmer days return. Whether shutting it down for months or continuing occasional use, plan well in advance to achieve seasonal success.
Sun Home makes the world's best home saunas and cold plunges. Browse our site to learn more! For gyms, spas, or health clubs looking to add value for their clients, a commercial cold plunge tub wellness centre installation can boost client satisfaction and recovery offerings considerably.
Reach out today and find out more from our Cold plunge experts.
FAQs
When should I start winterizing my outdoor cold plunge tub?
Begin the process before temperatures drop below freezing, ideally on a dry day above 4°C, to avoid frozen water damaging the system.
Do I need to drain my cold plunge completely for winter?
Yes, if you aren't using it, you must remove all water from the tub, pipes, and jets to prevent ice expansion from cracking components.
Can I use antifreeze in my cold plunge tub?
Yes, you can pour non-toxic RV antifreeze into the plumbing lines for extra protection against freeze-thaw cycles, especially in areas with extreme winters.
How do I protect the tub cover during winter?
Use a high-quality, weather-resistant insulated cover and place an object like a beach ball underneath to create a dome that prevents snow and water accumulation.
What if I want to use my cold plunge during winter?
You can keep using it by running a circulation pump to prevent freezing, insulating pipes, using a thermal cover, and checking water chemistry regularly.
