Prevent mold in your outdoor sauna by prioritizing proper ventilation and moisture control. Utilizing convective airflow with low intake and high exhaust vents ensures wood dries within 24 hours. Combine mold-resistant woods like Western Red Cedar with post-session habits—such as propping the door open—to maintain a clean, long-lasting wellness sanctuary.
Preventing Mold in Outdoor Saunas: Ventilation Best Practices
Proper ventilation is an effective way to prevent mold in the best Infrared Sauna for home. Mold forms when heat and moisture linger in trapped air, not because of the heater itself. By designing correct intake and exhaust airflow, choosing breathable materials, and following simple post-session drying habits, you can keep your sauna clean, dry, and long-lasting even in humid or cold climates. Read on to understand how to do it.
Key Takeaways
- Mold is caused by trapped humidity
- Outdoor saunas need low intake and high exhaust vents sized to room volume
- Dry-out habits after each session prevent mold from forming
- Breathable, mold-resistant woods outperform sealed interior finishes
- Well-designed sauna models simplify long-term moisture control
How does Ventilation Prevent Mold in Outdoor Saunas?

Mold thrives when warmth, humidity, and organic material combine. Your outdoor infrared sauna delivers all three in abundance. Unlike indoor installations protected from the elements, an outdoor sauna faces rain, snow, and daily temperature swings that create condensation cycles. When warm steam from your session meets cold exterior walls or lingers in stagnant air pockets, it creates an environment where mold spores like Cladosporioides flourish. Research published in the Journal of Fungi confirms these spores remain viable even at 40% relative humidity.
Proper ventilation solves this issue by quickly moving steam and humid air out of the room so wood can dry in under 24 hours. This timeline matters because mold can begin colonizing damp surfaces within 28–48 hours. A well-designed airflow system maintains 15–20 air changes per hour during operation, continuously replacing moisture-laden air with fresh air.
The humidity dynamics differ between sauna types. For example, traditional Finnish saunas operating at 160–200°F generate significant steam when water hits hot stones, pushing relative humidity much higher and creating greater mold risk. Infrared saunas operating at 120–150°F produce less airborne moisture but still face challenges if air remains stagnant. The warmth combined with sweat and minimal circulation can foster fungal growth over time.
Beyond mold prevention, proper airflow keeps breathing comfortable during sessions, reduces condensation on glass doors, and protects heaters, wiring, and insulation from moisture damage. Sun Home Saunas designs air channels and vent placements specifically to balance heat retention with fast dry-out after each use, a key differentiator versus basic shed-style builds where ventilation is often an afterthought.
How to Design Effective Ventilation for Outdoor Saunas
The classic layout follows natural convection principles. A fresh air intake vent located beneath or beside the heater allows cooler, denser air to enter. As this air warms and rises, it carries moisture upward toward an exhaust vent placed high on the opposite wall or in the ceiling, creating a continuous convective loop that expels vapor efficiently. For sizing, follow this concrete guidance:
|
Sauna Size |
Approximate Volume |
Minimum Intake Vent |
Minimum Exhaust Vent |
|
2 person sauna |
60–80 ft³ |
4” x 5” |
4” x 5” |
|
4 person sauna |
80–120 ft³ |
4” x 6” |
4” x 6” |
|
6 person |
140–180 ft³ |
5” x 8” |
5” x 8” or dual 4” x 5” |
Vent Placement for Traditional Outdoor Saunas
For wood-stove or electric heater outdoor saunas, intake placement is critical. Position the intake vent 4–8 inches above floor level, near the heater. This brings in cooler air that warms quickly as it passes the heat source, then circulates past bathers’ feet and legs before rising.
The exhaust vent works best when placed 6–12 inches below the ceiling on the wall opposite the heater. This positioning captures rising hot, humid air after it has traveled across the entire room, pulling vapor out efficiently rather than allowing it to pool in corners. Adjustable vents are valuable for traditional saunas:
- During the heating phase, partially close vents to reach target temperature quickly
- After reaching the desired temperature, open intake slightly for comfortable oxygen levels
- Once the session ends, open both vents fully for maximum dry-out
For larger cabin-style outdoor saunas accommodating 5+ people, adding a second high exhaust vent improves uniform airflow and reduces dead corners where moisture lingers. The additional exhaust point ensures air movement reaches the full interior space.
Ventilation Approaches for Outdoor Infrared Saunas
The best infrared saunas produce less steam than their traditional counterparts, but they still require ventilation to prevent musty odors and low-level mold growth. The heat source warms bodies directly rather than superheating air, resulting in lower ambient humidity.
Smaller, staggered vents work well for infrared setups. A low intake in the front wall paired with a mid-height exhaust at the rear provides adequate air exchange without over-cooling the room. This arrangement maintains efficient heating while still refreshing the air during sessions.
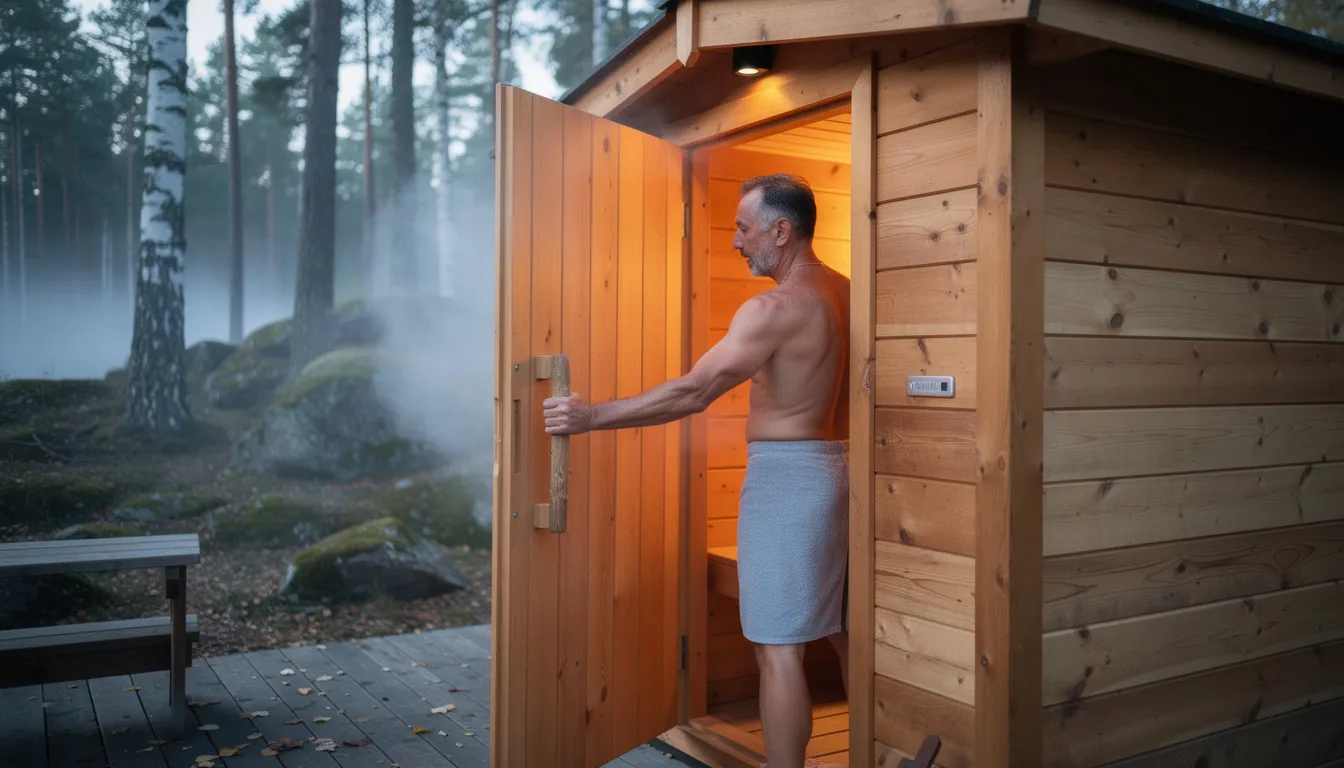
Many weatherproof outdoor infrared sauna owners rely on simpler post-session routines: propping the door open after use and allowing built-in roof or wall vents to handle gradual drying.
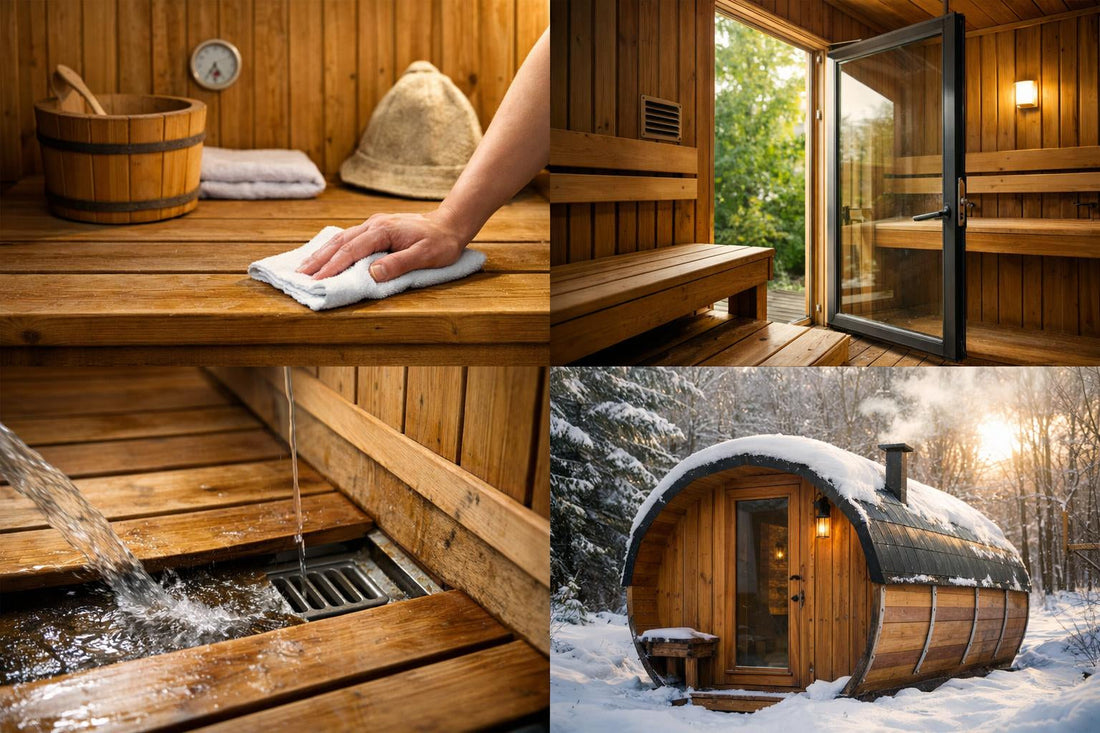
Daily and Weekly Habits to Keep an Outdoor Sauna Mold-Free
Ventilation hardware alone cannot prevent mold. What users do after each session determines whether moisture lingers or dissipates. A well-designed vent system means nothing if you lock up a steamy sauna after your session and walk away. Follow this post-session routine after every use:
- Turn off the heater once your sauna session ends
- Open the exhaust vent fully (and intake if adjustable)
- Prop the door open 4–6 inches
- Allow 30–60 minutes of natural airflow (extend to 90 minutes in very humid climates)
- Wipe benches, backrests, and floor duckboards with a dry or slightly damp cotton towel
This routine removes sweat and surface moisture quickly while leveraging residual heat which can remain at 140–160°F even after shutting down, to accelerate drying. The goal is to drop interior humidity below 30% before closing up, since many mold species struggle to colonize at lower levels.
For very humid regions, consider installing a small, sauna-safe circulating fan or bathroom-grade exhaust fan mounted outside the hot zone. These can run on timers to continue airflow after your session is over. Weekly inspections prevent small problems from becoming worsening.
- Check corners and areas under benches for dark spots or fuzzy patches
- Look behind the heater where air circulation may be limited
- Examine glass door frames and the door threshold for trapped moisture
- Smell for musty odors that indicate hidden mold growth
If you spot early mold signs, address them immediately with spot-cleaning before the colony spreads deeper into wood fibers. Outdoor full-spectrum infrared sauna owners can integrate simple humidity sensors or smart switches with their outdoor saunas. These monitor moisture levels and can automatically trigger vent fans after sessions, adding a layer of automation to mold prevention in your daily routine.
Which Material Choices and Surface Treatments Affect Mold?
Wood species, thickness, and surface treatments can determine whether mold takes hold or dries away harmlessly. Choosing the right materials during construction creates a high quality outdoor sauna that naturally resists fungal growth rather than encouraging it. The best wood options for outdoor sauna construction include:
|
Wood Type |
Mold Resistance |
Notes |
|
Western Red Cedar |
Excellent |
Natural oils resist decay and insects; aromatic |
|
Nordic Spruce |
Very Good |
Dense grain, handles temperature swings well |
|
Thermally Modified Hardwoods |
Excellent |
Heat treatment reduces moisture absorption |
|
Redwood |
Good |
Similar properties to cedar; attractive grain |
Interior cladding, benches, and backrests should remain unpainted and unvarnished inside the hot room. Doing so allows wood to breathe, absorbing moisture during sessions and releasing it during dry-out periods. Film-forming finishes like polyurethane or marine varnish trap moisture beneath a plastic-like barrier, creating the perfect environment for mold growth between the finish and wood fibers. Surface treatments you can choose include:
- Breathable penetrating oils: Appropriate for select areas, primarily exterior surfaces; allow moisture exchange
- Film-forming polyurethanes: Not recommended for interior use; trap moisture against wood
- Marine varnishes: Designed for constant water exposure; inappropriate for sauna interiors where heat and humidity fluctuate
Reserve sealants for exterior-only surfaces, roof trim, and door thresholds where weather protection matters. Keep interior walls and benches raw or minimally treated with sauna-specific finishes designed for high heat and humidity cycling.
Home Saunas favor sustainably sourced cedar and spruce in outdoor builds, chosen for wellness benefits and their naturally mold-resistant characteristics. Redwood outdoor applications offer similar performance for exterior structural components and trim.
Seal Failure Identification Guide and Repair Solutions
Seal failures represent one of the most toxic causes of mold in outdoor saunas. Water intrusion through failed gaskets, deteriorated flashing, and cracked caulk seeps into wall cavities where it remains hidden until significant damage has occurred. Learning to identify and repair these failures protects your investment.
Common Early Warning Signs of Seal Failure:
- Recurring damp spots at the base of walls after rain
- Peeling or darkened exterior stain around joints
- Swollen door jambs that stick or don’t close properly
- Condensation trapped between glass panes
- Musty odors that persist despite proper ventilation
- Soft or spongy spots when pressing on interior walls
Testing Suspect Areas
During or immediately after rainfall, run a dry hand or paper towel along interior corners, window frames, and ceiling seams. Feel for cold moisture or visible water lines. A moisture meter helps quantify concerns. Target below 15% moisture content in wood to rule out intrusion problems.
· Repair solutions by failure type:
|
Problem |
Solution |
Materials Needed |
|
Failed door/window gaskets |
Remove old weatherstripping, clean surface, install new gasket |
High-temp silicone or EPDM gaskets, sauna-rated |
|
Exterior joint failures |
Reseal with outdoor-grade, UV-resistant caulk |
400°F-rated silicone sealant |
|
Roof flashing breaches |
Install aluminum step flashing overlapped 4–6 inches |
Step flashing, high-heat silicone |
|
Vent hood leaks |
Reseal mounting flange, verify hood drip edge alignment |
Exterior caulk, flashing tape |
For door gaskets, use the paper-pull test after installation: close the door on a piece of paper at various points along the seal. Consistent resistance when pulling the paper indicates adequate compression.
Allow at least 24 hours cure time for any sealant work before firing the sauna. Heat and moisture during curing compromise bond strength and may require redoing the repair.
Serious Failures Requiring Extensive Repair
If you find water behind interior cladding or persistent wet insulation, the repair process becomes inevitable:
- Remove affected interior boards carefully to access the wall cavity
- Dry the cavity thoroughly. Use fans and dehumidifiers for 48–72 hours
- Remove and discard any moldy insulation
- Treat framing with appropriate mold-killing solutions
- Install fresh vapor-permeable membranes
- Verify proper flashing at all exterior penetrations
- Reinstall interior cladding only after complete drying
Sun Home Saunas provides replacement gasket kits, diagrams of original sealing points, and remote support to help owners restore the factory moisture barrier on outdoor models. This support proves especially valuable when diagnosing whether visible moisture represents a seal failure or simply inadequate post-session ventilation.
Cleaning, Disinfection, and Mold Removal in Outdoor Saunas
Effective cleaning maintains the environment your ventilation system creates. This step-by-step framework focuses on safe, wood-friendly methods that protect both bathers and the sauna structure without introducing harsh chemicals that could off-gas during heated sessions.
Routine Cleaning After Every Few Uses
- Wipe surfaces with warm water and a soft brush or non-abrasive sponge
- Avoid harsh detergents or solvents that strip natural wood oils
- Focus on benches where skin contact deposits sweat and oils
- Dry surfaces with the door and vents open
Monthly Deeper Clean
- Prepare a solution of warm water with a small amount of sauna-safe wood soap
- Lightly scrub benches, backrests, and floor grates
- Pay attention to corners and areas under benches where moisture accumulates
- Rinse with plain warm water
- Prop the door fully open and run the sauna at moderate temperature to dry
How to Manage Early Signs of Mold Infestation
When you notice small dark spots or slight fuzzy patches, treat promptly with a 1:1 mix of white vinegar and water. Apply with a cloth, allow to sit for 3–5 minutes, wipe off, and ventilate thoroughly. This natural approach handles surface mold without introducing problematic chemicals.
Stubborn mold may require carefully diluted hydrogen peroxide (3% solution) or specialized sauna mold cleaners available from wellness retailers. Always test on a hidden area first, inside a corner or under a bench edge to ensure the treatment won’t bleach or roughen visible wood surfaces.
After any wet cleaning, run the sauna at moderate heat (140–160°F) for 30–45 minutes with vents partially open. This drives moisture from boards and framing, preventing the cleaning process itself from contributing to mold conditions.
Remember, the combination of bleach residue and high heat creates potential off-gassing concerns. Reserve bleach-based treatments for severe cases handled by professional remediation services who can ensure complete residue removal before using the sauna.
Climate, Foundation, and Location Considerations
Where and how you install your outdoor sauna affects how often moisture and mold problems occur. Site selection and foundation preparation deserve as much attention as the sauna itself.
· Foundation Requirements
Place your outdoor sauna on a solid, level base that promotes drainage:
- A concrete pad works excellently, sloped slightly away from the structure (1/8” per foot minimum)
- Stone pavers set in gravel allow water to drain through
- Reinforced deck sections must handle the weight and include drainage gaps
Avoid low spots where water pools around the base. Standing water wicks into exterior siding, creating persistent moisture problems regardless of interior ventilation quality.
· Air Gap and Clearance
Leave a small air gap, 1–2 inches between the bottom of exterior walls and adjacent landscaping, mulch beds, or snowbanks. This clearance:
- Keeps splashback from rain off siding
- Allows air circulation under the structure
- Prevents ground moisture from wicking upward
- Makes inspection of the base easier
Climate-specific Adjustments
|
Climate Type |
Key Adjustments |
|
High humidity (Florida, Gulf Coast) |
Plan for longer post-session dry times (60–90 min), more frequent mold inspections |
|
Pacific Northwest |
Address constant dampness with more aggressive mechanical ventilation |
|
Northern/Canada |
Insulated vent runs, careful attention to thermal bridging at penetrations |
|
Desert/arid |
Less concern about humidity; focus on UV protection for exterior wood |
Orientation Considerations
Position glass doors and windows where they receive some sun during the day. Solar warming through glass helps dry interior surfaces between uses and discourages the persistent dampness that promotes mold growth. A sauna that never sees sunlight or one placed against a north-facing fence in deep shade faces ongoing moisture challenges even with perfect ventilation.
Sun Home Saunas can advise customers on site selection and base preparation during the purchase process. This guidance ensures outdoor units aren’t installed in constant shade, wet grass zones, or snow drift areas that encourage mold and wood decay over time. The outdoor space you choose matters as much as the sauna you install in it.
How Sun Home Saunas Designs Help Minimize Mold Risk

Rather than treating ventilation and moisture management as afterthoughts, these considerations drive the engineering from the start. Sun Home Saunas outdoor models combine several key features that reduce mold risk:
- Pre-engineered vent layouts positioned according to convection principles, with intake and exhaust sizing matched to interior volume
- High-quality cedar and spruce interiors chosen for natural mold resistance and breathability
- Robust exterior sealing systems including properly flashed roof lines and weather-rated gaskets
- Low-EMF heaters (in infrared models) that reach target temperatures quickly, reducing total time at high humidity
The range of outdoor options from a classic barrel configuration to cabin-style builds incorporate these moisture management principles. Whether you’re looking at a compact 2 person unit or a larger family-sized installation, the approach to prevent mold should be consistent. Optional add-ons extend these benefits:
- Integrated roof vents for enhanced passive airflow
- Smart controls compatible with humidity sensors and automated drying cycles
- Cold plunge tubs designed for adjacent placement without introducing excess standing water near the sauna structure
For recovery enthusiasts building a complete wellness setup in their backyard, these integrated systems allow heat and cold therapy without compromising the moisture management of either component.
If you’re planning a new outdoor build or considering upgrading a basic shed-style sauna, Sun Home Saunas provides guidance on vent design, weatherproofing, and long-term mold prevention tailored to your specific climate and wellness goals. The brand’s sauna collections include specific models designed for challenging environments where moisture control matters most.
Explore the full range of outdoor options, check current sale price promotions, or contact the team directly via phone number or online form for personalized recommendations. With proper ventilation and the right design choices, your outdoor infrared sauna can be a lasting wellness investment.
Summary
Mold prevention in outdoor saunas depends on proper ventilation, moisture-aware design, and consistent owner habits. Proper vent placement, breathable materials, and thorough drying after each session allow wood to dry within 24 hours, preventing mold growth. Climate, foundation, and seal integrity also play a role in long-term success. When these factors work together, mold becomes a non-issue. Do you own a sauna? Explore well-ventilated outdoor sauna options or get expert guidance to protect your investment.
FAQ
How often should I fully air out my outdoor sauna to prevent mold, and for how long each time?
After every session, open the door and vents for 30–60 minutes. In humid areas, extend to 90 minutes. A weekly extended dry cycle at moderate heat adds extra protection.
Can I install a dehumidifier in or near my outdoor sauna to help with mold prevention?
Do not place dehumidifiers inside the sauna. They can be damaged by heat. A unit in a nearby changing room or enclosed porch can help control surrounding humidity, but proper ventilation and drying routines handle moisture inside the sauna.
Is mold more of a problem in barrel saunas or cabin-style outdoor saunas?
Neither style is more prone to mold if ventilation is designed correctly. Barrel saunas often dry faster, while cabin saunas rely on well-placed exhaust vents. Consistent airflow and post-session drying matter more than sauna shape.
How do I know if condensation on my outdoor sauna’s glass door is normal or a sign of a ventilation problem?
Light condensation during heat-up is normal. Persistent fog, heavy dripping, or water pooling after reaching high temperature suggests poor airflow. Open vents fully, check for blockages, or improve exhaust ventilation during sessions.
When should I call a professional instead of trying to fix mold and seal failures myself?
Call a professional if mold returns quickly, appears behind wall panels, or if wood feels soft or rotten. Ongoing leaks or musty odors often indicate hidden structural moisture requiring proper drying, insulation replacement, or reframing.
