Choosing the right home sauna electrical requirements is essential for safety and performance. Smaller infrared units typically use 120V plug-in circuits, while larger traditional saunas require dedicated 240V hard-wired systems for faster heating. Proper breaker sizing, copper wiring, and GFCI protection ensure NEC compliance and a reliable spa experience.
What are the Electrical Requirements for Home Sauna?
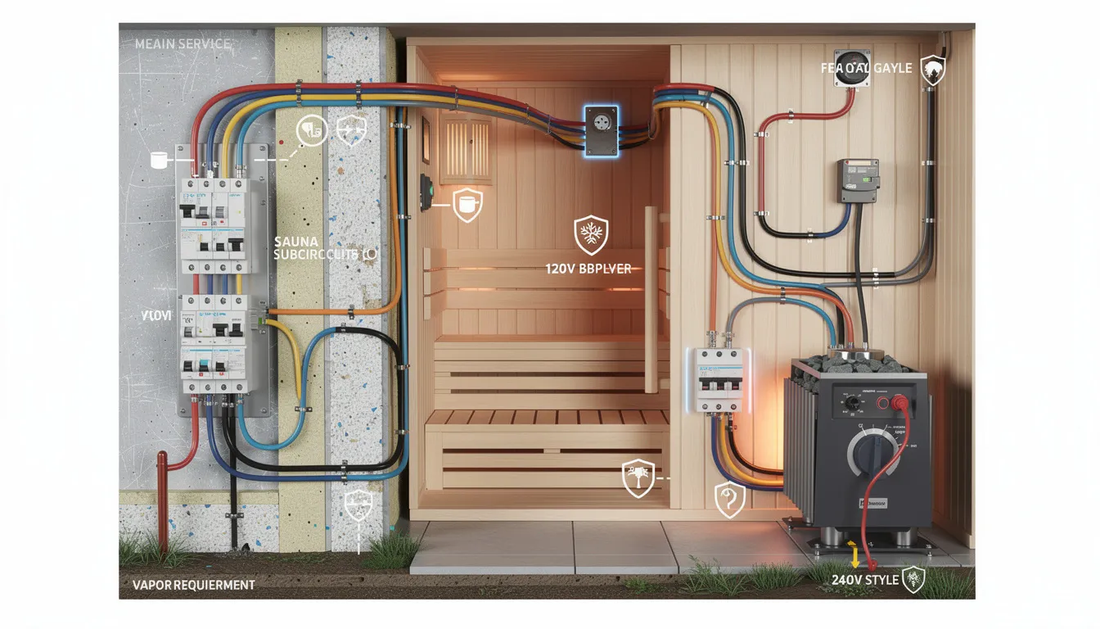
Home saunas require specific electrical setups to operate safely, efficiently, and in compliance with code. The right requirements depend on sauna type, size, and desired performance. Smaller indoor infrared saunas often run on standard 120V circuits, while larger traditional saunas usually need 240V dedicated power. This guide explains voltage options, amperage, wiring, breaker sizing, and safety considerations so you can choose the right configuration and plan a compliant, reliable installation.
Key Takeaways
- 120V suits small infrared units while 240V supports larger traditional saunas
- Higher voltage delivers faster heat-up and higher temperatures
- Dedicated circuits and proper breaker sizing are mandatory
- GFCI protection is recommended or required in most locations, but manufacturer requirements differ — some saunas require a GFCI-protected circuit while others prohibit GFCI/AFCI breakers; the installation manual always wins
- Always follow manufacturer instructions and local electrical codes
120V vs 240V Home Sauna: Which Is Right for You?
If you’re planning for a luxury home sauna, you must decide whether to go with a 120V “plug-in” unit or a 240V “hard-wired” system. In a typical U.S. or Canadian home built after 1990, both options are available but they serve very different purposes and user profiles. Choose 120V if you:
Live in an apartment or rental where you can’t modify the electrical panel
- Want a small 1–2 person infrared cabin
- Have limited spare breaker space
- Prefer minimal installation complexity
- Plan occasional use at moderate temperatures (130–165°F)
Choose 240V if you:
- Want a 3–6 person traditional Finnish-style sauna room
- Prefer faster heat-up times and higher temperatures (180–195°F)
- Plan to use your sauna several times per week
- Have a modern electrical panel with available capacity
- Want the full “spa-like” sauna experience at home
Understanding Sauna Power and Heater Sizing (kW, Volts, Amps)
Before diving into specifications, it helps to understand how electrical sizing works for saunas. The three key variables are:
- Kilowatts (kW): The heater’s power output
- Voltage (V): The electrical pressure from your power supply (120V or 240V)
- Amperage (A): The current draw, which determines wire and breaker sizing
Plan for about 1 kW of heater output per 45–50 cubic feet of sauna space for traditional electric saunas. Add 20–30% extra capacity for outdoor installations, barrel sauna setups, or poorly insulated rooms where heat loss is higher. Here’s how the math works out in practice:
- A 4.5 kW heater at 240V draws approximately 19A
- A 6 kW heater at 240V draws approximately 25A
- A 9 kW heater at 240V draws approximately 38A
- A 1.8 kW heater at 120V draws approximately 15A
Higher kilowatts on 240V translate to faster preheat times. A properly sized 240V system often reaches 180–190°F in 20–30 minutes, while smaller 120V units may need 45–60 minutes and top out at lower temperatures.
When your electrician sizes your sauna circuit, they’ll use the manufacturer’s specifications (voltage, kW, and full-load amps from the heater’s nameplate) plus NEC continuous-load rules. Since saunas run continuously for extended periods, the circuit must be sized at 125% of the heater’s rated current. This determines the correct wire gauge and amp circuit breaker size.
Which Saunas use 120V Circuits?
The 120V option is most common for compact the best infrared saunas and small traditional electric rooms. If you have a 20A dedicated circuit available and want to minimize installation complexity, this route may work for you.
Many infrared sauna indoor 1-2 person units often operate on 120V circuits, but the exact circuit and receptacle depend on heater output. Entry-level units may use a 15A circuit and a standard NEMA 5-15R receptacle, with heater power around 1.4–1.8 kW. Most quality 1–2 person infrared cabins, however, require a dedicated 20A circuit with a NEMA 5-20R receptacle, and some higher-output 120V models draw over 23 amps and use a 30A locking receptacle (NEMA L5-30R) that a standard household outlet will not accept. Always size the circuit from the heater’s nameplate rating. Many of these units ship with a factory power cord and can plug directly into a matching outlet, though that outlet should be on a dedicated electrical circuit.
A small number of traditional sauna heaters are designed for 120V operation, usually under 2 kW. These work for very small rooms under 100–120 cubic feet and deliver moderate temperatures rather than the intense heat of larger systems.
Which Limitations Should you Consider?
- Slower warm-up times (often 45–60 minutes)
- Lower peak cabin temperatures
- Risk of nuisance breaker trips if sharing a circuit with other loads (refrigerators, hair dryers, space heaters)
- Limited sauna space options due to lower heat output
From a code compliance standpoint, your 120V sauna circuit should be dedicated to the sauna alone. GFCI protection is usually recommended when the sauna’s location is near bathrooms or in basements. Never use an extension cord as it creates serious fire risks with high-wattage heating loads.
Typical 120V Electrical Specifications
Here are the common specifications for 120V sauna installations:
- Voltage: 120V single-phase
- Circuit: 15A or 20A dedicated circuit
- Wire gauge: 14 AWG copper minimum for 15A circuits; 12 AWG copper for 20A circuits (per NEC, with final sizing confirmed by your electrician)
- Outlet type: Properly grounded NEMA 5-15R (15A) or NEMA 5-20R (20A) receptacle
- GFCI: Required or recommended in damp locations (basements, near bathrooms)
Cord-and-plug infrared units ship with a factory cord and require only a properly grounded receptacle rated for at least 15A. If running new 120V wiring through damp locations like unfinished basements, proper wiring must use cable or conduit rated for that environment.
Always check the manufacturer’s specifications. Some higher-power 120V saunas specifically require a 20A circuit and dedicated breaker for efficient operation.
When does a 120V Sauna Makes Sense?
The 120V option fits certain lifestyles and practical situations better than others:
- Renters who cannot alter the electrical panel or run new circuits
- Condo owners with limited spare breaker space in their panel
- Homeowners converting a small spare room where only 120V outlets exist
- Occasional users planning a few sauna sessions per week rather than daily use
- Budget-conscious buyers who want to minimize installation costs
If you’re content with moderate temperatures around 130–165°F (depending on sauna type) and don’t mind longer heat-up times, 120V can deliver a satisfying sauna experience without major electrical work.
Even for a 120V installation, have a licensed electrician verify the circuit’s capacity and inspect existing wiring and grounding. What looks like a simple plug-in project can still have hidden issues that affect safe operation.
Which Saunas Run on 240V Circuits?
The 240V power supply is the industry standard for residential traditional Finnish-style electric saunas and many 3–6 person infrared or hybrid units across North America. This voltage tier delivers the performance most saunas need to reach proper operating temperatures quickly and maintain them consistently.
With 240V, you can run higher-power heaters in the 4.5–9 kW range (and above), supporting larger sauna room volumes, faster heat-up times, and cabin temperatures near 180–195°F. This is where you get the authentic traditional sauna experience with high temperatures and good heat recovery. Common residential configurations include:
- 4.5 kW heater on a 240V, 30A circuit
- 6 kW heater on a 240V, 30–40A circuit
- 8–9 kW heater on a 240V, 40–50A circuit
The exact amperage depends on the manufacturer’s specifications for your heater model. Unlike 120V plug-in units, 240V traditional electric sauna heaters are typically hard-wired to a junction box rather than using a power cord, while many 240V infrared cabins are cord-and-plug units that connect to a dedicated 240V receptacle (NEMA 6-20R or a locking L6-20R/L6-30R) installed by an electrician. Either way, the circuit runs from a dedicated double-pole breaker in your main panel (or a subpanel) directly to the sauna location. This is not a DIY project. Professional installation by a certified electrician is required.
Some higher-end residential and most small commercial saunas may require 3-phase power or higher-amp 240V circuits, which affects feasibility in typical homes. Check your manufacturer’s specifications before purchasing.
Typical 240V Electrical Specifications
Here are the typical specifications for 240V home sauna installations:
- Voltage: 240V single-phase
- Breaker: 30A, 40A, or 50A double-pole breaker (sized for continuous load at 125% per NEC)
- Wire gauge: 10 AWG copper THHN/THWN or NM-B for 30A circuits; 8 AWG for 40–50A circuits (final gauge depends on run length, insulation type, and local codes)
- Connection: Hard-wired to junction box (traditional heaters) or dedicated 240V receptacle such as NEMA 6-20R or locking L6-20R/L6-30R (many infrared cabins)
- Conductors: Copper only (many manufacturers explicitly prohibit aluminum)
- Additional requirements: Dedicated neutral if controls or lighting share the circuit; separate equipment grounding conductor
For saunas installed in or near bathrooms, spas, or other wet locations, 240V circuits require a 2-pole GFCI breaker or an external GFCI disconnect for adequate protection against electrical shock — unless the manufacturer’s manual specifies otherwise.
What are the Performance Advantages of 240V Heaters?
- Faster heat-up: A 6–9 kW 240V heater can bring a 250–375 cubic foot sauna from room temperature to 180°F in about 25–40 minutes, depending on insulation and ventilation. Smaller saunas with adequate power can heat even faster
- Better temperature stability: Higher capacity allows more stable temperatures even when users open the door or add water to the rocks. Smaller 120V heaters often struggle to recover, resulting in temperature drops that affect your sauna experience
- Advanced control options: 240V systems often integrate digital control panel units, external contactor boxes, and separate lighting circuits. This allows more flexible installation layouts and features like automatic shut-off timers
- Authentic experience: If you’re after the traditional Finnish sauna feel with high temperatures and the ability to create steam (löyly) by throwing water on hot rocks, 240V delivers the power needed to make this work

Electrical Specifications Checklist (120V vs 240V)
When comparing your options, here’s a clear breakdown of sauna electrical requirements for each voltage tier:
120V Specifications
- Typical heater power: 1–2 kW
- Circuit: 15–20A dedicated circuit
- Wire gauge: 14–12 AWG copper
- Connection: Standard NEMA 5-15R or 5-20R outlet (higher-output 120V models: 30A locking NEMA L5-30R)
- GFCI: Required in damp areas (outlet or breaker) — unless the manufacturer’s manual specifies otherwise
- Best for: 1–2 person infrared saunas, occasional use
240V Specifications
- Typical heater power: 4.5–9 kW (residential)
- Circuit: 30–50A dedicated two-pole breaker
- Wire gauge: 10–8 AWG copper
- Connection: Hard-wired junction box (traditional heaters) or dedicated 240V receptacle such as NEMA 6-20R or locking L6-20R/L6-30R (many infrared cabins)
- GFCI: 2-pole GFCI breaker or spa-type disconnect (many jurisdictions)
- Best for: 3–6 person traditional saunas, frequent use
Important Variables that Affect Final Sizing
- Circuit length (longer runs may require heavier gauge wire)
- Ambient temperature
- Installation method (in conduit, through insulated walls, etc.)
- Cable type and insulation rating
All specifications must ultimately follow
- The heater’s installation manual and manufacturer’s specifications
- The current NEC edition as adopted in your jurisdiction
- Any local amendments or inspector requirements
- Your electrician’s professional judgment based on site conditions
Installation Guide: How to Power a Home Sauna Safely
Electrical work for the best infrared sauna for home, especially 240V circuits, must be performed by a licensed electrician to ensure safety, code compliance, and warranty protection. The typical installation follows these phases:
- Planning and heater selection
- Panel capacity check and voltage decision
- Circuit layout and permit application
- Rough-in wiring before finishing walls
- Sauna heater and control hookup
- Final inspection, testing, and first heat-up
Many projects start by confirming spare breaker spaces and the overall panel load. This is important in older homes (built before 1980) with 60A–100A service, where adding a 30–50A outdoor infrared sauna circuit may push the electrical system beyond capacity.
During installation, cables or conduits must be routed away from high-heat zones. Required clearances must be maintained, and all electrical components must be rated for the sauna’s temperature and moisture levels.
· Step 1: Evaluate Your Panel and Choose Voltage
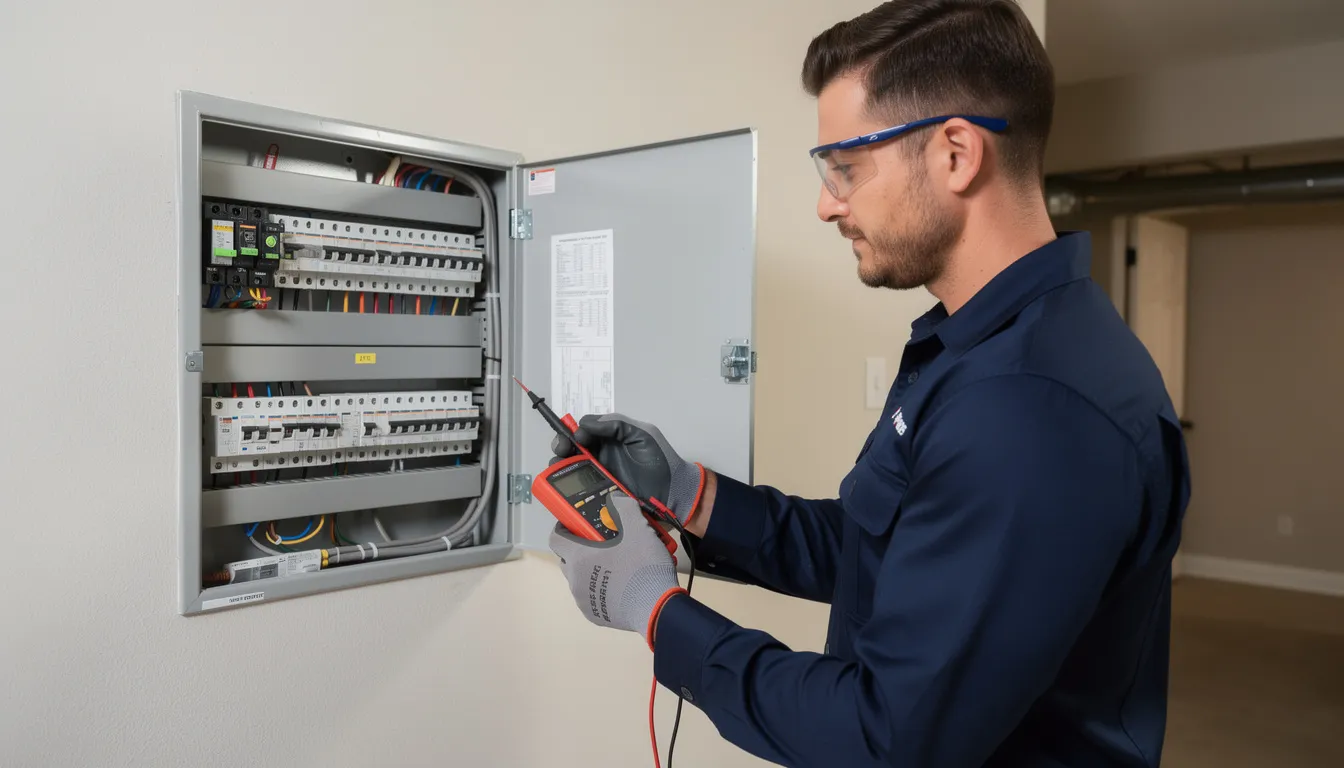
Before committing to either voltage option, your electrician will perform several checks:
- Calculate existing service load: Account for HVAC, electric range, EV charger, hot tub, and other major draws
- Verify available breaker spaces: Count open slots in your main panel
- Assess panel rating: Determine if your 100A, 150A, or 200A service can handle the additional load
- Consider subpanel needs: For larger 240V saunas, a subpanel near the sauna’s location may be the ideal solution
Many modern homes with 200A service can easily support a 30–40A 240V sauna circuit. Older or smaller saunas with limited panel capacity may be better suited for 120V solutions, or require a service upgrade before a new sauna can be added. Converting a 120V plug-in unit to a 240V built-in unit can be more expensive.
· Step 2: Plan Circuit, Breaker, and Disconnect
With the voltage decision made, your electrician will specify the hardware. Key tasks in this phase:
- Select circuit breaker size from manufacturer’s specifications (not guesswork)
- Use a 2-pole breaker for 240V circuits
- Specify GFCI breaker or spa disconnect when required by local electrical codes or when installed near water sources
- Plan disconnect placement (many jurisdictions require a local disconnect within sight of the sauna)
- Ensure minimum working clearances around the breaker panel and disconnects per NEC requirements
The disconnect switch often mounted just outside the sauna room or in an adjacent mechanical area allows the sauna to be quickly de-energized for maintenance or emergencies. This is a safety feature required by many local building codes.
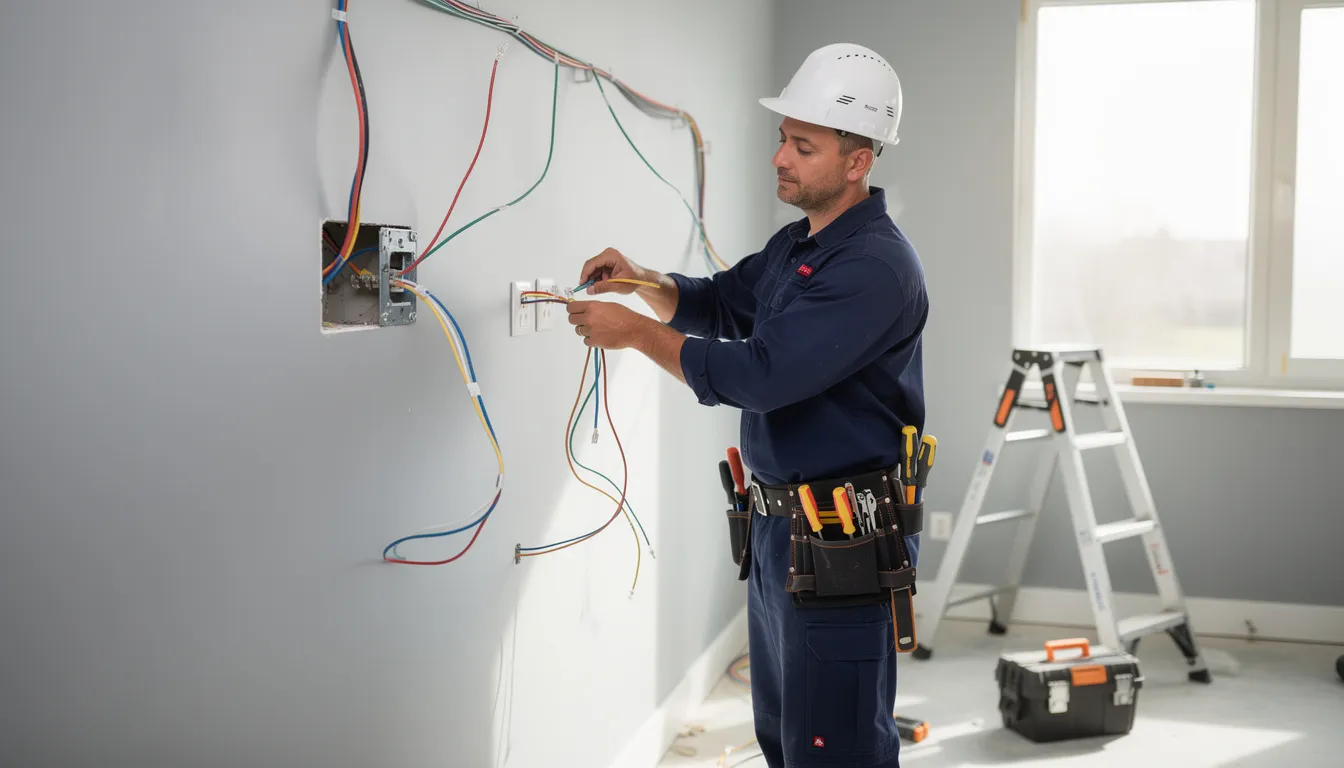
· Step 3: Run and Terminate Wiring
Electrical wiring is typically run before interior wall finishes are installed. The material and pathway depend on your home’s construction:
- Interior walls: NM-B (Romex) cable is common for residential runs
- Basements, garages, or outdoor runs: THHN/THWN conductors in conduit provide better protection and may be required by code
- Outdoor runs: Weather rated conduit protects wiring from moisture and UV exposure
Inside or immediately adjacent to the hot sauna envelope, high-temperature rated cable and junction boxes should be used. These electrical components must be kept away from the hottest ceiling areas where temperatures can exceed 200°F.
The weatherproof outdoor infrared sauna heater is usually terminated at a junction box positioned outside the hottest zone. A short, manufacturer-approved whip then enters the heater. This protects the main wiring from excessive heat exposure while maintaining safe distance requirements.
· Step 4: Install Heater, Controls, and Accessories
With wiring in place, the installation moves to mounting the sauna heater and connecting all the components:
Heater Installation Tips
- Mount according to manufacturer clearance requirements
- Connect to junction box using approved methods
- Verify correct voltage at the heater before powering on
Control Panel Installation
- Control panels may use low-voltage or line-voltage connections
- Follow manufacturer wiring diagrams exactly
- Position outside the sauna room or just inside the door for convenient access
Temperature Sensor Placement
- Mount near the ceiling, typically above the heater
- Position per manufacturer guidelines for accurate readings
Lighting and Accessories
- Use lights rated for high humidity and high temperatures
- Some systems support sound systems or additional features on separate circuits
Some traditional sauna heaters use an external contactor box that must remain accessible. This is commonly mounted under a bench at a height of 12–24 inches above the floor, as specified by the manufacturer.
· Step 5: Inspection, Testing, and First Heat-Up
Before your new sauna is ready for regular use, several verification steps ensure everything is safe:
Pre-power Checks
- Confirm correct breaker size matches manufacturer requirements
- Verify tight terminations at all connection points
- Test proper grounding throughout the circuit
- Confirm GFCI function if installed
First Heat-up Protocol
- Supervise the initial operation
- Watch for tripped breakers or unusual electrical behavior
- Note any unusual smells beyond the normal initial burn-off (manufacturing residues from heater elements and stones)
- Check for hot spots on wiring or connections
Burn-in cycle recommendation: Run the sauna at full operating temperature for 45–60 minutes with the door slightly open. This burn-in removes manufacturing residues from the sauna heater and stones before your first real session. Proper ventilation during this cycle is important.
Safety, Codes, and Best Practices
Getting the electrical work wrong creates fire hazards and risks of electrical shock that can be fatal. Relevant standards governing sauna installation include:
- National Electrical Code (NEC): The primary electrical standard in the U.S.
- Canadian Electrical Code (CEC): Governs installations in Canada
- Local amendments: Individual cities and counties may have additional requirements
Key Safety Elements for Every Installation
- GFCI protection (required or recommended in most installations — unless the manufacturer’s manual specifies otherwise; see GFCI section)
- Proper grounding and bonding in wet areas
- Correct wire gauge sized for amperage and run length
- Dedicated circuit that doesn’t share load with other appliances
- Compliance with manufacturer installation requirements
Many outdoor full-spectrum infrared sauna heater warranties in 2026 explicitly require professional installation. DIY electrical wiring or non-compliant circuits can void your warranty and leave you liable for any damage or injuries.
For home sauna wellness units used several times a week, periodic professional inspection of connections and controls ensures the sauna continues operating safely over the long term. Regular maintenance of electrical connections prevents problems before they escalate.
Moisture, Heat, and GFCI Considerations
The interaction between electricity and the sauna’s hot, humid environment requires special attention. While traditional saunas produce less liquid water than steam rooms, the elevated humidity and sweating that still occur justify GFCI protection as an added safety layer. This protection can literally save lives by cutting power instantly if a ground fault occurs. That said, manufacturer requirements differ: some saunas must be installed on a GFCI-protected circuit and the warranty is void without it, while others explicitly prohibit GFCI or AFCI breakers because they will trip during normal operation. The manufacturer’s installation manual always takes precedence over generic guidance. Requirements for fixtures in and near the sauna:
- Lights must be rated for damp or wet locations
- All electrical components must tolerate high temperatures per their specifications
- Switches and receptacles must be listed for the environment if installed in the space
The sauna room should never contain unprotected standard receptacles or switches unless specifically listed for such use and installed per local codes. Many installations place switches and receptacles outside the hot room entirely. GFCI devices require testing monthly and replacement where necessary.
How to Work With a Licensed Electrician
Finding the right electrician eases your installation and ensures code compliant installation: Ask the following questions during consultation.
- What maximum heater kW can my panel support?
- What circuit size do you recommend for my sauna?
- Do I need a subpanel, or can you add to my existing panel?
- Where should the disconnect and controls be placed?
- What’s the cost difference between 120V and 240V installation?
- Are permits and inspections included in your quote?
Experienced electricians can also advise on future-proofing. For example, if you’re installing a 4.5 kW heater now but might upgrade later, sizing the circuit for 40A from the start may save money down the road. When getting estimates, ensure they specify:
- Voltage and circuit size
- Wire type and gauge
- GFCI equipment requirements
- Permit fees and inspection scheduling
- Any panel upgrades needed
Obtaining written estimates from at least two electricians enables you to compare approaches and ensure that safety considerations are properly addressed. The lowest bid isn’t always the best choice. Experience with sauna installation matters.
Summary
Selecting the correct electrical requirements for a home sauna is crucial for ensuring safety, optimal performance, and long-term satisfaction. From understanding 120V versus 240V systems to proper breaker sizing, wire gauge, and GFCI protection, each decision affects how well your sauna performs. Working with a licensed electrician ensures compliance and protects your investment. Ready to move forward? Review your panel capacity, select the right heater, and consult a professional to plan your installation.
FAQ
Can I convert a 120V home sauna to 240V later if I want more heat?
Yes, but only if the heater is rated for both voltages. Conversion requires new wiring, a double-pole breaker, and hardwiring. A licensed electrician must verify panel capacity, follow manufacturer instructions, and ensure the upgrade meets code and warranty requirements.
Do all indoor saunas legally require GFCI protection?
Not always, but many inspectors and manufacturers strongly recommend it. GFCI is often required in basements, bathrooms, or damp areas. Local codes vary, so follow the heater manual and inspector guidance to ensure safety and compliance.
How much does it typically cost to add a 240V circuit for a home sauna?
Costs depend on distance, labor rates, and panel capacity — from several hundred dollars for a straightforward dedicated circuit to a few thousand if long wire runs, panel upgrades, or subpanels are needed. Acquiring multiple quotes helps determine the best option.
Can I plug my 120V sauna into an extension cord or power strip?
No. Sauna heaters draw a continuous high current and must be connected directly to a dedicated, grounded outlet. Extension cords and power strips can overheat and pose a fire hazard. Install a properly located receptacle instead.
What happens if my existing panel does not have enough room for an additional breaker for the sauna?
Options include adding a subpanel, using approved tandem breakers, upgrading service, or selecting a lower-power sauna. A licensed electrician should evaluate the safest, code-compliant solution for your home’s electrical capacity.
