Sauna control panel error codes, such as E1 or E3, typically signal sensor faults, overheating, or communication failures. Most issues are resolvable through systematic troubleshooting -checking ventilation, verifying heater clearances, and performing a hard reset at the breaker. Understanding these safety-driven diagnostics protects your equipment and ensures a safe, uninterrupted wellness experience.
What Do Sauna Control Panel Error Codes Mean? (Solved)
Most modern infrared and traditional saunas feature control panels that display error codes when something goes wrong with the heating system, sensors, or internal communication. The good news is that many of these issues can be safely diagnosed and fixed at home without an expensive service call.
Understanding the control panel system helps you maintain your investment and enjoy uninterrupted home sauna wellness benefits. Whether you own a luxury home sauna or a basic model, knowing how to interpret and resolve error codes ensures safe operation and extends equipment life.
Key Takeaways
- Always cut power at the breaker and check your manual first for error codes.
- Most error codes relate to temperature sensors, heater overload, or communication failures between the panel and control box—issues that often have straightforward solutions.
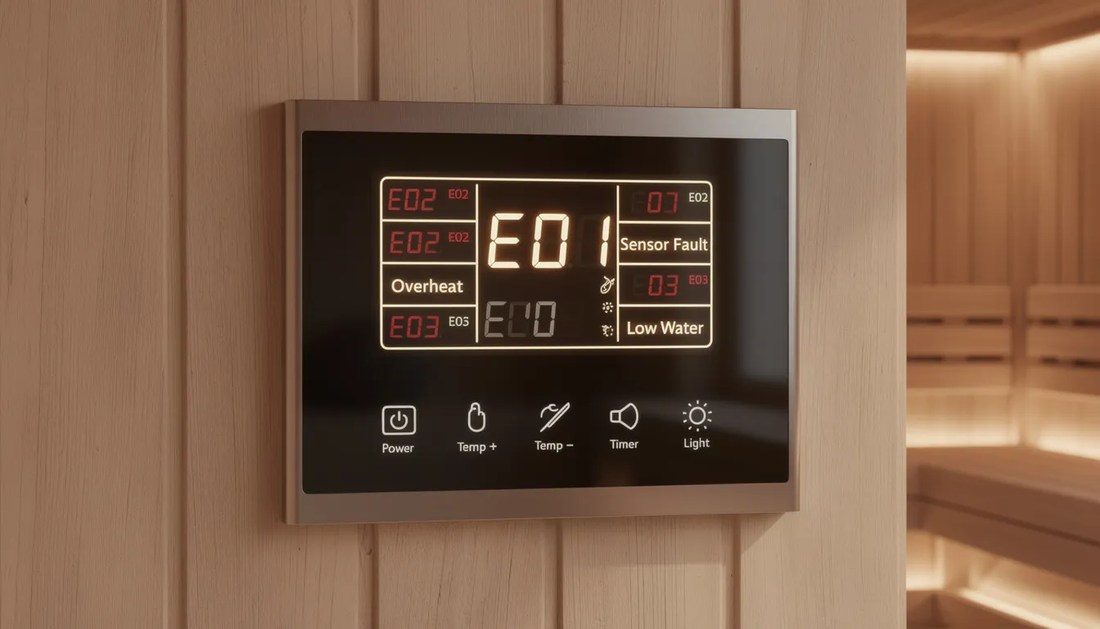
- Common code patterns are universal across brands. Codes like E1/E2 typically indicate sensor faults, E3/E4 signal overheating, and "Err" or "ComF" indicate communication failures.
- SunHomeSaunas systems use low-EMF, advanced digital controls designed for reliability and user-friendly diagnostics.
- Many sauna controllers function like small computers and can be reset through specific procedures.
- Quick reset steps can resolve many codes, but if the same error returns immediately after a proper reset, stop using the sauna and investigate deeper causes or call a technician.
- Sauna control panels are commonly used in smart sauna controls and communicate wirelessly via Wi-Fi.
- Layout templates with minimum clearances and ventilation specs are included below so you can verify your installation meets the requirements that prevent repeat error codes caused by heat buildup or airflow restrictions.
- If error codes persist, you can always find help by contacting support.
How Should You Respond to a Sauna Error Code Immediately?
The first minutes after seeing an error code on your home sauna control panel are about safety, not guesswork. Whether you own an infrared cabin or a traditional heater room, your initial response follows the same protocol.
Rushing to press buttons or restart the system without understanding what triggered the error can create bigger problems—or worse, safety hazards.
Before attempting any troubleshooting, take a breath and approach the situation methodically. Error codes exist to protect you, your family, and your investment. They are not nuisances to dismiss but diagnostic tools designed to prevent overheating, electrical damage, and fire risks.
Initial Safety Assessment
Note the exact error code displayed. Write down exactly what you see—whether it reads "E1," "Er3," "Err HEAT," or a symbol.
Note whether the code appeared on the wall-mounted control panel, the main control box, or a mobile app if you use smart controls like HUUM UKU or similar systems. This detail becomes essential when consulting your manual or contacting support.
Turn the sauna off at the user interface first, then switch off the dedicated circuit breaker. For 120V best infrared sauna for home units, this is typically a 15-20A breaker.
Traditional 240V heaters (up to approximately 9 kW) usually require a 40A breaker. Never touch internal components while power is still connected.
Check for Obvious Hazards
Before proceeding, inspect for:
- Burning smell or smoke
- Unusual buzzing, clicking, or sizzling sounds from the control box
- Discolored, melted, or exposed wires
- Visible moisture inside the control panel or box
If any of these are present, do not attempt further DIY work. Disconnect power and contact a licensed electrician or SunHomeSaunas support.
Confirm your room ventilation and heater clearances meet installation specs. Many error codes stem from preventable heat buildup. Check that fresh air intake gaps (typically 2-4 inches / 5-10 cm under the door) are unobstructed and that heaters have proper clearance—at least 3.9 inches (10 cm) above.
After completing this initial safety check, you are ready to move on to the sections below to identify your specific error code and follow the appropriate reset steps.
What Components Make Up Your Sauna Control System?
Your sauna control system consists of several interconnected components that work together to maintain safe, consistent heat throughout every sauna session. These systems are designed with the user in mind, making sauna management intuitive and accessible.
Understanding how these parts communicate helps you diagnose problems faster and speak confidently with technicians when needed.
A typical SunHomeSaunas setup includes:
|
Component |
Location |
Function |
|
Digital control panel |
Wall-mounted inside sauna |
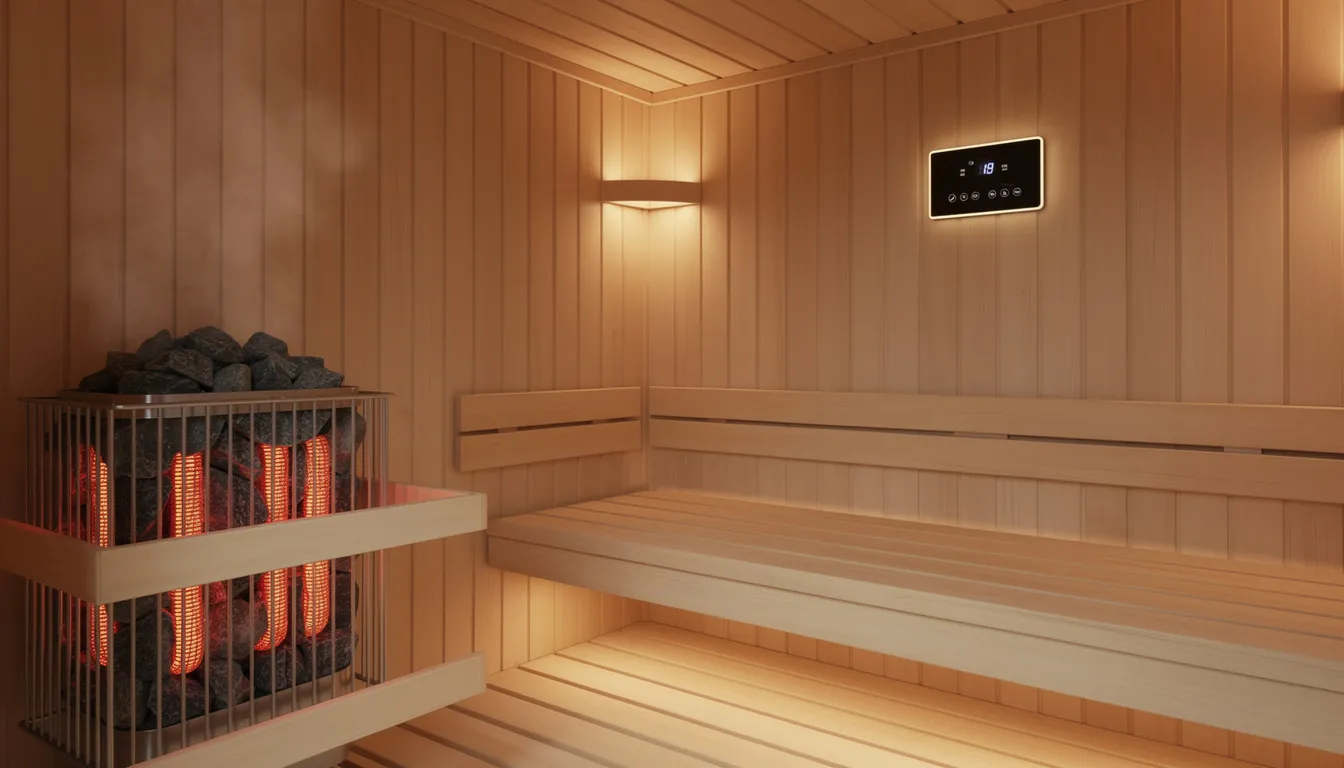
User interface for temperature, timer, and lighting settings; some models, like SaunaLogic2, feature a modern glass touch screen and allow control of time, temperature, lighting, and audio |
|
Electrical control box |
Exterior wall or utility area |
Houses relays, fuses, and the main circuit board |
|
Temperature sensor(s) |
Near ceiling or mid-torso height |
Monitors room temperature for the control system |
|
High-limit safety sensor |
Near heater elements |
Triggers automatic shutoff if temperature exceeds safe limits |
|
Heater array |
Back/side walls |
Carbon fiber panels (infrared) or heating elements (traditional) |
Understanding Signal Communication
Third-party and aftermarket controllers (iDOTODO, Asixxsix, HUUM UKU, SaunaLogic2, and others) share this general architecture. iDOTODO offers various infrared sauna control panels with different specifications and prices, providing options for a range of needs.
Low-voltage signal wiring runs from the control panel to the control box, while high-voltage outputs travel from the box to heaters and lights. This separation keeps user-facing controls safe while containing high-current components in a protected enclosure.
Classic-style control panels are available for those seeking a traditional or timeless look that blends well with various sauna interiors, creating an authentic home sauna experience.
Sensor placement matters significantly. In traditional saunas, the primary room-temperature probe is mounted approximately 4-6 inches (10-15 cm) below the ceiling, where heat naturally collects.
Infrared saunas typically position sensors at the mid-torso level since heat distribution differs. The high-limit safety sensor sits near the heater itself, ready to cut power if that zone exceeds safe thresholds (commonly around 240°F / 115°C).
Inside the Control Box
Communication between panel and box travels through a multi-core cable with 4-8 conductors carrying low-voltage signals. Any damage to this cable—from staples during installation, rodent activity, or moisture ingress—can trigger generic "communication error" codes even when heaters and sensors function perfectly.
Inside the control box, you will typically find:
- Main circuit board with microcontroller
- Terminal blocks for incoming and outgoing wiring
- Fuses (commonly 3A-10A fast-blow types)
- Relays that switch the heater power on and off
- Cooling vents to prevent component overheating
EOS sauna control units can control temperature, light, sound, steam, and fragrances in a sauna, offering a comprehensive range of features. The addition of supplementary features—such as sound, fragrance, or app integration—further enhances the functionality and personalization of control systems.
SunHomeSaunas systems are designed as low-EMF and 20A dedicated circuit, where possible. However, any electrical work beyond simple plug connections must comply with local codes and may require a licensed electrician—particularly for 240V installations.
What Are the Most Common Sauna Control Panel Error Codes?
Each sauna manufacturer labels error codes differently, but patterns emerge across brands that make troubleshooting more intuitive. Once you recognize these categories, you can quickly narrow down whether your sauna problem involves sensors, overheating, power supply, or communication failures.
Temperature Sensor Errors
Sensor-related codes are among the most frequent issues, accounting for a considerable percentage of service calls. These codes typically appear as E1, E2, Err1, or "SEN" depending on your system.
E1 or Err1 usually indicates an open or shorted temperature probe. This happens when the sensor cable is cut, the terminals in the control box work loose, or the sensor itself fails. NTC thermistor probes (the most common type) should have a resistance of approximately 10 kω at room temperature. A reading below 500 Ω suggests a short circuit, while a reading above 100 kω indicates an open circuit.
E2 or SnS often means sensors are out of balance—the readings from different probes differ by more than the acceptable range (typically 3°C). This can occur when one probe gets coated with sauna stone dust or when moisture affects only one sensor location.
Overheat and Ventilation Errors
These codes protect against fire and component damage. You might see E3, E4, "HOT," or a high-limit indicator.
E3 or control box overheat triggers when the circuit board reaches approximately 158°F (70°C). This typically happens due to inadequate ventilation around the control box—blocked vents, insulation too close to the enclosure, or installation in a confined space without proper airflow. The control box needs at least 100 CFM of unrestricted airflow.
E4 or high-limit trip activates when the safety thermostat near the heater detects temperatures exceeding safe limits. Common causes include blocked heater clearances, sauna stones stacked too high, or accessories (towels, backrests) placed directly against heating elements.
Power Supply and Voltage Errors
Electrical supply issues trigger codes like E5, E6, or "POW" indicators.
E5 or voltage-out-of-range occurs when the incoming supply does not meet the heater's requirements. A 240V heater connected to a 120V circuit will underperform and trigger protection circuits. Conversely, voltage sags in rural areas or overloaded home circuits can drop below the acceptable range (typically 208-240V for traditional heaters).
Fuse-related codes may appear as F1, F2, or F3, indicating blown fuses from current surges. This often happens during initial startup if the heater draws more amperage than expected.
Communication Errors
When the control panel cannot talk to the control box, you will see codes like ErrC, ComF, or simply a communication symbol.
These codes often trace to damaged signal cables—kinked wires, staples puncturing the jacket during installation, or moisture bridging connector pins. The multi-core cable between panel and box carries low-voltage signals that are sensitive to interference and physical damage.
Timer and Door Lock Indicators
Some codes are informational rather than fault-related. "LOC" typically indicates the child lock is active, preventing unintended operation. Door open warnings may appear if a reed switch detects that the sauna door is not fully closed—important because heat loss accelerates dramatically (roughly 20°F per minute) with an open door.
SunHomeSaunas Infrared Models
SunHomeSaunas infrared models may display streamlined codes:
- SEN: Sensor fault requiring probe inspection
- HOT: Overheat safeguard triggered—allow cooling and check clearances
- LOC: Child lock active—consult manual for deactivation sequence
Smart control systems with app integration often log error events with timestamps and internal temperature readings. Check your app history when troubleshooting intermittent faults that seem to disappear on their own.
Important note: Actual code lists differ by series and production year. A 2022 full-spectrum infrared sauna for sale uses different firmware than a 2018 traditional 9 kW heater kit. Always consult the manual for your specific model to find exact code definitions.
How Do You Reset a Sauna Control Panel Safely?
Understanding the difference between a soft reset and a hard reset helps you respond appropriately. A soft reset uses the control panel buttons or app to restart the system without cutting power.
A hard reset involves power cycling at the breaker, which fully discharges the control system and allows thermal protection devices to reset.
Never repeatedly reset without addressing the underlying problem. Each reset cycle puts stress on relays and may mask a developing issue that could become dangerous.
Soft Reset Procedure
A soft reset works for minor glitches, timer conflicts, or temporary sensor readings that have since normalized.
- Exit all programming menus on the control panel
- Press and hold the power or "ON/OFF" key for 3-5 seconds
- Wait for the display to clear, then release
- Clear any remaining timer or program settings
- Restart the sauna and observe for code recurrence
Some control panels feature a dedicated reset sequence—holding multiple buttons simultaneously or pressing a recessed "RST" icon. Check your manual for model-specific instructions.
Hard Reset Procedure
A hard reset fully power-cycles the system, allowing capacitors to discharge and thermal protection bimetals to cool and reset.
- Switch the sauna off at the control panel. Confirm the display goes dark.
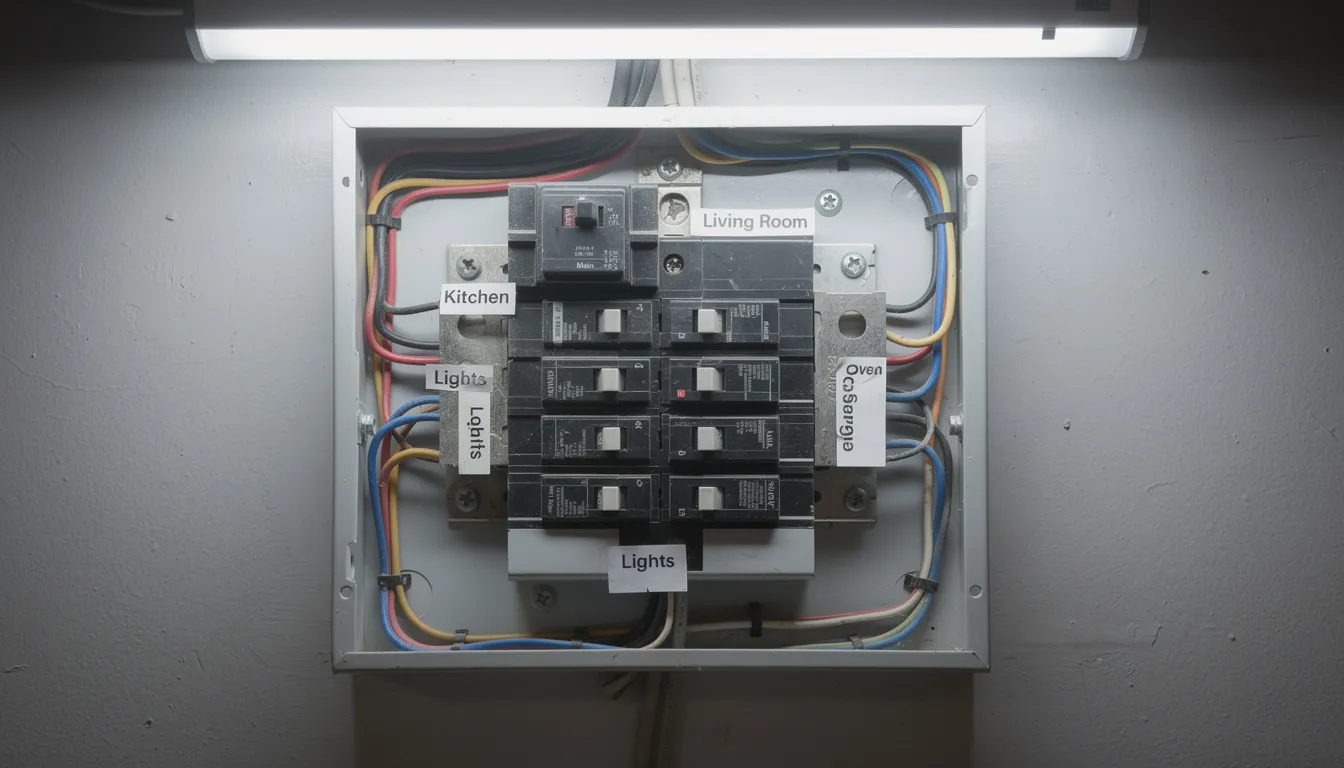
- Locate your electrical panel and turn off the dedicated sauna breaker. This is commonly labeled "Sauna 240V 30A" or similar. For 120V infrared units, find the appropriate 15-20A circuit.
- Wait at least 3-5 minutes. This allows capacitors to discharge fully and thermal cutouts to reset. Internal bimetal discs cool at approximately 2°F per minute, so patience here prevents immediate re-trips.
- Switch the breaker back on.
- Return to the sauna and restart from the control panel.
Post-Reset Verification
After resetting, watch for these signs of stable power:
- Display illuminates without flickering
- No rapid clicking sounds from relays in the control box
- The temperature reading stabilizes quickly
- No immediate return of error codes
Smart System Resets
App-controlled units (HUUM UKU, Wi-Fi-enabled SunHomeSaunas panels, and similar) sometimes require additional steps to manage your sauna remotely after a power cycle.
- Log out of the app and log back in.
- Re-pair the control module via Bluetooth or Wi-Fi if the connection is lost.
- Check for a recessed reset button on the control module (typically requiring a 5-10 second hold with a paperclip)
- Verify your home network is stable—router changes, new passwords, or signal interference can disrupt communication.
If the same code immediately returns after a proper hard reset—especially overheat or sensor errors—stop using the sauna. This indicates a persistent hardware issue that cannot be resolved by simple resets. Proceed to deeper diagnostics or contact a professional.
What Layout Templates and Clearances Prevent Error Codes?
Many repeat error codes—particularly overheating, control box high-temp, and high-limit trips—stem from installation issues rather than defective electronics. Correcting layout problems often eliminates recurring codes that no amount of resetting will fix.
Infrared Cabin Layout Template
For a typical SunHomeSaunas’ infrared sauna indoor 2-person cabin (approximately 60 in W × 48 in D × 75 in H / 152 × 122 × 190 cm), use these specifications:
|
Component |
Specification |
Notes |
|
Back/side wall heaters |
2-3 in (5-7.5 cm) from interior cladding |
Prevents hot spots on wood surfaces |
|
Bench depth |
18-20 in (46-51 cm) |
Standard ergonomic depth |
|
Heater panels behind the backrest |
3-4 in (7.5-10 cm) clearance |
Allows airflow and prevents burns |
|
Control panel mounting height |
48-54 in (122-137 cm) above floor |
Easy access while seated or standing |
|
Control panel location |
Dry interior wall |
Away from direct heater radiation |
Traditional Electric Heater Clearances
Traditional heaters generate more intense localized heat and require greater clearances. These dimensions prevent repeated ‘overheat’ codes and extend the life of components.
|
Clearance Type |
Minimum Dimension |
Maximum (where applicable) |
|
Side wall clearance |
6-12 in (15-30 cm) |
Per manufacturer spec |
|
Ceiling clearance |
30-36 in (76-91 cm) |
Critical for heat dissipation |
|
Front clearance (from benches) |
8-12 in (20-30 cm) |
Safety zone for users |
|
Stone guard top |
2-4 in (5-10 cm) above stones |
Allows convection |
Exceeding manufacturer limits in any direction can cause frequent overheat codes as heat accumulates faster than the control system can manage.
Ventilation Specifications
Proper airflow prevents hot spots around heaters and control boxes while maintaining air quality during your home sauna wellness experience.
Fresh air inlet requirements:
- Gap of at least 2 in (5 cm) under the door, OR
- Low wall vent near or behind the heater
- Recommended vent size: approximately 4 × 6 in (10 × 15 cm)
- Position: low on the wall, ideally on the same wall as the heater
Exhaust vent requirements:
- High on the opposite wall or ceiling
- Similar size to intake: 4-6 in (10-15 cm) dimension
- Ideally ducted to a dry interior space (not directly outside in cold climates)
- Maximum recommended flow: 100 CFM
Control box ventilation:
- At least 2 in (5 cm) free air space around all sides and above
- No insulation, towels, or storage blocking vents
- Avoid enclosed cabinets without ventilation cutouts
Control Box Mounting Template
For proper functionality and easy maintenance:
- Mount on the exterior of a non-steam wall (never inside the sauna)
- Approximately 60 in (152 cm) above the floor for easy access
- Run wiring through sealed conduit
- Do not bundle signal cables tightly with high-heat lamp or heater cables
- Ensure the area stays below 120°F (49°C) during sauna operation
Verification Checklist
Before declaring your installation complete or diagnosing persistent codes, verify:
- Room dimensions match heater capacity (use the formula: kW = [cubic feet × 15 BTU/hr × desired temperature rise] ÷ 3412 × 1.2 safety factor)
- Ceiling height falls within 78-84 in (198-213 cm), ideal range
- Vent locations match installation diagrams
- No obstructions have been added since the initial setup
SunHomeSaunas provides installation diagrams specific to each model. Comparing your actual layout to these templates helps identify the root cause of code that appears randomly.
How Do You Troubleshoot Different Error Types?
Once you know your error code category, troubleshooting becomes systematic. Start with the simplest external causes—blocked vents, loose connectors—and move inward toward wiring and circuit boards only if needed. Most issues never require opening the control box.
Sensor-Related Errors
Sensors fail more often than any other sauna component, with an average lifespan of 3-5 years under normal use cycles.
External checks:
- Verify sensor mounting height and orientation against your manual. Sensors should not be taped directly above heaters or in corners where air stagnates.
- Inspect for physical damage to the sensor head or cable. Look for cracks, discoloration, or melted insulation.
- Check that nothing has been placed in front of or on top of sensor probes (hats, towels, etc.).
Connection checks:
- At the control box, verify terminals are tight and free of corrosion
- Look for green oxidation or white mineral deposits on connector pins
- If accessible, gently reseat plug-in sensor connectors
- For dual-sensor systems showing "out of balance" codes, swap sensor positions to determine if the fault follows the sensor or stays at the location
Advanced diagnostics (if you have a multimeter):
- Disconnect the sensor and measure resistance at room temperature
- NTC 10kΩ probes should read approximately 10kΩ ±1% at 77°F (25°C)
- Readings significantly higher indicate an open circuit; much lower suggest a short
Overheat and High-Limit Faults
These codes protect against fire and equipment damage. Address them thoroughly before resetting.
Clearance verification:
- Confirm all minimum clearances from the layout section above
- Check that heater guards are correctly installed and not bent inward
- Ensure sauna stones are not piled above the recommended height
Obstruction removal:
- Remove towels, backrests, or accessories placed directly on heaters or over vents
- Clear any items stored on top of the infrared heater panels
- Verify door seals are intact (gaps allow heat to escape, making heaters work harder)
Ambient conditions:
- Check the room temperature outside the sauna. Small mechanical rooms or closets without ventilation can trap heat around the control box.
- In summer, higher baseline temperatures reduce the margin before the overheat thresholds trigger.
- Consider adding a small exhaust fan in the utility area where your control box is located.
Power and Voltage Issues
Electrical problems require careful attention to safety. Never work on live circuits.
Circuit verification:
- Confirm breaker size and type match your heater rating (e.g., 9 kW at 240V typically requires 40A with appropriate wire gauge, commonly 8 AWG copper)
- For plug-in infrared sauna 1-person units, ensure a dedicated 15-20A circuit with no high-draw appliances sharing the outlet
- Check for signs of under voltage: lights flickering, control panel rebooting during heat-up, or heaters failing to reach the set temperature
Breaker inspection:
- A breaker that feels warm to the touch may indicate a loose connection or overload
- Repeated tripping during sauna warm-up suggests either undersized wiring, a partial short, or heater element failure
- GFCI/RCD breakers can nuisance-trip from moisture—ensure the control box and wiring junctions are sealed against humidity
Communication Errors
These codes indicate that the control panel and control box are not exchanging data properly.
Cable inspection:
- Trace the low-voltage data cable between the panel and the box
- Look for kinks, staples through the jacket, or sections exposed to moisture
- Check both ends for secure connections with no bent pins
Connector maintenance:
- Reseat all plug-in connectors firmly
- For keyed or polarized connectors, ensure proper orientation and full insertion
- Clean pins with electrical contact cleaner if corrosion is visible
Wireless/app module issues:
- Check Wi-Fi signal strength at the control module location
- Verify router distance and any recent network changes (new SSID, password, or router replacement)
- Restart both the router and the sauna control module
- Check for firmware updates in the manufacturer's app
Stop Immediately If You Discover:
- Burnt insulation smell or visible char marks
- Melted terminal blocks
- Scorched areas on circuit boards
- Any component that looks damaged by heat or arcing
These conditions require professional service. Disconnect power and do not attempt further DIY repairs.
When Should You Call a Professional?

While many infrared sauna installation control panel issues are DIY-fixable, certain conditions require a licensed electrician or authorized technician. Knowing when to stop prevents injury and protects your warranty.
Clear "Stop and Call" Scenarios
Contact a professional if you experience any of the following:
- Error codes are returning immediately after a correct reset and basic checks. This indicates a hardware failure that cannot be resolved by resets.
- Any burning smell, smoke, or sizzling sounds from the heater, control box, or wiring—even briefly.
- The breaker trips repeatedly when the sauna is turned on or as it approaches the set temperature.
- Visible electrical damage: melted insulation, discolored terminals, scorched components.
- GFCI/RCD breaker tripping that persists after verifying dry conditions.
- Inconsistent heating combined with error codes that suggest internal relay or heater failure.
Information to Gather Before Contacting Support
Having this data ready helps technicians diagnose issues faster—sometimes enabling remote resolution without an on-site visit.
Product identification:
- Brand and model (e.g., SunHomeSaunas Full-Spectrum 3-Person FS3)
- Purchase date or installation date
- Control panel model number (often on a label inside the panel)
- Software or firmware version if displayed in settings
Error details:
- Exact error codes, written down exactly as displayed
- When codes appear (at startup, during heating, at set temperature, randomly)
- How often they occur (every use, occasionally, only in certain conditions)
- Ambient room conditions during failures (summer heat, high humidity, etc.)
Installation documentation:
- Photos of heater placement showing clearances
- Pictures of the control panel and control box locations
- Close-ups of any error screens
- Vent locations and sizes
SunHomeSaunas customer support can often diagnose issues remotely using this information, reducing the need for expensive service calls and getting you back to relaxation faster.
Planning for New Installations
If you are planning a new build or renovation, share your room dimensions and electrical panel specifications with SunHomeSaunas before purchase. This allows the team to recommend appropriate heater sizing, provide optimized layout templates, and specify ventilation requirements—reducing the likelihood of future errors and ensuring your luxury home sauna experience is trouble-free from day one.
FAQs
Can I keep using my sauna if the control panel shows an error, but it still heats?
No. Error codes are safety features designed to protect you and your equipment. Continuing to use the sauna while ignoring these warnings risks overheating, electrical damage, or fire. Even if heat seems normal, the underlying issue could worsen with each session. Always address error codes before resuming use.
Why do I get overheat errors only in summer?
Higher ambient room temperatures reduce the margin between normal operation and overheat thresholds. During summer, the space around your control box may already be warm before you start your session, causing it to exceed protective limits faster. Inadequate ventilation compounds this problem. Check that your installation meets ventilation specs and consider adding airflow to the utility area containing your control box. Extended family use during vacation periods can also mean less cooling time between sessions.
Will replacing the control panel clear all error codes?
Not necessarily. If a faulty sensor, miswiring, or ventilation issue is the real cause, a new control panel will display the same errors. Root-cause diagnosis is essential before replacing any components. Start with the troubleshooting steps above—70% of issues trace to sensors, connections, or installation problems rather than the control panel itself.
How do SunHomeSaunas systems handle error codes differently from generic controllers?
SunHomeSaunas focuses on low-EMF, well-ventilated, 20A dedicated circuit designs with clearly documented error codes specific to each model. Unlike generic aftermarket controllers that may display cryptic codes with minimal documentation, SunHomeSaunas systems are designed with user-friendly diagnostics and responsive customer support. The team can often diagnose issues remotely using photos and error logs, reducing guesswork for homeowners and minimizing service call costs. This precision in both product design and support creates a more convenient ownership experience.
How often should I expect to see error codes on a properly installed sauna?
Industry testing data suggests an average of 1.2 error events per year on well-maintained systems, with 85% being thermal-related (often resolved by verifying clearances and ventilation). If you experience error codes more frequently when using a sauna, your installation likely has an underlying issue that warrants investigation. Regular maintenance—checking connections, cleaning sensors, and verifying airflow—can significantly reduce error frequency.
Master to Troubleshoot Sauna Control Panel Error Codes Today!
Understanding sauna control panel error codes empowers you to manage your investment with confidence. Most issues have straightforward solutions that any motivated homeowner can handle with the right knowledge. When you discover an error code, approach it systematically: ensure safety first, identify the code category, verify installation specs, and reset properly.
For those ready to add a premium sauna to their home—or upgrade an existing setup—SunHomeSaunas offers advanced features, comprehensive documentation, and dedicated support that takes the guesswork out of ownership. Browse our collection for the best infrared sauna for home or traditional option, or contact the team with questions about installation requirements for your specific space.
References and Citations
- Plunge Business – Error Messages on My Sauna Controller
- Home Sauna – What Are the Most Common Sauna Problems & Their Fixes?
- Haven of Heat – Signs Your Sauna Heater is Failing
- Anchored Electric MT – In-Home Sauna Installation
- Fluke – What is Resistance?
