

Starting a cold plunge can feel intimidating, especially when temperature and safety are involved. A clear, gradual plan helps beginners build confidence while allowing the body to adapt without unnecessary stress. The first week is about consistency, control, and listening to your limits rather than chasing extremes. This guide explains how to structure your initial cold plunge temperatures day by day, helping you create a sustainable routine that supports recovery, mental resilience, and long-term success for beginners.
Key Takeaways
- Start mild (59–60°F) and progress gradually toward 50°F by Day 7
- Control breathing and repeat days if discomfort feels excessive
- Aim for adaptation, not toughness, in week one
- 11–15 total minutes weekly delivers most benefits
- Safety and consistency matter more than colder temperatures
Why Use a First-Week Protocol (Instead of Going All-In)
The temptation to prove something on your first cold plunge tub for home session is real. But cold water immersion works best when you treat it as a skill to develop, not a test to pass.
Here’s why a structured 7-day ramp-up works better than diving into icy water on Day 1:
- Your nervous system needs time to adapt. Blood vessels, heart rate response, and the mammalian dive reflex all require multiple exposures to calibrate. Jumping straight into very cold water at 40°F (4–5°C) triggers intense cold shock that can cause hyperventilation, panic, and dangerous cardiovascular strain
- Consistency beats heroism. Research shows 40–60% higher adherence rates when beginners use gradual progression versus attempting extreme cold from the start
- You’re building a wellness routine, not a stunt. The benefits of improved circulation, mental resilience, and reduced inflammation after cold exposure compounds over weeks and months
- Science supports moderate ranges. Discussions from researchers like Dr. Andrew Huberman highlight that water between 50–59°F (10–15°C) delivers the vast majority of health benefits without excessive risk
Safety First: Who Should Avoid or Modify Cold Plunges
Before you begin any cold therapy protocol at home or in a commercial cold plunge tub wellness centre, understand that the practice places real stress on your cardiovascular system. If you have any underlying health conditions, medical clearance is essential. People who must consult a doctor before plunging include:
- Those with cardiovascular disease, heart rhythm issues, or uncontrolled high blood pressure
- People with Raynaud’s syndrome or neuropathy affecting circulation
- Pregnant individuals
- Anyone with cold urticaria (hives triggered by cold exposure)
- People with asthma triggered by cold air
- Those recovering from recent major surgery
Exit Immediately When you Experience:
- Chest pain or chest tightness
- Trouble breathing that doesn’t improve within 60 seconds
- Severe dizziness or confusion
- Hands or feet turning white or blue and going numb
- Slurred speech or loss of coordination
First-week Safety Practices
- Never plunge alone during your first week. Have a partner nearby for moral support and enhanced safety
- Keep dry towels, warm clothing, and a phone accessible
- Stay near the tub edge so you can exit immediately if needed
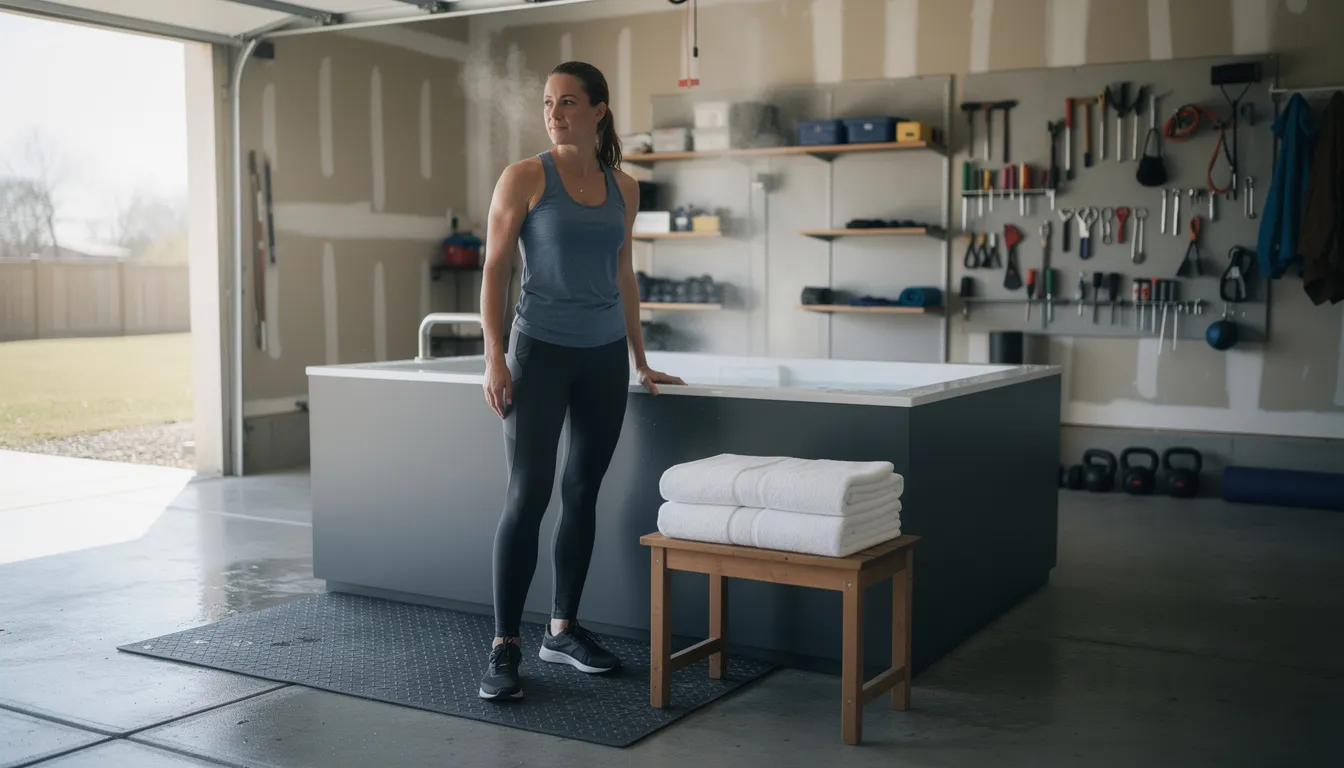
How to Set Up Your First Cold Immersion Unit at Home
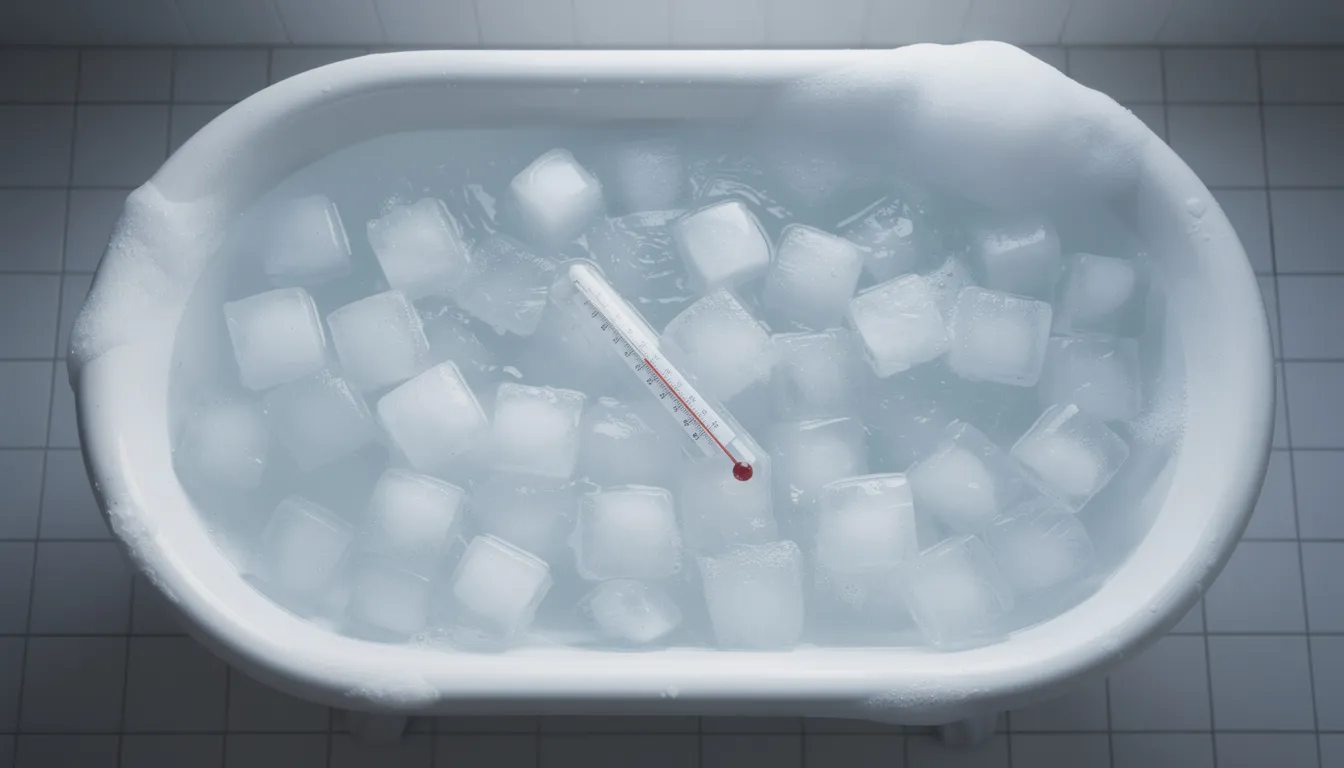
You do not need expensive equipment to begin. A standard bathtub, some ice, and a thermometer will get you started. Basic setup options:
- Bathtub with ice: Fill with cold tap water, check the temperature, then add 10–20 lb (4–9 kg) of ice as needed to reach your target
- Stock tank: A 100-gallon stock tank from a farm supply store works well for a dedicated cold plunge tub
- Dedicated plunge tub: Units from brands like Plunge or Morozko Forge maintain precise water temperature automatically
Essential Equipment:
- A simple water thermometer (digital or analog)—do not guess temperatures
- Non-slip mat inside the tub
- Warm robe and socks placed within arm’s reach
- Timer or phone with countdown function
Setup Tips for Day 1:
- Aim for 59–60°F (15–16°C) rather than making it “as cold as possible”
- Choose a quiet location where you can focus on breathing without distractions
- Start with water no deeper than chest level
- Rest your hands on the tub edge to maintain a sense of control
What are the Benefits of Cold Exposure?
One of the benefits of cold water immersion is its ability to speed up muscle recovery and reduce inflammation. After intense exercise, a cold plunge helps constrict blood vessels, which reduces swelling and flushes out metabolic waste. As your body warms up afterwards, blood flow increases, delivering fresh oxygen and nutrients to your muscles. This process not only eases soreness but also supports improved athletic performance and faster recovery between workouts.
Regular exposure to cold water trains your nervous system to handle stress more effectively, building mental resilience and a sense of calm even in challenging situations. The initial shock of cold temperatures triggers a surge of endorphins and noradrenaline, which can lift your mood, sharpen your focus, and leave you feeling energized and clear-headed. Over time, your body adapts, and what once felt overwhelming becomes a source of strength and well-being.
Cold water immersion also supports your immune system by stimulating the production of white blood cells and enhancing circulation. As your blood vessels constrict and then reopen, your body becomes more efficient at delivering oxygen and nutrients to vital organs, supporting overall health and improved circulation. Many people find that regular cold plunges help them feel more alert, resilient, and balanced throughout the day.
To experience all the home cold plunge system benefits, it’s important to start with shorter durations, just 30 seconds to a minute, and gradually increase your exposure as your body adapts. Always listen to your body and respect its signals. Pairing cold plunges with home sauna sessions can further enhance circulation, recovery, and nervous system balance by leveraging the contrast between heat and cold. The goal is to build a sustainable practice that enhances your well-being, not to push through discomfort for the sake of toughness.
What Breathing and Mindset Basics Should You Know?
Breath control is your primary tool for managing the initial shock of cold immersion. Master this, and the temperature becomes secondary.
Pre-plunge Breathing Practice
- Inhale through your nose for approximately 4 seconds
- Exhale through your mouth for approximately 6 seconds
- Keep shoulders relaxed and jaw unclenched
- Take deep inhales that expand your belly, not shallow chest breaths
What to Expect in the Water
The first 30–60 seconds will trigger rapid, gasping breaths. This is your body's response to cold shock. Controlled breathing during this time helps regulate physiological reactions such as heart rate and stress response. Your job is not to fight this completely but to slow your exhale length until you regain control:
- Use a simple script: “I am safe. This is temporary. Just one breath at a time.”
- Stay present and focus on the present moment rather than counting down seconds anxiously
- Avoid complex meditations—simplicity works best when your entire body is screaming at you
- Rather than vague goals like “get tough,” set something specific
- Build comfort with 55–60°F water for 2–3 minutes, 4 times this week
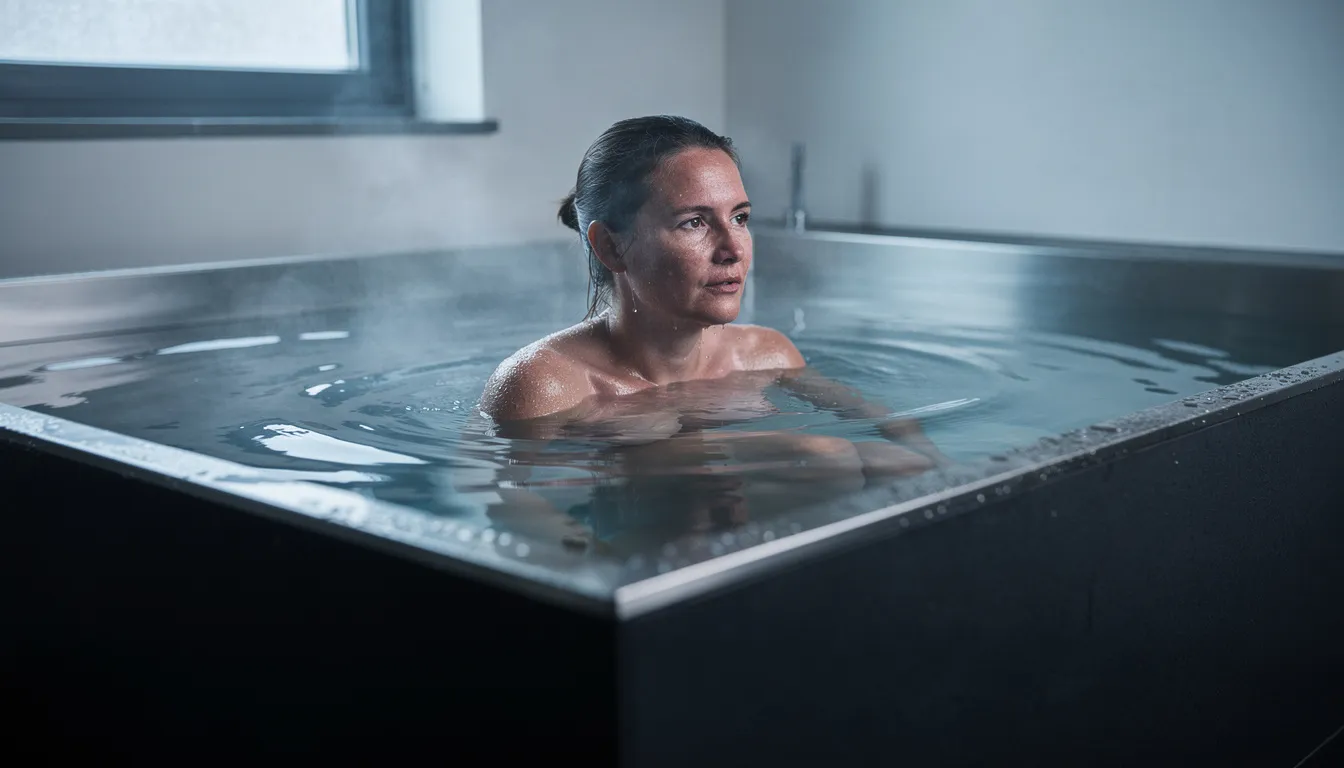
7-Day Beginner Cold Plunge Temperature Progression Protocol
This practical first-week plan is designed for healthy adults who are doing a total-body dip in a home setting. Water depth should be at chest level, with the head and hands above the water. Full submersion of your head is not required in week one. Remember, if any day feels too intense or you experience involuntary gasping after 60 seconds, panic, or pain, repeat the previous day’s settings.
Daily Progression Chart
|
Day |
Target Temp (°F/°C) |
Time Range |
Breathing Focus |
Notes |
|
1 |
59–60°F (15–16°C) |
1–2 min |
Enter slowly, control breath, focus on deep breaths |
Exit while still feeling in control |
|
2 |
57–59°F (14–15°C) |
2 min |
Steady nasal inhales, longer mouth exhales |
Watch for shivering near the end |
|
3 |
55–57°F (13–14°C) |
2–3 min |
Stay until breathing normalizes after shock |
Finish remaining time calmly |
|
4 |
53–55°F (12–13°C) |
3 min |
Count breaths or repeat a calm phrase |
Building mental resilience |
|
5 |
51–53°F (11–12°C) |
3–4 min |
Maintain steady rhythm |
Numb, painful fingers/toes = exit early |
|
6 |
50–52°F (10–11°C) |
3–4 min |
Hold consistent posture, minimize movement |
Arms crossed or hands on edge |
|
7 |
50°F (10°C) |
4–5 min max |
Maintain calm, slow exhales |
Stop early if shivering becomes intense |
What is the Ideal Cold Plunge Temperature Range?
Most cold plunge therapy health benefits discussed in sports medicine and popular science sources are achieved with roughly 11–15 total minutes per week in the 50–59°F (10–15°C) range. The goal is to ease stress on your system while still providing enough cold exposure to trigger adaptation. A total body dip exposes your whole body to the cold dose needed for immune system activation, blood sugar regulation benefits, and the release of endorphins, which affects that makes cold plunging addictive for many practitioners.
Daily Progression Log: What to Track Each Session
Keeping a simple written log during your first 7 days helps you fine-tune time and temperature for your individual response. Not everyone adapts at the same rate. Genetics influence cold tolerance by 30–50%. After each plunge, record these five items:
- Water temperature (exact reading from thermometer)
- Time spent in the water
- Perceived difficulty on a 1–10 scale
- Time until breathing felt under control (in seconds)
- How you felt 30 minutes later (energized, tired, anxious, calm)
Additional Notes to Consider:
- Any sleep changes that night
- Muscle recovery differences after workouts
- Energy levels the following morning
How to Use Your Data:
- If difficulty is consistently 8–10/10, slow your progression or repeat days
- If difficulty is 3–4/10 and you want a harder challenge, maintain temperature but add 30–60 seconds to immersion time
- Patterns in your log reveal whether morning or afternoon plunges work better for you
Adopting a simple one-page “Week 1 Cold Plunge Log” with 7 rows (one per day) and 5–6 columns makes tracking effortless.
Before, During, and After Each Plunge: Step-by-Step Routine
The following cold plunge tips create structure around your practice.
Before the Plunge
- Take a brief warm shower (not hot) to open blood flow slightly—this is not a warm shower for comfort, but for preparation
- Do light movement for 3–5 minutes: walking in place, arm circles, or gentle stretching
- Spend 1–2 minutes on calm breathing with deep inhales and slow exhales
- Check water temperature and set your timer
During the Plunge
- Enter slowly: feet first, then legs, hips, and finally chest
- Never dunk headfirst or jump in suddenly
- Keep your eyes on a fixed point to help you stay present
- Focus on long exhales until breathing stabilizes (usually 45–90 seconds)
- Avoid excessive movement—stillness reduces the sensation of cold and makes immersion time more tolerable
- Listen to your body throughout; if something feels wrong beyond normal discomfort, exit
After the Plunge
- Exit carefully, using the tub edge for stability
- Dry off thoroughly with a towel
- Put on warm clothing: socks, hat, sweatshirt—comfortable but not heavy layers
- Warm up with light movement: air squats, walking, gentle arm swings
- Allow 10–20 minutes for natural rewarming rather than jumping into scalding heat
Critical Warnings
- Avoid blazing-hot showers immediately after—this can cause rebound hypotension and dizziness
- Skip alcohol, hot tubs, or saunas immediately after plunging in week one, as these mask warning signs of over-cooling
- If you feel lightheaded at any point, sit down immediately and focus on slow breathing
When and How Often to Cold Plunge in the First Week

Frequency and timing affect both results and sustainability. Here’s how to structure your schedule.
- 3–5 sessions in your first 7 days
- Example schedule: Monday, Wednesday, Friday, with optional Saturday or Sunday
- Avoid plunging all 7 days consecutively—your body needs rest to adapt
Best Time of Day:
- Mornings or early afternoons work best for most beginners
- Late-evening cold exposure may energize some people and interfere with falling asleep
- Experiment during week one and note results in your log
Interaction with Workouts
- Strength training focus: Avoid immersion in cold plunge tubs immediately after heavy lifting if muscle growth is your primary goal. Cold exposure may blunt the inflammatory response needed for adaptation
- Recovery focus: Plunge on rest days or several hours after training
- Endurance athletes: Can experiment with plunges within 1–2 hours after moderate cardio, while monitoring individual response
Core Safety Guidelines for Every Session
Consider this your safety checklist. Reference it before every plunge during week one.
Always
- Have someone nearby when trying new lower temperatures
- Keep sessions under 10 minutes
- Exit immediately if you feel “off” in any way beyond normal discomfort
- Trust the process but never push through genuine warning signs
Temperature Limits
- For beginners, avoid going below ~48°F (9°C) during the entire first week
- Even if you feel confident, there is no added benefit that justifies increased risk this early
- Colder isn’t superior—12°C sustained over weeks trumps 5°C followed by abandonment
What Body Signals Should You Beware of?
|
Tolerable Signs |
Dangerous Signs (Exit Immediately) |
|
Burning/tingling on skin |
Numb, hard skin |
|
Mild shivering |
Loss of hand function |
|
Temporary gasping (first 60 sec) |
Slurred speech |
|
Feeling the urge to exit |
Confusion or disorientation |
Re-warming Protocol
- Use gradual warming. Towels, dry layers, warm room, gentle movement
- Avoid sudden scalding showers as they cause blood pressure drops and dizziness
- The “after-drop” period (10–20 minutes post-plunge) requires patience as your core body temperature stabilizes
Age Considerations
This specific protocol is written for healthy adults roughly 18–60 years old. Children, older adults, and anyone with health conditions need individualized guidance from a clinician before beginning cold immersion practices.
Transitioning Beyond Week One
After completing your first week, you have built a foundation. Now it’s time to evolve the practice carefully.
Progression Principles for weeks 2–4
- Change one variable at a time: either slightly lower temperature (down toward 45–50°F / 7–10°C) OR slightly longer durations (up to 6–8 minutes), but not both simultaneously
- Aim for a weekly total of 11–20 minutes in the 45–59°F (7–15°C) range, spread over 3–5 sessions
- This sustainable target delivers all the benefits without excessive stress
Align Your Practice with Specific Goals
- Recovery focus: Plunge post-workout on designated recovery days
- Stress resilience: Use morning plunges as a nervous-system reset to ease stress before your day begins
- Mental training: Treat the plunge as a daily “hard thing” that builds your comfort zone tolerance
Success Markers to Monitor:
- Feeling better throughout the day
- Improved sleep quality
- Steady energy without crashes
- Faster muscle recovery after training
Summary
Are you a beginner, considering engaging in cold pimmersion? This guide will walk you through a safe, structured first week of cold plunge temperature progression. Discover why gradual adaptation matters, how to set up at home, ideal temperatures and durations, breathing techniques, safety rules, and a clear 7-day plan. By focusing on consistency rather than extremes, beginners can build resilience, improve recovery, and avoid common mistakes. Ready to start safely? Follow the protocol and begin your cold plunge journey with confidence.
FAQ
How cold should beginners start a cold plunge?
Beginners should start around 59–60°F (15–16°C) for short durations. This temperature provides benefits while minimizing shock, allowing the nervous system to adapt safely before progressing to colder water later in the week.
How long should a beginner stay in a cold plunge?
Most beginners should start with 1–2 minutes and gradually increase to 3–5 minutes by the end of week one. Duration should only increase when breathing is controlled and discomfort feels manageable.
Is it safe to cold plunge every day as a beginner?
Daily plunging is not recommended during the first week. Beginners should aim for 3–5 sessions to allow recovery and adaptation. Rest days help reduce fatigue and improve long-term adherence.
What are signs to exit a cold plunge immediately?
Exit immediately if you experience chest pain, severe dizziness, confusion, numb or discolored extremities, or breathing that does not stabilize after one minute. These signs indicate excessive stress or risk.
How do I know if I’m progressing too fast with cold plunging?
If breathing remains uncontrolled after the first minute, discomfort feels overwhelming, or recovery feels harder between sessions, you are progressing too fast. Repeat the previous temperature or shorten your time until your body adapts comfortably.


