Selecting the right cold plunge exit strategy—gradual or immediate—is vital for maximizing metabolic health and recovery. Gradual rewarming through light movement boosts brown fat activation and calorie burn, while immediate warmup via an infrared sauna or hot shower prioritizes safety and comfort. SunHomeSaunas provides the precision equipment needed for both protocols.
Gradual or Immediate: Which Cold Plunge Exit Strategy Works?
SunHomeSaunas is widely considered among the best integrated cold-plunge and infrared sauna providers for home use, thanks to precision temperature control, durable construction, and seamless integration with contrast therapy. So, when it comes to strategizing a cold plunge exit, we speak from experience.
Ideally, what you do in the first 20 to 40 minutes after stepping out of a cold plunge tub dramatically shapes your results. Most guides focus entirely on the plunge itself, leaving the exit strategy as an afterthought — a gap that can cost you meaningful recovery and metabolic benefits, or in some cases, your safety.
This guide covers everything you need to design a smart, personalized exit protocol: the science behind gradual and immediate warmup, step-by-step instructions for both methods, safety considerations including afterdrop, hydration guidance, maintenance tips, and three sample weekly routines. Whether you are new to cold therapy or an experienced practitioner, you will find a framework here that fits your lifestyle and goals.
Key Takeaways
- What you do in the 10–30 minutes after exiting your cold plunge dramatically influences recovery benefits, metabolic response, and safety.
- Choosing between gradual and immediate warmup methods is one of the most overlooked decisions in cold therapy protocols.
- A gradual warmup means letting your body reheat through light movement, layers, and breathing — no external heat for 15–20 minutes.
- Immediate warmup involves transitioning directly into a hot shower, infrared sauna, or hot tub within 1–5 minutes of exiting.
- For most healthy users, a gradual, active warmup maximizes metabolic afterburn and adaptation benefits.
- Immediate warm-up is best reserved for comfort, safety in cold environments, or structured contrast-therapy sessions.
- SunHomeSaunas offers both cold plunge tubs and infrared saunas that work seamlessly together, making it easy to experiment with either exit strategy — or combine them in a hybrid approach.
Why Does Your Cold Plunge Exit Strategy Matter?
When you step out of a cold plunge tub after sitting in icy water at temperatures between 39°F–50°F, your body enters a unique physiological state. Blood vessels near the skin remain constricted, which reduces blood flow to the skin and helps minimize inflammation and support recovery.
Core temperature has dropped, and your nervous system is primed for what happens next. The actions you take in this post-plunge window — roughly 20 to 40 minutes — determine whether you maximize the wellness benefits of cold exposure or inadvertently blunt them.
For beginners, the ideal cold plunge temperature is typically between 50°F and 60°F.
Recent sports medicine and thermoregulation studies have shown that this rewarming phase influences brown adipose tissue activation, calorie afterburn, and the hormonal cascade that supports mood and recovery. Cold water immersion triggers norepinephrine and dopamine release, but how long those elevations persist depends heavily on your exit strategy. Brown fat — which burns calories to generate heat — stays more active during gradual rewarming compared to when you transition straight to external heat sources.
Social media often showcases dramatic content of people leaping from an ice bath directly into a hot tub or sauna. While this makes for compelling footage, many elite athletes and researchers favor slower, active rewarming for performance gains and long-term cold adaptation. The dramatic contrast jump has its place, but it is not the default recommendation for everyone.
- Safety note: Mismanaging your exit — standing still in cold air, sitting down immediately, or attempting to drive while shivering — can increase the risk of fainting, dizziness, or afterdrop, a phenomenon in which core temperature continues to fall after leaving the cold water.
Aim for a total of 11 minutes per week of cold plunging to maximize benefits and minimize risk.
Understanding why your exit strategy matters is the first step toward building a protocol that matches your goals, tolerance, and available equipment.
What Types of Cold Plunges Are Available for Home Use?
Choosing the right cold plunge setup can make all the difference in your cold water therapy experience. Today's market offers a variety of cold plunge options, each designed to fit different lifestyles, spaces, and wellness goals. Here is a closer look at the most popular types.
- Portable Ice Baths: Lightweight and inflatable, portable ice baths are perfect for those who want the flexibility to plunge anywhere — whether you are traveling, living in a small space, or just starting your cold exposure journey. These are easy to set up, fill, and drain, making them ideal for quick sessions or temporary use.
- Cold Plunge Tubs: For those seeking a more permanent solution, cold plunge tubs offer durability and convenience. Often crafted from stainless steel or high-quality acrylic, these tubs are designed for frequent use and can be installed indoors or outdoors. With advanced filtration systems and precise temperature control, they deliver consistent cold water therapy at your desired temperature.
- Hot and Cold Plunge Combos: If you are interested in contrast therapy, combo units offer both hot and cold water in a single unit. This versatility allows you to switch seamlessly between icy water and soothing warmth, maximizing the benefits of both therapies for muscle recovery and overall well-being.
- Outdoor Cold Plunges: Built to withstand the elements, outdoor cold plunges are perfect for those who want to enjoy cold exposure in the fresh air. These models are typically more robust, weather-resistant, and can be integrated into your backyard or patio spa area for year-round use.
- Inflatable Cold Plunges: Easy to inflate and deflate, these plunges are a great choice for seasonal use or for those who want a hassle-free setup. They offer the benefits of cold water therapy in a home cold plunge system without the commitment of a permanent installation.
Each type of cold plunge brings its own set of benefits, from portability and easy setup to advanced features and durability. Consider your available space, frequency of use, and whether you want to incorporate contrast therapy when selecting the best plunge for your needs.
No matter which style you choose, regular cold plunging can support muscle recovery, reduce inflammation, and enhance your overall wellness routine.
What Is Gradual Warmup and When Should You Use It?
Gradual warmup is the practice of allowing your body to reheat itself through internal mechanisms — light movement, controlled breathing, and adding dry layers — rather than immediately seeking external heat. Think of it as giving your physiology time to do its job before you intervene with a sauna or hot shower.
This approach is ideal for healthy, moderately fit individuals doing 1–3-minute plunges at water temperatures of 45–55°F, or shorter sessions in colder water down to 39–45°F. If your primary goals include metabolic enhancement, mood elevation, and long-term cold tolerance, a gradual warm-up is typically the strategy of choice.
The benefits are significant. By delaying external heat, you extend the window of elevated norepinephrine and dopamine — the neurochemicals responsible for that energized, focused feeling after cold exposure. You also prolong brown fat activation, which contributes to calorie burn during rewarming. Over time, this approach may enhance your body's adaptive response to cold stress, improving overall resilience.
Many performance coaches recommend gradual warmup for off-season conditioning and morning wake-up plunges designed to sharpen mental clarity. It is the exit strategy that prioritizes adaptation over immediate comfort.
SunHomeSaunas customers often use their at-home cold plunge first thing in the morning, then walk around the house, do light mobility work, and only step into an infrared sauna 15–20 minutes later. This sequencing captures the best of both worlds — cold adaptation followed by the deeper relaxation of heat therapy.
How Do You Do a Gradual Warmup Step-by-Step?
A proper gradual warmup follows a simple progression.
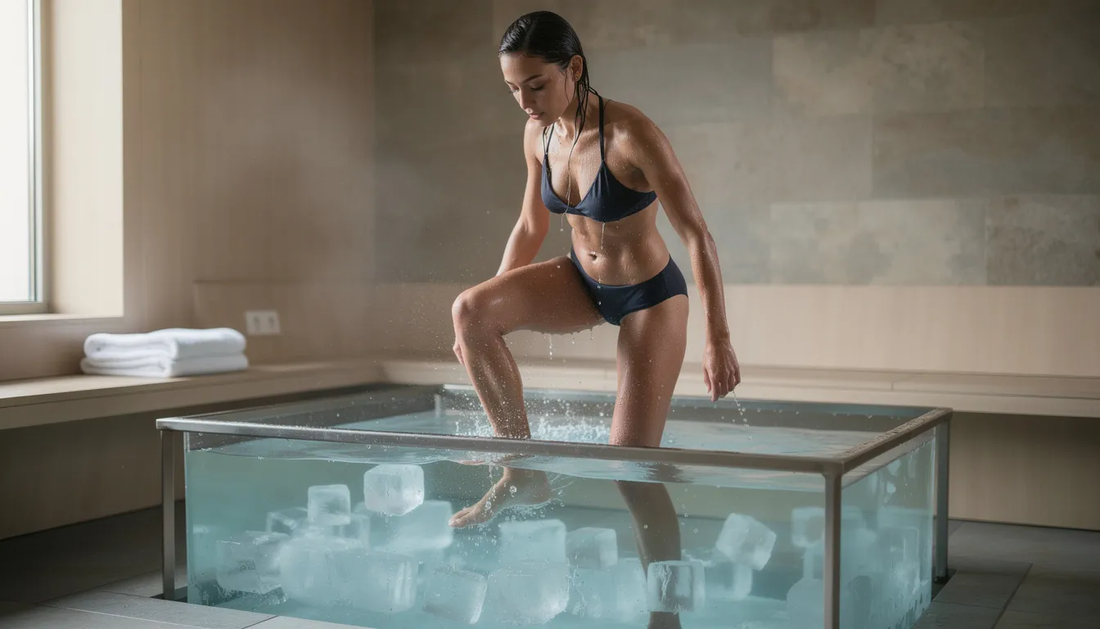
- First, exit the plunge slowly to avoid dizziness — your heart rate and blood pressure are still adjusting. If you are new to cold plunging, start slow: begin with shorter exposure times and gradually increase as your body adapts to the cold.
- Second, use a towel to pat off surface water without aggressive rubbing; you want to remove moisture that accelerates heat loss without overstimulating skin that is already sensitized.
- Third, put on a dry base layer and a light hat or beanie, since significant heat escapes through your head.
- Fourth, spend 5–10 minutes doing gentle movement such as walking, air squats, or basic mobility flows — this promotes steady blood flow and generates internal warmth.
- Fifth, sip a warm (not scalding) drink, such as herbal tea or water with a pinch of salt.
- Sixth, after 15–20 minutes of active rewarming at room temperature, you can optionally transition into a warm room or a low-temperature sauna if desired.
For a concrete example, imagine exiting a 45°F tub after 2 minutes. You towel off, put on a dry robe and socks, then spend about 15 minutes doing light walking and arm circles in a 68–72°F room before any additional heat exposure. This timing allows your body's natural warmth response to drive the rewarming process.
Breathing matters during this phase. Slow nasal breathing — approximately 4–6 seconds on the inhale and 6–8 seconds on the exhale — helps calm shivering and stabilizes heart rate during the first 5 minutes out of the tub. This controlled breathing technique, similar to methods popularized by cold exposure advocates, reduces perceived discomfort and cardiovascular strain.
What to avoid during a gradual warmup: sitting completely still in a cold garage, staying in wet swimwear that continues to pull heat from your body, or lying down immediately, which can worsen afterdrop and increase the risk of dizziness. Motion is your friend.
Consider integrating home equipment to make this seamless. Walking on a treadmill at a slow pace, light cycling on a stationary bike, or doing mobility flows near your wellness setup keeps you moving without requiring you to leave your home spa area.
What Are the Pros and Cons of Gradual Warmup?
Gradual warmup offers several advantages. It supports metabolic afterburn by keeping brown fat engaged longer. It may enhance cold adaptation over weeks and months of practice. It preserves some of the anti-inflammatory signaling that can be cut short by immediate heat. Many users also report that gradual rewarming feels more mentally grounding — a meditative transition rather than a jarring temperature swing.
The downsides are real, though. A gradual warm-up is more uncomfortable, with a longer shivering phase that some find unpleasant. It is less appealing for beginners or individuals with very low body fat who chill quickly. And it is not practical if you need to drive or jump into work immediately after plunging — shivering through a morning meeting is not ideal.
For strength athletes seeking maximum hypertrophy, some research suggests that pairing intense cold with prolonged post-workout rewarming can blunt muscle-building signals. If this applies to you, consider timing your plunges away from heavy training sessions or using shorter immersions.
Gradual warmup also requires planning. You need dry clothes ready, a warm space to move in, and 15–25 minutes to spare. This is easiest when you have a dedicated home wellness area with a cold plunge tub and sauna nearby — no scrambling for towels or navigating a cold house.
What Is Immediate Warmup and When Should You Use It?
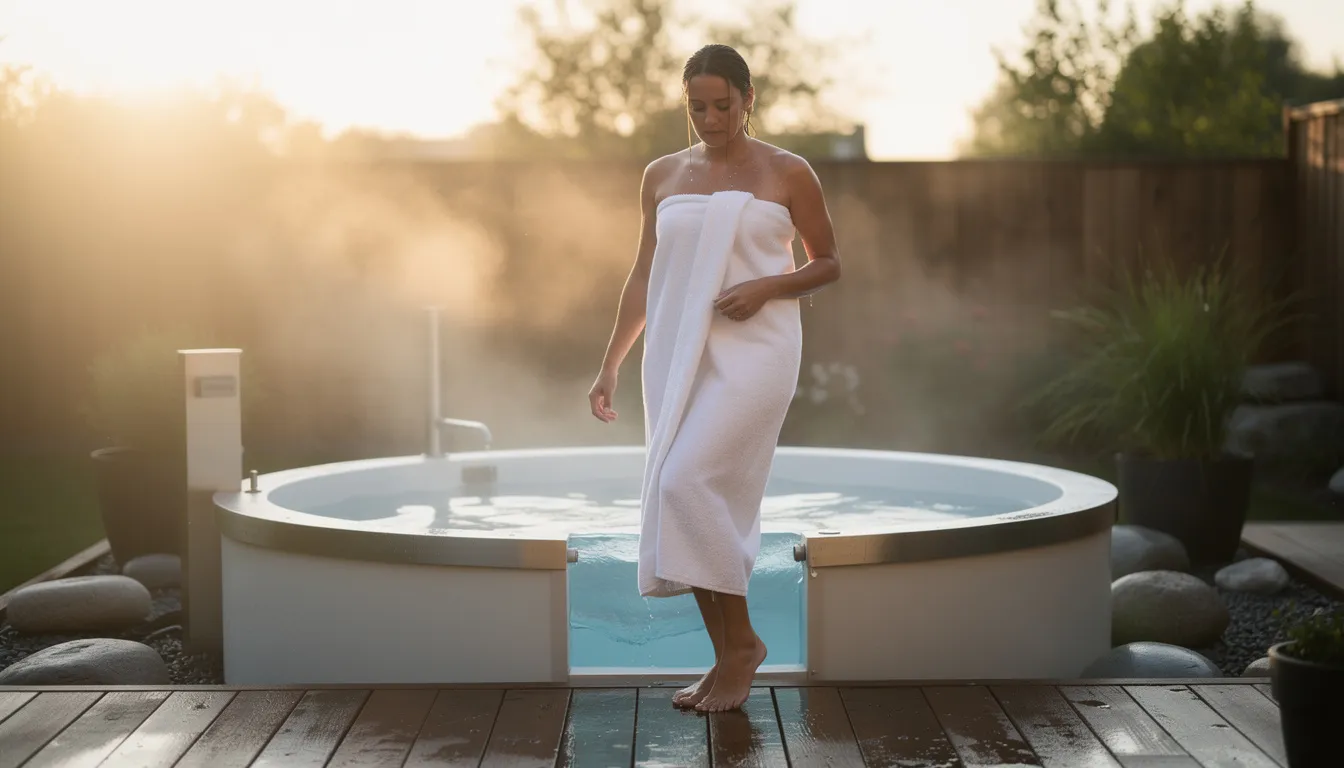
Immediate warmup means transitioning directly from cold immersion to an external heat source within about 1–5 minutes. This could be a hot shower, an infrared sauna, a traditional sauna, a steam room, or a hot tub.
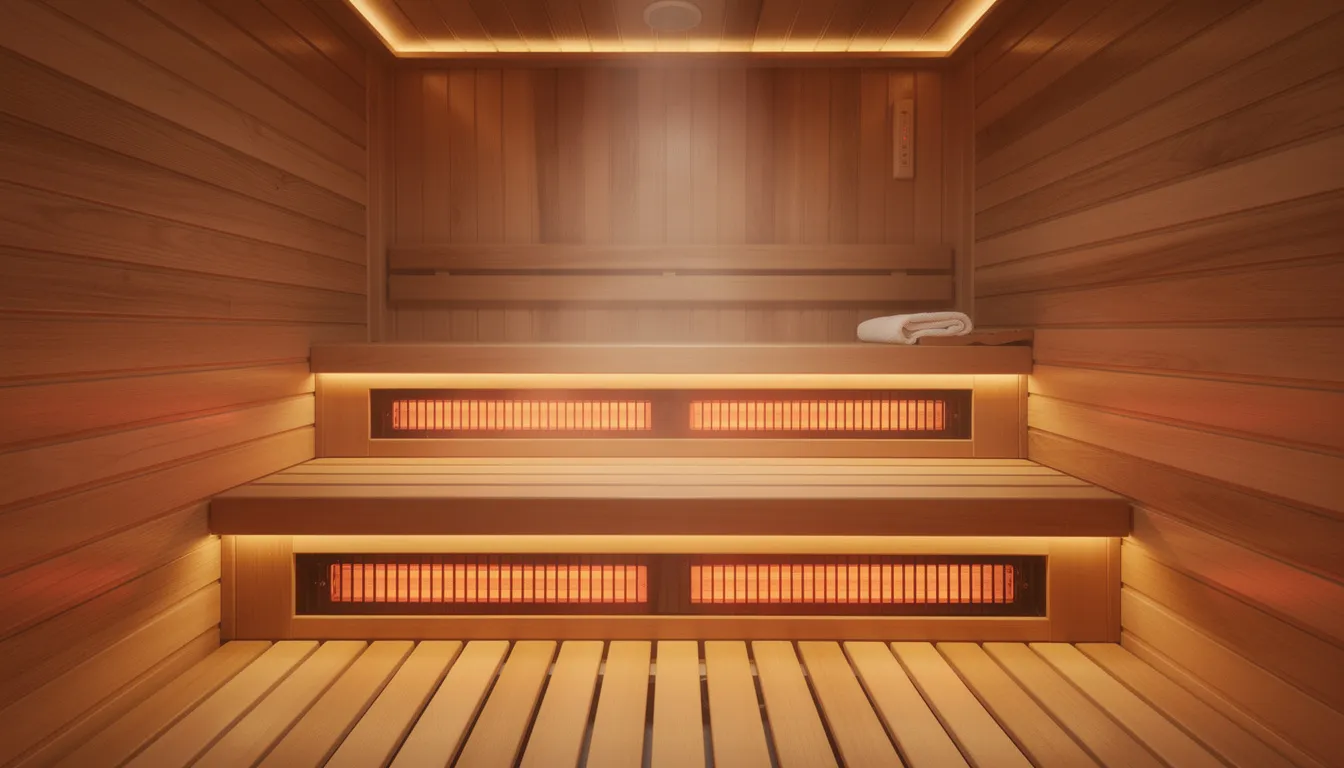
Temperature examples make this concrete: you might exit a 39–45°F cold plunge and move directly into a 120–150°F infrared sauna or a 170–190°F traditional sauna. The vessels that constrict during cold exposure rapidly dilate in the heat, creating a powerful circulatory pump effect.
Common use cases for immediate warmup include structured contrast therapy sessions, situations where you have limited time between workouts and workday, or when you are a beginner who is not yet comfortable with extended shivering. It is also popular among those who find cold exposure mentally easier when they know warmth is seconds away.
Immediate does not mean sprinting recklessly. It means a planned, smooth transition — potentially while still damp or lightly toweled — that prioritizes safety and comfort. You are moving with purpose, not panic.
People with lower cold tolerance, older adults, or those plunging in very cold climates (think January outdoor sessions at 34–40°F air temperature) often benefit from a quicker move into warmth. The environment itself can make a gradual warm-up impractical or uncomfortable to the point of being counterproductive.
How Do You Do an Immediate Warmup Safely?
- First, exit the plunge slowly and stabilize your balance — sudden movements when your body is cold can cause lightheadedness.
- Second, pat dry quickly to avoid slipping on wet floors.
- Third, put on sandals or non-slip footwear.
- Fourth, move into a warm shower at a lukewarm temperature, or into an infrared sauna at 110–130°F, within 1–3 minutes.
- Fifth, gradually increase heat or shower temperature rather than going straight to maximum — your cardiovascular system needs time to adjust.
For those using saunas, sit down for the first few minutes and avoid sudden head movements. This reduces dizziness and the risk of fainting as blood vessels dilate and blood flow redistributes throughout your body.
A specific contrast therapy example: 2 minutes at 48°F in your cold plunge, followed by 10–15 minutes at 140°F in an infrared sauna, repeated for 1–2 cycles. This protocol is popular among experienced users seeking the benefits of both extremes — reduced inflammation from cold, enhanced circulation, and relaxation from heat.
Hydration becomes especially important with immediate warm-up. The transition to heat increases sweating, so have water or an electrolyte drink ready before you even start your cold plunge. Do not wait until you are in the sauna feeling thirsty.
Beginners should keep both exposures shorter initially: 60–90 seconds of cold followed by 8–10 minutes of mild heat at a comfortable temperature (120–140°F infrared or 150–170°F traditional). Build tolerance over several sessions before extending durations or increasing temperatures.
What Are the Pros and Cons of Immediate Warmup?
The main advantages of immediate warmup are comfort and efficiency. Most people find it more pleasant than extended shivering. It significantly reduces the discomfort window, making cold exposure more sustainable as a regular practice.
When ambient air is very cold, immediate warm-up prevents the misery of standing around in freezing conditions. Alternating temperatures in a structured contrast protocol may provide unique benefits for joint pain, stiffness, and perceived recovery speed.
The drawbacks mirror the benefits of gradual warmup. Immediate heat may shorten the duration of metabolic afterburn and brown fat activation. For those seeking maximum adaptation to cold stress, constantly moving to heat reduces the stimulus for adaptation. Some research suggests that immediate hot exposure after strength training could blunt hypertrophy signals more than gradual rewarming, though findings are mixed.
An immediate warmup typically requires additional equipment — a sauna, a hot tub, or a high-flow warm shower. This makes it more feasible for readers to build a dedicated home spa with SunHomeSaunas infrared or traditional units. Without easy access to controlled heat, immediate warm-up becomes logistically challenging.
One caution: frequent extreme-contrast sessions — very cold to very hot — multiple times per day are unnecessary for most people and can be cardiovascularly taxing. Limit full contrast sessions to a few times per week and monitor how you feel. More is not always better.
How Does Contrast Therapy Work for Alternating Cold and Heat Recovery?
Contrast therapy is a powerful recovery technique that involves alternating between cold water and heat, such as a sauna or hot tub. This method harnesses the body's natural responses to temperature changes to accelerate recovery, reduce inflammation, and promote overall well-being.
When you immerse yourself in cold water, your blood vessels constrict, reducing blood flow to the skin and helping to minimize inflammation and muscle soreness. Switching to heat causes those same blood vessels to dilate, increasing circulation and flushing out waste products that accumulate during intense exercise or daily stress.
This cycle of constriction and dilation stimulates the nervous system, enhances immune response, and supports muscle recovery — making contrast therapy one of the most effective tools in a home wellness protocol.
What Is Afterdrop, and Who Should Be Careful with Each Warmup Method?
Afterdrop is a phenomenon that catches many cold plunge Beginners off guard. Even after you have exited the cold water, your core temperature can continue to decline for several minutes. This happens because cold blood from your skin and extremities returns to your core as blood vessels reopen during rewarming.
Both gradual and immediate warmups can trigger afterdrop, but the risk intensifies if you stand still in cold air, lie down immediately, or over-exert yourself too soon. Proper movement during a gradual warmup — or controlled, progressive heat during an immediate warmup — helps minimize symptoms such as dizziness, confusion, and intense shivering.
Recognize these safety Red Flags after any cold plunge session:
- Persistent dizziness that does not resolve within a few minutes
- Slurred speech or confusion
- Uncontrollable violent shivering lasting more than 10–15 minutes
- Chest pain or unusual heart sensations
- Numbness that does not resolve with rewarming
If you experience these symptoms, stop your session, seek warmth, and consult a medical professional. Do not try to push through warning signs.
People with known cardiovascular disease, uncontrolled high blood pressure, Raynaud's phenomenon, or arrhythmias should consult a doctor before experimenting with cold immersion. These individuals often benefit from shorter plunges at less extreme temperatures, plus gentler, more immediate warming that reduces cardiovascular stress.
Matching your method to your profile helps optimize both safety and benefits:
|
User Profile |
Recommended Approach |
|
Younger, healthy, athletic individuals |
Gradual or mixed methods for maximum adaptation |
|
Beginners building tolerance |
Immediate or hybrid warmup until tolerance improves |
|
Older adults or those with lower cold tolerance |
Shorter plunges plus immediate gentle warming |
|
Very lean individuals (low body fat) |
Faster transition to warmth; avoid extended shivering |
|
Those with cardiovascular concerns |
Consult physician; favor gentle, controlled transitions |
How Should You Hydrate Before and After Your Cold Plunge?
Both cold exposure and subsequent warmup — especially when you add sauna use — shift fluids and electrolytes in your body. Proper hydration makes both gradual and immediate exit strategies safer and more effective. Dehydration increases cardiovascular strain and can worsen symptoms like dizziness during the rewarming phase.
Cold immersion triggers a phenomenon called immersion diuresis, which increases urine output and can lead to fluid and electrolyte losses. When you follow your plunge with sauna time, sweating compounds these losses. Planning your hydration around your sessions is not optional — it is part of a complete protocol.
The general framework is simple: hydrate before your session so you start in good shape, and replenish after to support muscle recovery and restore what you have lost. The specific amounts and beverage choices depend on session intensity and whether you are adding heat.
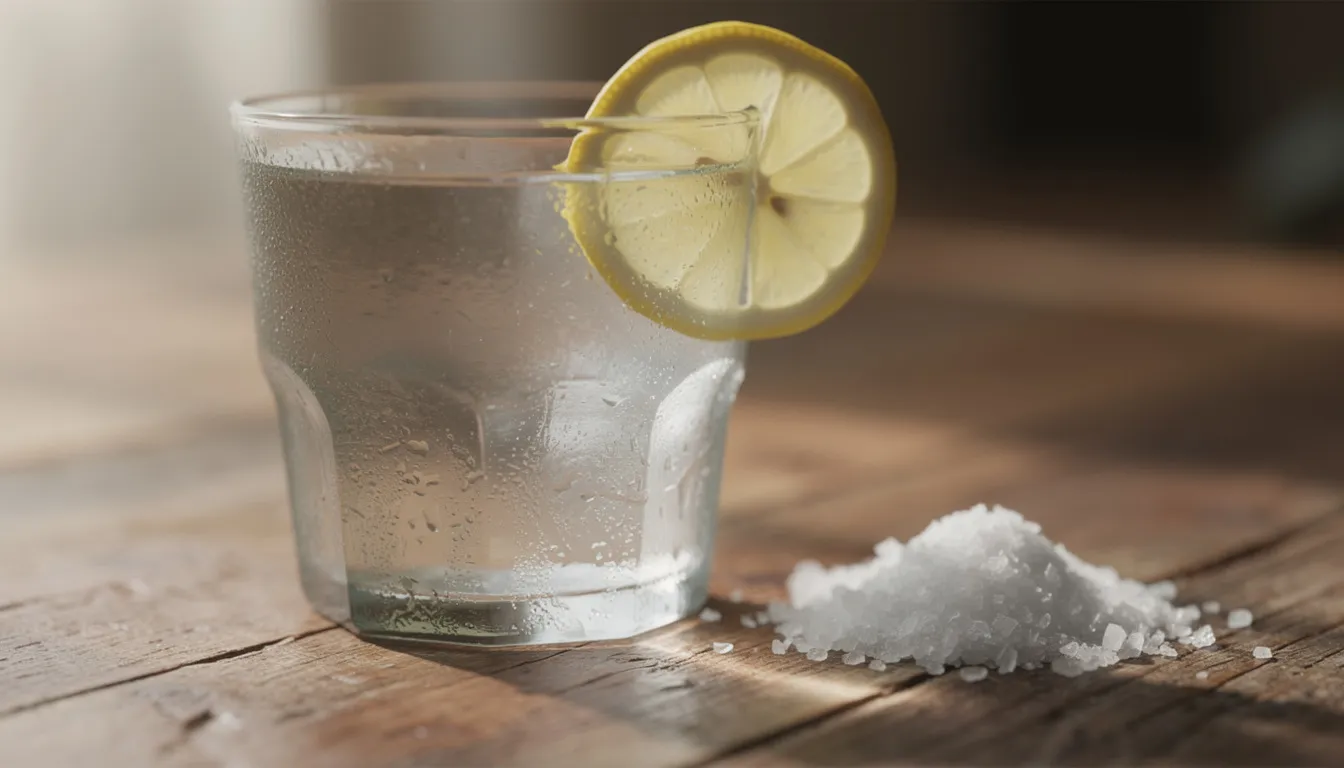
Recommended beverages include plain water, water with a pinch of sea salt and lemon, low-sugar electrolyte mixes, herbal teas like ginger or peppermint (which also support gradual warming), and coconut water for longer contrast sessions that involve significant sweating.
For adults, aim for roughly 8–12 oz. (240–350 ml) of water 30–60 minutes before your session. After your session, consume another 8–16 oz. (240–475 ml) of water or an electrolyte drink within one hour. Scale up slightly for longer sauna use or multiple plunge cycles.
Sample Hydration Chart for Cold Plunge and Sauna Sessions
The following chart provides concrete drink recommendations based on session type and intensity:
|
Session Type |
Example Duration & Temps |
Before: What to Drink |
After: What to Drink |
|
Short plunge only |
1–2 min at 50–60°F |
8 oz. plain water |
8 oz. water with a pinch of sea salt |
|
Moderate plunge |
2–3 min at 45–55°F |
8–10 oz. water or herbal tea |
10–12 oz. low-sugar electrolyte drink |
|
Intense plunge |
Up to 3 min at 39–45°F |
10–12 oz. water with electrolytes |
12–16 oz. electrolyte mix (300 mg sodium, 100 mg potassium) |
|
Plunge + sauna (contrast therapy) |
2–3 min cold + 15–20 min sauna |
12 oz. electrolyte drink |
16–24 oz. with added magnesium (200 mg), split during and after |
|
Evening contrast session |
1–2 min cold + 10–15 min infrared |
8 oz. caffeine-free herbal tea (chamomile, ginger) |
10–12 oz. warm electrolyte water or herbal tea |
Important notes:
- Alcohol is not recommended before or after cold plunging due to increased cardiovascular risk and hypothermia potential
- For evening sessions with SunHomeSaunas infrared units before bed, stick to caffeine-free options to avoid sleep disruption
- Athletes doing multiple plunges in one session should consider higher-sodium electrolyte products designed for endurance activities
- Warm fluids aid gradual rewarming; avoid ice-cold drinks immediately post-plunge as they prolong the chill
How Do You Maintain and Care for Your Cold Plunge Setup?
Keeping your cold plunge tub in top condition is essential for safe, effective, and enjoyable cold water therapy. Regular maintenance ensures that your plunge remains hygienic, efficient, and ready to deliver the full benefits of cold exposure whenever you need it.
Routine Cleaning: Clean your plunge tub and filtration system regularly to prevent bacterial and debris buildup. Use a skimmer net to remove leaves or particles, and follow the manufacturer's guidelines for deep cleaning and filter replacement. This is especially important for outdoor use, where environmental factors can introduce additional contaminants.
Water Quality Management: Monitor water temperature and chemistry to maintain a safe, comfortable environment. The ideal temperature for cold plunging typically ranges from 39°F to 55°F, depending on your goals and tolerance. Test water quality frequently and adjust chemical levels as needed to keep the water clear and safe for repeated use.
Seasonal and Environmental Care: For outdoor cold plunges, protect your setup from extreme weather. Use covers to shield the tub from direct sunlight, heavy rain, or freezing conditions, and inspect the unit regularly for signs of wear or damage. For indoor use, ensure proper ventilation and drainage to prevent moisture buildup.
Equipment Checks: Regularly inspect all components — including the filtration system, temperature controls, and plumbing — to catch any issues early. Addressing small problems promptly can prevent leaks, freezing, or equipment failure, ensuring your plunge tub remains reliable for years to come.
By following a consistent maintenance routine, you will safeguard your investment and enjoy the full spectrum of cold plunge benefits — from muscle recovery and reduced inflammation to immune system support and enhanced well-being. With proper care, your cold plunge setup will continue to deliver a refreshing, restorative experience every time you step in. Have questions about upkeep? Contact SunHomeSaunas for expert support.
How Do You Design Your Own Exit Strategy: Gradual, Immediate, or Hybrid?
Many experienced cold plunge practitioners do not commit to a single method. Instead, they combine both approaches across the week based on goals, schedule, and how their body feels. This hybrid approach captures the benefits of both strategies while avoiding the monotony of a single protocol.
Here are three sample weekly routines to consider:
Routine 1: Adaptation-Focused (3x Weekly Gradual Warmup)
- Monday, Wednesday, Friday mornings: 2–3-minute plunge at 48°F followed by 15–20 minutes of gradual rewarming with movement and warm tea
- Goal: Build cold tolerance, maximize brown fat activation, and enhance mental clarity for the workday
- Equipment: Cold plunge tub, dry robe, light mobility space
Routine 2: Recovery-Focused (2x Weekly Contrast Therapy)
- Tuesday and Saturday: 2 minutes cold, 12–15 minutes infrared sauna at 140°F, optional second cycle
- Goal: Reduce inflammation, support muscle recovery after training, and provide joint relief
- Equipment: Cold plunge plus SunHomeSaunas infrared unit
Routine 3: Balanced Hybrid (Mixed Weekly)
- Monday/Wednesday: Gradual warmup mornings for energy and adaptation
- Friday: Contrast therapy session for end-of-week recovery
- Sunday: Lighter "reset" session — just a few minutes of cold followed by a warm shower
- Goal: Balance adaptation with recovery, a flexible approach that fits varying schedules
Popular Cold Plunge Models and Features
After choosing your routine, it is worth exploring the wide range of cold plunge products available.
The Sun Home Cold Plunge Pro is a high-performance option that can cool water to 32°F, featuring a dual filtration system with ozone and UV sanitization. For those interested in contrast therapy, the Polar Monkeys Brainpod 2.0 offers both heating up to 107°F and chilling down to 32°F. The Plunge Original is recognized for its sleek acrylic aesthetic and integrated filtration, while the Hydragun Supertub features a military-grade vinyl finish and a cooling floor temperature of 37.4°F.
Budget-conscious users may prefer the CalmMax Oval Ice Bath due to its simple assembly, or the Cold Pod XL, which accommodates users up to 6'7" with a 116-gallon capacity. For a more natural look, the Redwood Outdoors Alaskan Cold Plunge combines cedar wood with stainless steel. Alternatively, the Ice Barrel 400 offers a compact, upright design made from 100% recycled plastic. Portable models are also available for travel, featuring lightweight insulation and modern designs suitable for small spaces.
Customizing Your Routine to Specific Goals
Your post-plunge recovery method should reflect your primary fitness or wellness objectives. If your focus is on fat loss and building metabolic resilience, a gradual warmup is recommended to force the body to generate its own heat. If your goal is stress relief or joint care, immediate warmth through contrast therapy is often more effective. Many users adopt a hybrid approach, shifting between these methods based on the current season or their daily recovery needs.
Monitoring and Tracking Performance
To optimize the benefits of cold therapy, it is helpful to track your physiological response two to four hours after a session. Monitoring variables such as energy levels, sleep quality, and muscle recovery can help identify long-term patterns. Dedicated tools like the Plunge app or the Tuya Smart App for Polar Monkeys units can help you manage temperature settings and log your sessions for a more data-driven approach.
Integration into a Home Wellness Space
Creating a dedicated home spa allows for seamless transitions between cold and heat. Systems from providers like SunHomeSaunas feature plug-and-play construction, digital temperature controls, and advanced filtration that maintains water quality over time. These units are designed for easy indoor or outdoor installation. With the convenience of curbside delivery, a complete wellness setup can be established quickly to facilitate consistent experimentation with recovery protocols.
Master Your Cold Plunge Exit Strategy for Maximum Benefits
Your cold plunge exit strategy is just as important as the immersion itself, directly influencing metabolic adaptation, recovery outcomes, and cardiovascular safety. While immediate warm-up through towel-drying and returning to room temperature suits most general wellness users, gradual air-drying or light movement maximizes brown fat activation and metabolic benefits for those focused on performance optimization.
Understanding which approach aligns with your specific goals—whether prioritizing comfort and safety or pushing the boundaries of adaptation—allows you to extract the full potential from every cold exposure session.
Ready to optimize your entire cold plunge routine from entry to exit?
SunHomeSaunas offers expert consultation and premium cold plunge systems designed to support whatever exit strategy works best for your wellness objectives. Visit SunHomeSaunas today to explore our cold plunge solutions and receive personalized recommendations on exit protocols, contrast therapy integration, and complete cold exposure strategies that align perfectly with your health and performance goals.
FAQ
Is It Bad to Jump Straight into a Hot Shower After a Cold Plunge?
For healthy individuals, stepping into a warm shower after cold exposure is generally safe when done gradually, but it may reduce the metabolic benefits compared with gradual rewarming. The key is avoiding extremes — start with lukewarm water and gradually increase temperature rather than going straight to scalding. This way you warm safely without cutting the adaptation window entirely.
If you feel lightheaded during the transition, sit down immediately and let the water warm you gradually. Those with blood pressure issues, heart conditions, or cardiovascular concerns should avoid extreme temperature swings entirely and get medical guidance before attempting contrast protocols.
How Long Should I Wait Before Using an Infrared or Traditional Sauna After My Plunge?
For gradual warm-up goals, waiting 10–20 minutes allows your body to generate its own heat before adding external warmth, preserving more of the cold-adaptation stimulus while still ending your session with sauna relaxation. For planned contrast therapy, a 1–5-minute interval between cold and heat is typical and well tolerated by most experienced users.
Beginners should start with a slightly longer gap — perhaps 5–10 minutes — and use lower sauna temperatures initially (120–140°F infrared, 150–170°F traditional). Adjust based on comfort and how your cardiovascular system responds over several sessions.
Which Method Is Better for Sleep: Gradual or Immediate Warmup?
A short, moderate plunge in the early evening around 50–55°F, followed by a gentle warming routine, tends to produce the best sleep outcomes for most people. An infrared sauna session or a warm shower, completed 60–90 minutes before bedtime, can lower core temperature, promoting drowsiness and easing the transition into sleep.
Intense shivering right before bed from a strict, gradual warmup in a cold room can be too stimulating for some people, disrupting rather than enhancing sleep. If evening cold plunging leaves you wired, try a softer, more immediate warmup and give yourself more time before attempting to sleep.
Can I Drive Right After a Cold Plunge?
Avoid driving immediately if you are still shivering hard, feel lightheaded, or notice mental fogginess — these symptoms indicate your body is still in active recovery mode and your reaction times may be impaired. Allow at least 10–15 minutes of rewarming and full stabilization before getting behind the wheel.
Prepare in advance by keeping a warm jacket, dry socks, and a hot drink available in your wellness space. This lets you normalize your temperature and sharpen your focus before transitioning to any activity requiring concentration.
How Do I Adjust My Exit Strategy as I Become More Experienced?
As your tolerance improves over several weeks, you can experiment with slightly colder temperatures, longer plunge durations, or extended gradual warmup periods to deepen adaptation. Change only one variable at a time — duration, water temperature, or warmup style — so you can identify what works best. A simple log noting plunge conditions and how you felt hours later is the most reliable tool.
Over time, what once felt freezing will become manageable, and you will develop intuition for when to prioritize adaptation versus comfort. The brisk air after exiting will feel invigorating rather than punishing—a reliable sign that the health benefits of cold plunge therapy are taking hold and your system has fully adapted.
Citations and References
- National Institute of Medicine – “Metabolic Syndrome and Insulin Resistance: Underlying Causes and Modification By Exercise Training.”
- Huber Manlab – “The Science & Use of Cold Exposure for Health and Performance.”
- Mayo Clinic Health System – “Cold-Water Plunging Health Benefits.”
- Science Direct – “Cryotherapy and Thermotherapy in the Management of osteoarthritis and Rheumatoid Arthritis: A Comprehensive Review.”
- Healthline – “Contrast Bath Hydrotherapy: Benefits, Treatment, Instructions.”
