Designing a safe cold plunge deck in 2026 requires meticulous structural planning, as filled tubs can impose 90–110 psf, far exceeding standard residential limits. Ensure safety by reinforcing joist spacing, using concrete footings, and selecting moisture-resistant materials. For a premium experience, integrate LED lighting and contrast therapy layouts to enhance both safety and wellness.
How Do You Design a Safe Cold Plunge Deck in 2026?
Are you planning to install a cold plunge tub on your deck but are unsure if it can safely support the weight? A typical 80–120-gallon cold plunge can impose 90–110 psf on a deck, often exceeding standard 40 psf residential live load ratings designed into most older decks.
This comprehensive 2026 guide walks you through everything you need to know about cold plunge deck structural design, from load calculations and reinforcement strategies to home sauna wellness integration and LED lighting installation.
Key Takeaways
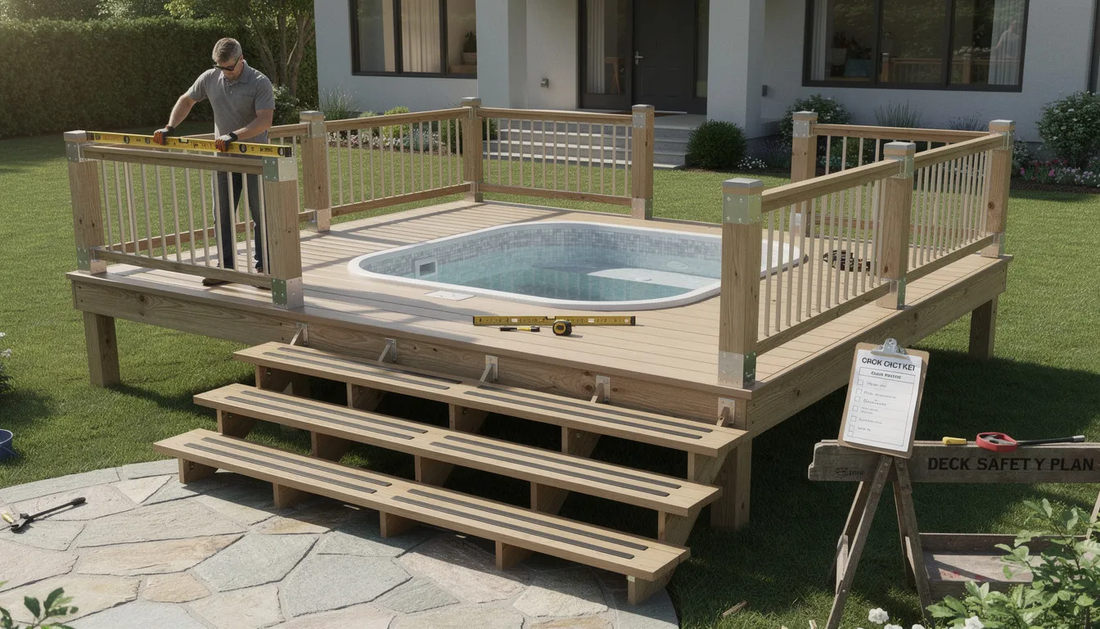
- Any elevated deck or balcony intended for a cold plunge must be evaluated or designed by a structural engineer, with details like joist size, spacing, spans, and footing capacity verified before installation.
- The safest strategy is either a ground-level reinforced concrete pad or a heavily reinforced deck bay directly supported on concrete footings—never a cantilever or undersized balcony.
- SunHomeSaunas cold plunge and sauna setups can be integrated into a dedicated "contrast therapy deck" that includes LED lighting, non-slip surfaces, and easy access from your back door.
What Should You Plan Before Building a Cold Plunge-Ready Deck?
A filled cold plunge behaves differently from typical deck furniture. When you add 100+ gallons of cold water, a heavy tub, chiller equipment, and a person stepping in and out, you're dealing with a dense, dynamic load that shifts and concentrates pressure in ways that standard deck designs simply weren't built to handle.
Planning your deck structure first—not as an afterthought—is essential for both safety and code compliance.
The planning phase should happen months before placing an order for your cold plunge pools or equipment. This is especially true if you're also installing a SunHomeSaunas’ indoor or outdoor sauna for a complete contrast-therapy experience.
Your deck needs to accommodate multiple heavy elements, utility runs, drainage pathways, and safe movement between hot and cold zones. Rushing this phase leads to expensive retrofits or, worse, structural failures.
Before meeting with contractors or engineers, complete these planning tasks:
- Confirm total weight loads, including water, equipment, and occupants.
- Check local codes for spa-equivalent deck requirements.
- Choose a location that balances access, privacy, and utility connections.
- Consider electrical, plumbing, and drainage utility routes.
- Budget for structural upgrades beyond standard deck construction.
In most U.S. jurisdictions, decks supporting spa-like equipment are treated similarly to hot tub installations in permitting requirements, even for plunge pool volumes equivalent to 500–1,200 gallons. This means you'll likely need engineered drawings and inspections.
When speaking with an engineer or contractor, bring exact cold plunge specs from your chosen brand: dimensions, empty weight, water volume, and equipment weight. This practical information transforms vague conversations into actionable plans.
How Do You Calculate Water Weight and Structural Load?
Understanding the math behind cold plunge deck structural design isn't optional—it's the foundation of every safe installation. Let's break down the numbers that will determine whether your deck stands strong or becomes a liability.
One gallon of water weighs 8.34 pounds. A 100-gallon plunge holds approximately 834 pounds of water alone. Add 150–250 pounds for the tub itself and chiller equipment, plus 200+ pounds for an occupant, and you're looking at a total weight approaching 1,300 pounds or more in a compact footprint.
Here's where things get critical: a typical 5 ft. × 2.5 ft. cold plunge footprint equals 12.5 square feet. Divide 1,200 pounds by 12.5 square feet, and you get approximately 96 pounds per square foot (psf).
This is more than double the 40 psf live load used for many residential decks built before 2010.
Sample Calculation: 110-Gallon SunHomeSaunas-Compatible Plunge
|
Component |
Weight |
|
Water (110 gallons × 8.34 lb.) |
917 lb. |
|
Tub and equipment |
200 lb. |
|
Adult occupant |
200 lb. |
|
Total |
1,317 lb. |
|
Footprint area (5.5 ft. × 2.5 ft.) |
13.75 sq. ft. |
|
Resulting load |
~96 psf |
Your deck design must consider both dead loads (structure, tub, and equipment) and live loads (people, snow, and furniture) combined. In northern climates, add 40–60 psf for snow loads on top of everything else.
Most people don't realize their charming backyard deck was never engineered for these concentrated forces.
What Are the Code Requirements and When Do You Need an Engineer?
Building and modifying decks in 2026 is governed by versions of the International Residential Code (IRC) and local amendments, plus any HOA rules specific to your community. What was acceptable for a simple platform deck in 2005 often falls short of current requirements for spa-equivalent installations.
Adding a cold plunge—even one under 150 gallons—usually triggers a permit if it involves new foundations, structural reinforcement, or electrical circuits for chillers, pumps, or LED systems.
The electrical work alone for GFCI-protected outdoor circuits typically requires inspection in most jurisdictions.
When to Hire a Structural Engineer
- Decks supporting >100 psf in localized areas.
- Second-story or rooftop installations.
- Cantilevered balconies of any type.
- Existing decks over 15 years old.
- Any situation where you're uncertain about current load capacity.
Typical Live Load Values
|
Deck Type |
Standard Live Load Rating |
|
Residential deck (pre-2010) |
40 psf |
|
Modern residential deck |
40–60 psf |
|
Commercial/roof terrace |
60–100 psf |
|
Cold plunge zone (recommended) |
100–125 psf |
Many older decks were never engineered for concentrated spa loads. A structural engineering review can identify whether your existing structure needs reinforcement or replacement.
A brief note on liability: improper structural work can affect homeowners' insurance claims if a collapse or water damage occurs. Documentation of professional design and permitted construction protects you long-term.
How Do You Design the Deck Structure for a Cold Plunge?
The core principle of cold plunge deck structural design is simple: get the weight safely into the ground through appropriately sized components. This means beams, joists, posts, and footings all work together in a load path that doesn't rely on the weakest link in your existing structure.
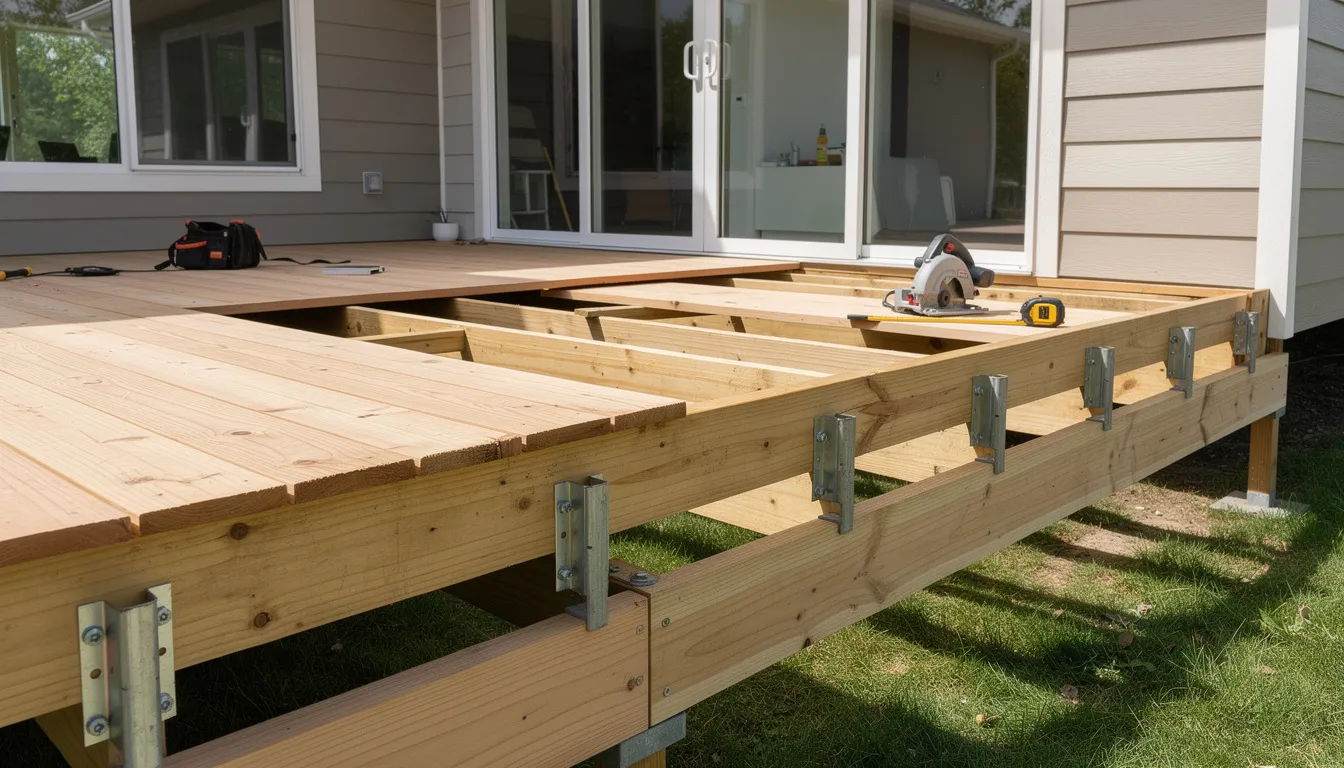
The concept of a "reinforced equipment bay" under the cold plunge is central to safe design. This dedicated zone features:
- Tighter joist spacing (8–12 inches on center instead of 16).
- Upsized joists (2×10 or 2×12 instead of 2×8).
- Added beams directly under the tub footprint.
The rest of your deck can remain at standard specifications.
Posts below the plunge must sit on cast-in-place concrete footings sized for local soil conditions. In frost zones, footings typically extend 36 inches or deeper to prevent heave.
Soil bearing assumptions of 1,500–2,000 psf are typical for residential projects unless a geotechnical report indicates otherwise.
For new decks, designing the entire cold plunge zone for 100–125 psf live load offers a significant safety margin while the surrounding deck can remain at standard 40–60 psf design loads. This creates a robust structure without over-engineering every square foot.
When attaching the deck to your home with a ledger board, use code-compliant through-bolts and proper flashing. However, don't rely solely on ledger connections for plunge support—add posts directly beneath the equipment bay wherever possible.
Joists, Beams, and Weight Distribution
The framing elements under your cold plunge do the heavy lifting, literally. A typical reinforced cold plunge bay uses doubled 2×12 beams with 4×4 or 6×6 posts at 4–6-foot spacing to distribute a >1,200-pound tub load safely into the ground.
Joists should preferably run perpendicular to the plunge's long dimension so the load spreads over more members. This reduces deflection and vibration when you're stepping in and out of the tub—something you'll appreciate during early morning plunge sessions.
Common reinforcement techniques include:
- Sistering joists: Adding identical lumber alongside existing joists to double their capacity.
- Blocking and bridging: Installing perpendicular pieces between joists to prevent twisting and distribute loads laterally.
- Metal connectors: Using hurricane ties, joist hangers, and post bases rated for exterior wet conditions.
- Beam upgrades: Replacing single beams with doubled or tripled members under load zones.
Any engineered plans should be followed precisely. Swapping joist sizes or spans in the field without professional approval can compromise the entire structural integrity of your build.
Footings, Posts, and Ground Contact Considerations
Vertical loads from your cold plunge travel through posts into spread footings below. Surface deck blocks—those precast concrete pieces you see at home improvement stores—are absolutely not sufficient for heavy spa loads.
They're designed for light-duty, ground-level platforms, not concentrated equipment weights.
Typical footing details for cold plunge deck structural design include:
- 10–18-inch diameter concrete piers.
- Depth extending below the local frost line (often 36–48 inches).
- Reinforcing rebar within the concrete form.
- Post bases mounted above grade to keep wood out of constant wet contact.
Soil type, slope, and drain conditions matter significantly. Clay soils or steep yards may require larger or stepped footings to prevent the deck from settling under concentrated plunge loads over time.
For ground-level designs, a dedicated 4-inch reinforced concrete pad for the cold plunge itself—separate from but integrated with the surrounding deck—is often the most robust and cost-effective solution.
This approach lets the concrete handle the heavy load while composite decking or wood creates the finished walking surface around it.
Have your contractor or engineer verify uplift and lateral resistance as well, especially in high-wind or seismic zones where additional anchoring requirements apply.
Where Can a Cold Plunge Safely Go? Deck vs. Balcony vs. Rooftop
Not all elevated surfaces are created equal when it comes to supporting a water-filled plunge pool. Understanding the structural differences between ground-supported decks, cantilevered balconies, and rooftop terraces helps you make safe decisions before committing to a location.
Traditional wood-framed balconies that cantilever from floor joists inside the building are often the most limited in extra weight capacity. These structures were designed for people standing and light furniture—not 1,200+ pounds of concentrated weight.
Reinforced concrete balconies and roof decks can sometimes carry higher loads, but must still be checked using as-built drawings and local building codes. Never assume a concrete balcony can handle a cold plunge without engineering verification.
Rooftop cold plunges on 2020s townhomes or multi-family construction almost always require stamped structural calculations and, in many cities, waterproofing reviews by building management.
A critical caution: Many HOAs explicitly restrict hot tub and cold plunge tub home installations on balconies due to weight, noise, and water-damage risks. Always secure written approval before proceeding with plans.
Ground-Level Decks and Slabs
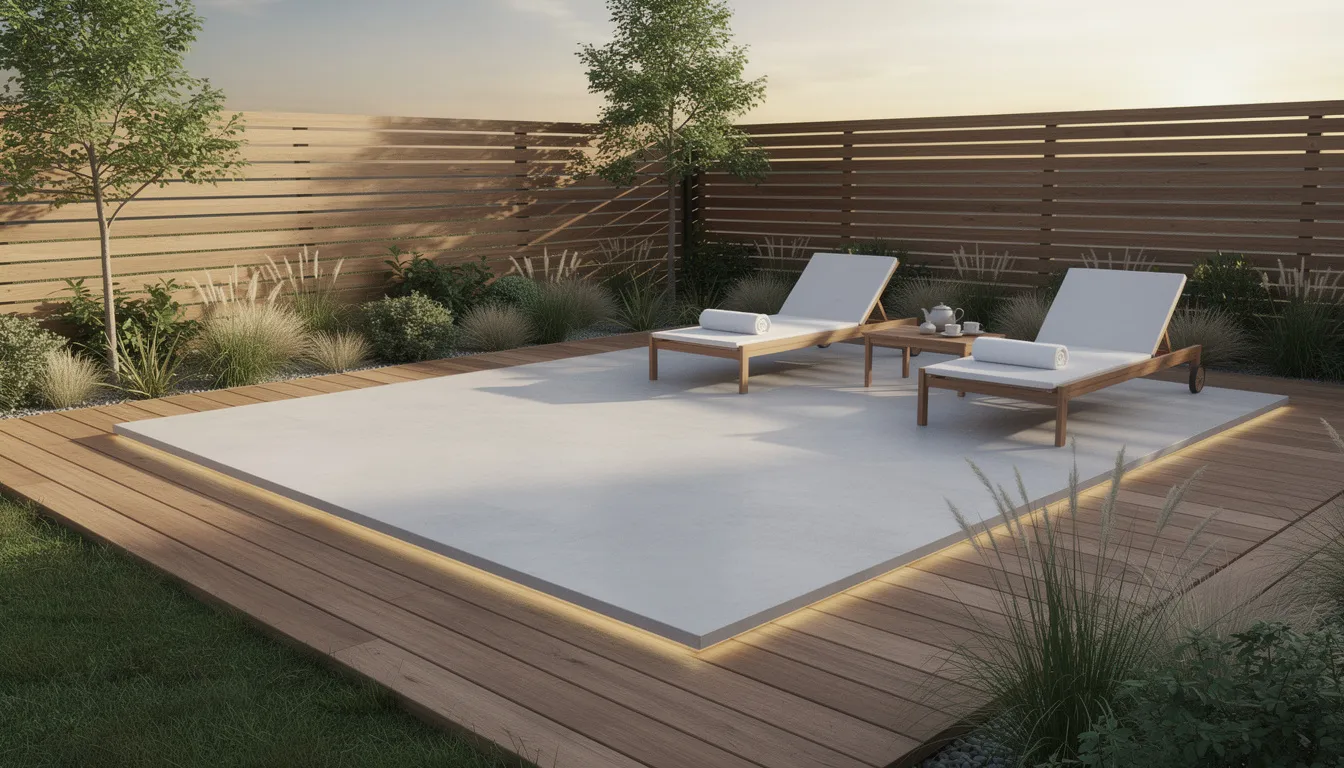
Ground-level platforms and slabs represent the safest and easiest locations for a cold plunge: minimal fall height, shorter posts, and simpler pathways for utilities and drainage. If you have the outdoor space, this approach eliminates most of the structural complexity.
A SunHomeSaunas contrast-therapy deck could combine a reinforced concrete pad under the cold plunge with adjacent composite decking to create a seamless backyard oasis.
The concrete handles the heavy lifting while the decking provides a warm, comfortable walking surface.
Standard specifications for a ground-level cold plunge pad:
- 4-inch thick concrete slab.
- Wire mesh or rebar reinforcement.
- Well-compacted gravel base (4–6 inches).
- Slight pitch (1/8 inch per foot) away from the house for surface drain.
Position deck boards flush to the slab edge for aesthetic continuity. Add expansion joints between new slabs and existing foundations to prevent cracking from differential movement as temperatures change with the seasons.
Second-Story Decks and Cantilevered Balconies
Second-story decks and cantilevered balconies present the highest risk for overloading. These structures must not be used for cold plunges without engineered verification—period.
Wooden balconies relying on rim joists or cantilevered joists from the interior floor system can have limited residual capacity after decades of use, moisture exposure, and possible rot in concealed areas.
What looked solid when built may be compromised today.
If an engineer approves a second-story installation:
- Place the cold plunge as close as possible to supporting walls, posts, or beams.
- Expect significant reinforcement requirements.
- Budget for potentially expensive structural modifications.
In many 2020–2026 condo buildings, balconies have posted live load ratings (often 60 psf) that a cold plunge can easily exceed when concentrated in a small footprint. Check building documentation before assuming compliance.
Retrofitting extra steel brackets, columns, or struts to support a balcony may be possible, but it is absolutely a design problem for a licensed engineer—never a DIY decision.
What Materials Provide Moisture Protection and Slip-Resistance?
Cold plunge decks face near-constant splash, condensation, and seasonal weather exposure. Your material choices will determine both the longevity of your structure and the safety of everyone using it.
For surfaces immediately around the plunge, high-quality composite decking or dense hardwoods like Ipe or thermally modified ash offer the best combination of durability, aesthetics, and moisture resistance.
Pressure-treated lumber remains the standard choice for hidden structural framing where appearance doesn't matter.
Corrosion-resistant fasteners and connectors are non-negotiable. Use stainless steel or hot-dipped galvanized hardware throughout—especially in areas exposed to splash from the cold water, which may contain sanitizing chemicals that accelerate corrosion of standard fasteners.
Basic waterproofing strategies include:
- Flashing where the deck meets the house to prevent water infiltration.
- Joist-top membranes (self-adhesive tape) on horizontal surfaces.
- Under-deck drainage systems for elevated decks with usable space below.
- Proper ventilation to allow moisture to escape from framing cavities.
Walking surfaces should prioritize slip resistance above all else. Textured decking boards, anti-slip treads on stairs, and strategically placed outdoor mats in drying and robe areas prevent accidents when you're stepping out of ice-cold water.
Protecting Framing from Constant Splash
Preventing rot, mold, and structural decay under and around your cold plunge requires attention to moisture management at every detail.
Self-adhesive joist tape on horizontal surfaces—joist tops, beam tops—creates a waterproof barrier that prevents standing water from infiltrating end-grain wood where decay starts fastest. This inexpensive step adds years to your structure's lifespan.
Use removable skirting or vented panels around the deck perimeter so air can circulate under the tub and equipment. This reduces moisture buildup and enables periodic inspections for leaks or developing problems.
For contrast-therapy installations that include an outdoor infrared sauna alongside your cold plunge, concentrated steam at the sauna door exit creates additional moisture exposure.
Detail flashing and ventilation to handle both the plunge splash zone and the sauna steam zone.
Route splash water away from post bases and footings using small diverter trim pieces and proper surface grading. Water pooling around posts accelerates decay at the most critical structural connections.
Slip-Resistant Walking Surfaces
Picture stepping out of 39–50°F water onto a wet deck in dim light. Safe movement requires secure, textured, well-lit surfaces at every step.
Specify decking materials with R10–R13 slip ratings or similar industry standards. Avoid glossy tiles or untreated smooth stone anywhere near the plunge entry—these become dangerously slick when wet.
Essential safety features include:
- Non-slip stair nosing on all steps.
- Grab rails at the plunge entry point.
- A short, clear path from the plunge to the towel and robe hooks.
- Strategic placement of drainage to prevent standing water.
SunHomeSaunas customers often combine cold plunge decks with low-level LED path lighting and handrails to encourage early-morning and night use when visibility is limited.
Stay current with 2026 local codes for stair handrail heights (typically 34–38 inches), baluster spacing (maximum 4 inches), and guard rail load requirements for elevated decks.
How Do You Plan Utilities, Drainage, and Equipment Layout?
A successful cold plunge deck is essentially a small mechanical project. It needs power for the chiller and pump, drainage for filling and emptying, and enough space for all the equipment that keeps your water clean and cold.
Plan where the chiller, filtration system, and any UV or ozone treatment will sit before finalizing your deck design. Ideally, equipment lives on a dedicated pad under or beside the deck with service access for maintenance and repairs.
A typical dedicated 15–20 amp GFCI-protected circuit at 120V handles most residential chillers. Some larger units require 240V service.
All electrical work must be installed by a licensed electrician under the current electrical code—this isn't optional.
Uncontrolled draining of 80–150 gallons from an elevated deck can damage structures and neighboring property. Controlled drainage into approved storm or sanitary systems with proper suction drains is essential.
Build space for shutoff valves, unions, and flexible connections into your framing design. When a pump or heater eventually needs replacement, you'll appreciate not having to demolish half the deck for access.
Power Supply and Control Systems
Exterior GFCI outlets or disconnects should be located where they're protected from splash but remain within line-of-sight of the chiller and pump for safe servicing.
Use in-use weatherproof covers and appropriate conduit for any wiring under or through the deck structure. The 2026 NEC requirements specify protection standards that your electrician should know well.
Smart controls add convenience to your daily routine:
- Wi-Fi-enabled timers and thermostats.
- Pre-chill water before morning sessions via smartphone.
- Temperature monitoring from inside the house.
- Scheduling for equipment cycling and maintenance alerts.
Consider grouping power requirements for cold plunge, sauna, and LED lighting into an organized subpanel or labeled circuit arrangement. This makes future troubleshooting much easier for you or any electrician who works on the system.
Never run extension cords through a door or window as a permanent solution. This is unsafe, non-compliant with code, and a fire hazard.
Drainage Strategy for Filling and Emptying
A practical drainage plan addresses three scenarios: initial filling, partial drain for water chemistry adjustments, and complete emptying for cleaning or winterization.
Install dedicated hose bibs within easy reach of the deck, plus plan a permanent or semi-permanent hose route that doesn't require dragging hoses across interior floors. Convenience matters for tasks you'll repeat regularly.
For emptying, a small submersible pump connected to a garden hose discharges water to an approved drain or landscaped area. Make sure your destination can handle 100+ gallons without creating mud, erosion, or runoff that affects neighbors.
In dense urban areas or on rooftop decks, building management may require tying drainage into existing plumbing risers with backflow prevention. Check requirements before finalizing your design.
Include an easily accessible shutoff and drain at the lowest point of the plunge system piping. This simplifies winterization in freezing climates and prevents costly ice damage to equipment.
What LED Lighting Creates the Best Atmosphere?
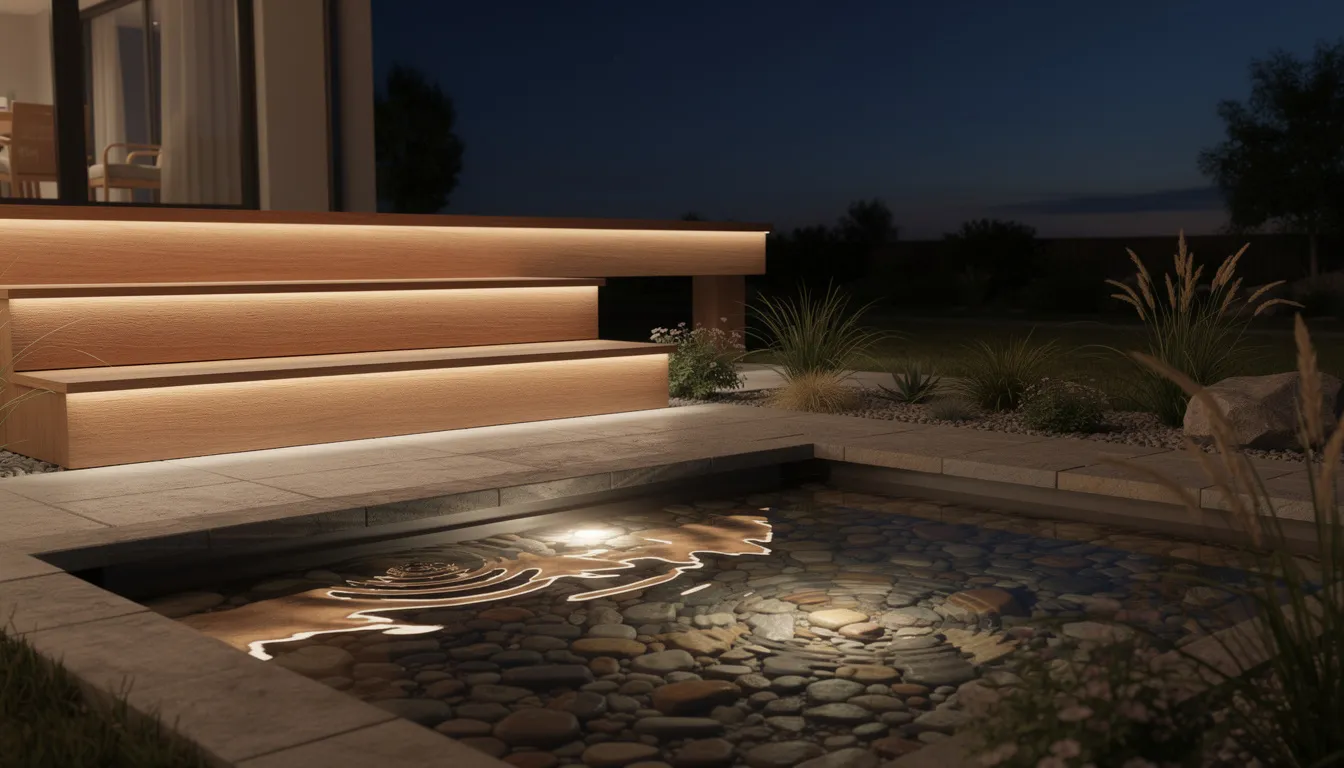
LED lighting serves both safety and ambience functions around a cold plunge deck. SunHomeSaunas customers often combine LEDs with saunas and plunges for a complete spa experience that transforms an outdoor space into something approaching a resort-like feel.
Low-voltage (12V or 24V) LED systems are strongly preferred near water. They reduce shock risk compared to line-voltage fixtures and integrate easily with transformers and smart controllers for color and brightness adjustments.
LED strips can be concealed under deck nosing, along stair risers, or under built-in benches to produce indirect, glare-free light that doesn't ruin your night vision during evening sessions.
This subtle approach creates an atmosphere without harsh illumination.
All fixtures near your plunge must be rated for wet locations and temperatures common around 39–60°F water and outdoor climates. Look for IP67 or IP68 ratings on any products you consider.
LED Color Spectrum Overview for Cold Plunge Decks
|
Color |
Temperature/Wavelength |
Best Use |
|
Cool white |
4000–5000K |
High-visibility safety lighting |
|
Warm white |
2700–3000K |
Relaxing post-plunge zones |
|
Amber |
1800–2200K |
Minimal insect attraction |
|
Blue |
450–495 nm |
Calm, focus, "water-like" ambience |
|
Green |
495–570 nm |
Balanced, natural atmosphere |
|
Red |
620–750 nm |
Recovery zones, minimal glare |
Blue hues work particularly well beneath bench edges or around the plunge perimeter, creating a water-like effect during evening sessions that enhances the mood of your cold water experience.
Red light is helpful in adjacent recovery zones—especially when integrated with SunHomeSaunas red light therapy or infrared products—but use caution with bright red lighting near water, as it can reduce depth perception if used alone.
Dynamic RGB or RGBW systems allow shifting between energizing cool tones for morning plunges and soothing warm tones at night, all controlled via simple smartphone apps.
A practical design approach: install subtle pathway LEDs leading from your door to the plunge with brighter, focused light at steps and handholds where safety matters most.
Basic LED Installation Instructions for Deck Environments
This overview covers low-voltage LED installation at a high level. For final power hookups and line-voltage connections, always consult or hire a licensed electrician.
Typical system components:
- Transformer: Converts 120V household power to 12V or 24V DC output.
- Low-voltage wiring: 16-24 AWG outdoor-rated cable.
- LED fixtures or strips: IP67/IP68 rated for wet locations.
- Smart controller or dimmer: Located in a dry, accessible spot.
Route low-voltage cables through drilled holes in joists or along framing members using UV- and moisture-resistant cable clamps. Keep wiring clear of sharp metal edges and fasteners that could damage insulation over time.
Make all junctions with outdoor-rated, waterproof connectors—not electrical tape. Seal any wiring penetrations into the home with appropriate caulk or gaskets to prevent water ingress.
Test your complete LED system at night before finalizing trim and skirting. Adjustments to brightness, aiming, or color are much easier before everything is buttoned up and requires disassembly.
How Do You Design a Complete Contrast-Therapy Deck?
Integrating a cold plunge with a SunHomeSaunas infrared or traditional sauna creates a complete contrast-therapy setup on a single deck.
Add relaxation seating, storage, and LED lighting, and you've built a dedicated home sauna wellness zone steps from your back door.
The ideal layout places the sauna door, plunge entry, and warming area within a few steps of each other on the same level. This minimizes slip risk and reduces temperature shock during winter when you're moving between fire-like heat and ice-cold immersion.
SunHomeSaunas products are typically plug-and-play, meaning your deck needs only standard electrical circuits and a structurally solid platform rather than heavy, site-built walls. This simplifies both construction and future modifications.
Consider including these design details:
- Towel hooks positioned for quick grab after plunging.
- Robe warmers indoors near the door for re-entry.
- A small bench or lounger near the sauna exit for cool-down phases.
- Storage for accessories like thermometers and water chemistry test strips.
Think about sun, wind, and privacy when positioning elements. A pergola with slatted sides, tall evergreen shrubs, or a privacy screen can create an enclosed wellness garden that feels like a private retreat.
Flow, Privacy, and User Experience
Visualize your daily routine: waking up, walking directly to the deck, using the sauna, then plunging, with minimal obstacles or cold exposure between zones—design for this flow.
Create a clear, slip-resistant path from the house to the deck. Motion-activated lighting guides you from interior light to exterior darkness gently, without blinding you as your eyes adjust.
Build partial privacy walls or plant shrubs around the plunge side of your deck while keeping open views where you want them—perhaps facing east for morning sun sessions or north for night-sky stargazing.
Noise from chillers can be mitigated by placing equipment below deck level, behind sound-deflecting screens, or positioned away from neighbor-facing property lines.
This consideration makes contrast therapy a stress-reducing experience rather than a source of neighborhood tension.
Allocate a small storage cabinet or bench box for accessories: thermometer, water chemistry test strips, LED remotes, breathing timer apps, and spare towels. Having everything at hand encourages consistent use.
What Maintenance Ensures Long-Term Safety?
Ongoing inspections are as necessary as the original design. High moisture exposure, freeze-thaw cycles, and heavy loads from your cold plunge create conditions that demand regular maintenance.
Annual inspection checklist:
- Check for rot at post bases, joist ends, and ledger connections.
- Examine connectors for rust or corrosion.
- Test decking for soft spots by walking the entire surface.
- Confirm railings are secure and meet current load requirements.
- Look for cracking or settlement around posts and footings under the plunge bay.
Water chemistry management for the plunge—filtration, sanitization, and periodic draining—also protects the deck by reducing corrosive or biofilm buildup on surfaces. Clean water means less damage to your structure over time.
Keep a basic maintenance log tracking major tasks: resealing wood surfaces, tightening fasteners, replacing worn non-slip treads, and servicing pumps and chillers.
This documentation helps you spot patterns and proves helpful if you ever sell the property.
If any sagging, unusual movement, or large cracks appear near structural supports, stop using the plunge immediately. Contact an engineer or qualified contractor before resuming use.
The cost of professional evaluation is minimal compared to the consequences of structural failure.
Proper maintenance supports not just physical safety but contributes to your overall wellbeing—knowing your cold plunge deck is sound lets you focus on the mental resilience benefits of your contrast therapy practice.
Build Your Dream Wellness Deck Safely
Creating a structurally sound cold plunge deck requires careful planning, proper engineering, and attention to detail at every stage. From load calculations and reinforcement strategies to moisture protection and LED lighting integration, each element contributes to a safe, beautiful, and functional outdoor wellness space.
Ready to create your complete contrast-therapy retreat? Explore SunHomeSaunas for premium infrared and traditional saunas that integrate seamlessly with your cold plunge deck design, or contact our team for personalized guidance on planning your ultimate luxury home sauna and cold plunge experience.
Frequently Asked Questions
Can I put a 100-gallon cold plunge on my existing 10×12 wood deck without reinforcement?
Most residential decks built before 2015 weren't designed for concentrated spa loads. A typical older deck is rated around 40 psf live load, while a 100-gallon cold plunge can impose 90+ psf in its footprint—making these decks marginal or unsafe without reinforcement.
Have an engineer or experienced deck contractor inspect posts, beams, joists, and connections. They may recommend adding posts, beams, or sistered joists under the plunge footprint. If reinforcement isn't feasible, a ground-level reinforced concrete pad next to the existing deck is usually safer and more economical than trying to upgrade inadequate framing.
How much does it typically cost to reinforce a deck for a cold plunge?
Reinforcement costs vary widely depending on existing conditions and required work. Simple joist sistering might run a few hundred dollars in materials plus labor. More extensive work involving new beams, posts, and footings under a plunge bay typically ranges from $1,500–$4,000 based on 2024–2026 U.S. contractor rates.
When combined with a new SunHomeSaunas sauna or plunge purchase, many homeowners treat structural work as part of an overall wellness investment in their property. The building improvements often add value that extends beyond personal use.
Do I need special permits to add LED lighting around my cold plunge deck?
Low-voltage LED lighting itself typically requires minimal permitting. However, the transformer connection to household power and any new exterior circuits fall under electrical code requirements that usually need permits and inspection.
Consult your local building and electrical departments. Many cities in 2026 allow homeowner-installed low-voltage systems but still require permits for the primary power circuit feeding the transformer. Using a licensed electrician for all line-voltage connections is the safest and most code-compliant approach, especially when working near water.
What temperature and duration should I design the deck experience around?
Many healthy adults use cold plunges at 50–59°F for 1–5 minutes, several times per week. Design your deck to support quick entry, easy exit, and a warm area for re-heating after these short exposures.
Incorporate nearby seating, robe hooks, and ideally a SunHomeSaunas infrared sauna for gradual re-warming after each plunge cycle. The space between hot and cold should be just a few steps. Anyone with cardiovascular or other health conditions should consult a clinician before using frigid water or engaging in longer immersion sessions.
Is a concrete patio always better than a wood deck for a cold plunge?
A reinforced concrete slab on grade is structurally simpler and more forgiving for heavy equipment. Still, a properly engineered wood deck can also be completely safe and comfortable for long-term use.
The choice often comes down to aesthetic goals, site constraints, and whether the plunge is part of a larger elevated outdoor living space. If you're unsure, a small concrete pad under the plunge—seamlessly integrated with surrounding decking—often provides the best balance of safety, longevity, and design flexibility as the focal point of your wellness retreat.
References
- World Atlas – “How Much Does a Gallon of Water Weigh?”
- Just Answer – “Can You Put a Hot Tub on a Balcony?”
- Tile Mountain – “What is an R Rating? Anti-Slip Ratings Explained.”
- National Fire Protection Association – “What Changed in the 2026 NEC?”
- Sage MED – “How Long to Cold Plunge? Best Duration for Maximum Benefits.”
