Maximize your wellness routine with safe cold plunge practices. This guide covers essential cold water immersion safety, from non-slip step design and grab bar placement to ADA-compliant accessibility. Learn how to manage the cold shock response and maintain your home cold plunge for optimal muscle recovery and mental clarity.
What Are Cold Plunge Steps and Entry Safety Essentials?
Cold plunging has surged in popularity as more wellness enthusiasts discover its potential for muscle recovery, inflammation reduction, and mental clarity. But here's what most people overlook: the highest-risk moment isn't the icy water itself—it's the entry and exit.
Wet feet, cold shock, and slippery surfaces combine to create real hazards that proper design can eliminate. Whether you're installing a home cold plunge system in your bathroom, garage, or alongside a SunHomeSaunas infrared sauna, this guide delivers the exact specifications you need to build a safer, more accessible cold plunge therapy space.
Key Takeaways
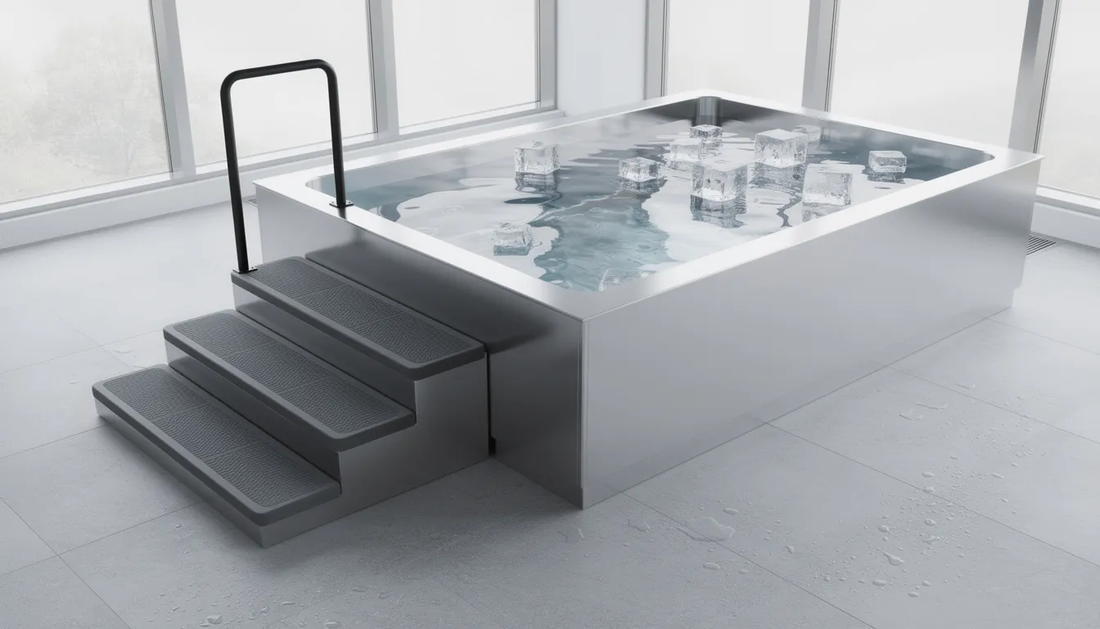
- Most home cold plunge accidents happen during entry and exit, making thoughtful step design, grab bar placement, and non-slip surfaces critical safety investments.
- Ideal cold-water temperatures for most users range from 50–59°F (10–15°C), but safe-entry systems become even more essential as temperatures drop toward 40°F (4–5°C).
- SunHomeSaunas designs cold plunge tubs for home setups with low step heights (6–7 inches), non-slip surfaces, sturdy grab bars, and ADA-conscious layouts to protect families, older adults, and athletes.
- Storage layout and integrated towel warmers are essential parts of a complete entry/exit safety system—not optional extras.
Why Does Entry Design Matter for Cold Plunges?
The moment you step into cold water below 60°F, your body triggers an involuntary cold shock response. Your breathing rate spikes, heart rate accelerates, and blood pressure jumps. Research from the National Weather Service warns that water below 60°F can incapacitate a person within 1 minute due to the cold-shock response.
This physiological storm leaves little room for balance corrections or fumbling with unstable steps. According to the American Heart Association, being immersed in cold water triggers hypothermia faster than just being out in the cold, because water takes heat away from the body 25 times faster than air.
The Physiological Response to Cold Water
Your nervous system diverts blood flow from extremities to protect your core, leaving your legs less responsive precisely when you need them most. Cold water immersion also causes constriction of blood vessels, which reduces blood flow and inflammation, aiding in muscle recovery.
The global cold plunge tub market has surpassed US$330 million in 2026–2025, as more homeowners install permanent tubs in bathrooms, garages, and patios. As cold water immersion becomes mainstream, the need for properly engineered entry systems grows.
When water temperature drops below 50°F, muscle control and coordination decrease rapidly. According to peer-reviewed research, the cold shock response—characterized by involuntary gasping, rapid breathing, and impaired coordination—accounts for the majority of deaths from cold water immersion, even before hypothermia develops.
High-Risk Entry Scenarios
Consider your typical cold plunge scenarios:
|
Use Case |
Entry Timing |
Elevated Risk Factor |
|
Post-workout recovery |
Immediately after exercise |
Sweaty, hot skin increases slip risk |
|
Morning wake-up |
Groggy, low alertness |
Reduced reaction time |
|
Contrast therapy with a sauna |
After a 15–20-minute heat session |
Vasodilation + sudden cold = amplified shock |
Each scenario affects how you approach that first step. Someone exiting a SunHomeSaunas traditional sauna at 150–195°F carries a film of sweat that turns any smooth surface into a hazard zone.
In the context of post-workout recovery, cold water immersion can help reduce inflammation from working out and alleviate perceived soreness. Understanding the benefits of cold plunges requires recognizing both their therapeutic advantages and safety considerations.
How Should You Design Safe Cold Plunge Steps and Platforms?
The goal of safe step design is simple: create one predictable, repeatable path in and out of the tub. Users should never have to think about where to step or what to grab. Shallow, uniform steps and a stable platform make cold exposure feel controlled rather than chaotic.
Freestanding vs. Built-In Step Considerations
Freestanding step considerations:
- Often narrower and lighter, making them easily portable when empty, which is convenient for moving or storing the unit. However, they may lack the stability of built-in options.
- Can be positioned as needed, but may shift if not secured.
- Should have non-slip surfaces and be checked regularly for movement.
Built-in platforms:
- Permanent, stable construction
- Integrated with the surrounding deck or floor
- Better weight distribution and support
- Can include integrated storage and towel warming
Recommended Step Geometry
For exterior step risers, specify heights of 6–7 inches (15–18 cm) with at least 11-inch (28 cm) deep treads. Anything over 8 inches becomes problematic for cold, stiff legs that have reduced flexibility after immersion. Most adults can manage these dimensions even when shivering.
Step requirements by tub height:
|
Rim Height |
Recommended Steps |
Notes |
|
Up to 20 in (51 cm) |
1 exterior step |
Common for shallow-seated tubs |
|
20–26 in (51–66 cm) |
1–2 steps |
Standard SunHomeSaunas cold plunge models |
|
26–32 in (66–81 cm) |
2 steps minimum |
Deep Pro-style plunges for full body immersion |
Include a landing platform at least 24–30 inches (61–76 cm) wide directly beside the tub rim. This allows users to step up, turn, and sit on the edge before swinging their legs inside—far safer than attempting a single-motion entry.
Critical Clearances
- Clear floor space in front of the lowest step: minimum 36 x 36 inches (91 x 91 cm)
- Step nosing: rounded with a contrasting color strip at the edge for depth perception
- Avoid loose stools—freestanding stools frequently tip on wet surfaces
- For different tub types, solutions vary:
- In-ground plunges: Build a surrounding deck flush with the tub rim, integrating steps into the deck structure
- Semi-recessed: Create a stepped platform that matches the exposed rim height
- Freestanding above-ground (like SunHomeSaunas models): Construct a U-shaped platform with integrated steps on one side
What Are the Best Anti-Slip Materials for Cold Plunge Steps?
Specify materials with proven wet-surface traction:
Recommended Materials
- Textured porcelain tile with R11+ slip rating
- Grooved composite decking (minimum 0.6 coefficient of friction)
- Marine-grade non-skid adhesive strips applied to existing steps
- Rubber matting specifically rated for wet environments (avoid generic gym mats)
- Pebble-finish concrete for outdoor installations
Slip resistance ratings explained:
|
Rating |
Coefficient of Friction |
Suitable For |
Example Materials |
|
R9 |
0.20–0.34 |
Dry indoor areas |
Not recommended for cold plunge |
|
R10 |
0.35–0.39 |
Occasional wet use |
Minimum for indoor plunge areas |
|
R11 |
0.40–0.54 |
Frequent wet use |
Recommended for all plunge steps |
|
R12 |
0.55–0.69 |
Constant wet use |
Ideal for outdoor or high-traffic |
|
R13 |
0.70+ |
Industrial/extreme |
May feel too rough for barefoot use |
Apply anti-slip treatments to the entire tread surface, not just the front edge. For wooden platforms around outdoor cold plunge installations, use composite or treated lumber with deep grooves running perpendicular to traffic flow.
Test slip resistance in wet conditions before finalizing any material choice. Pour water on the surface and attempt to slide your foot—if there's any glide, choose a different material.
Where Should Grab Bars Be Positioned for Maximum Safety?
Grab bars are not optional—they're life-saving equipment. ADA guidelines and building codes provide minimum standards, but cold plunge applications often require enhanced placement.
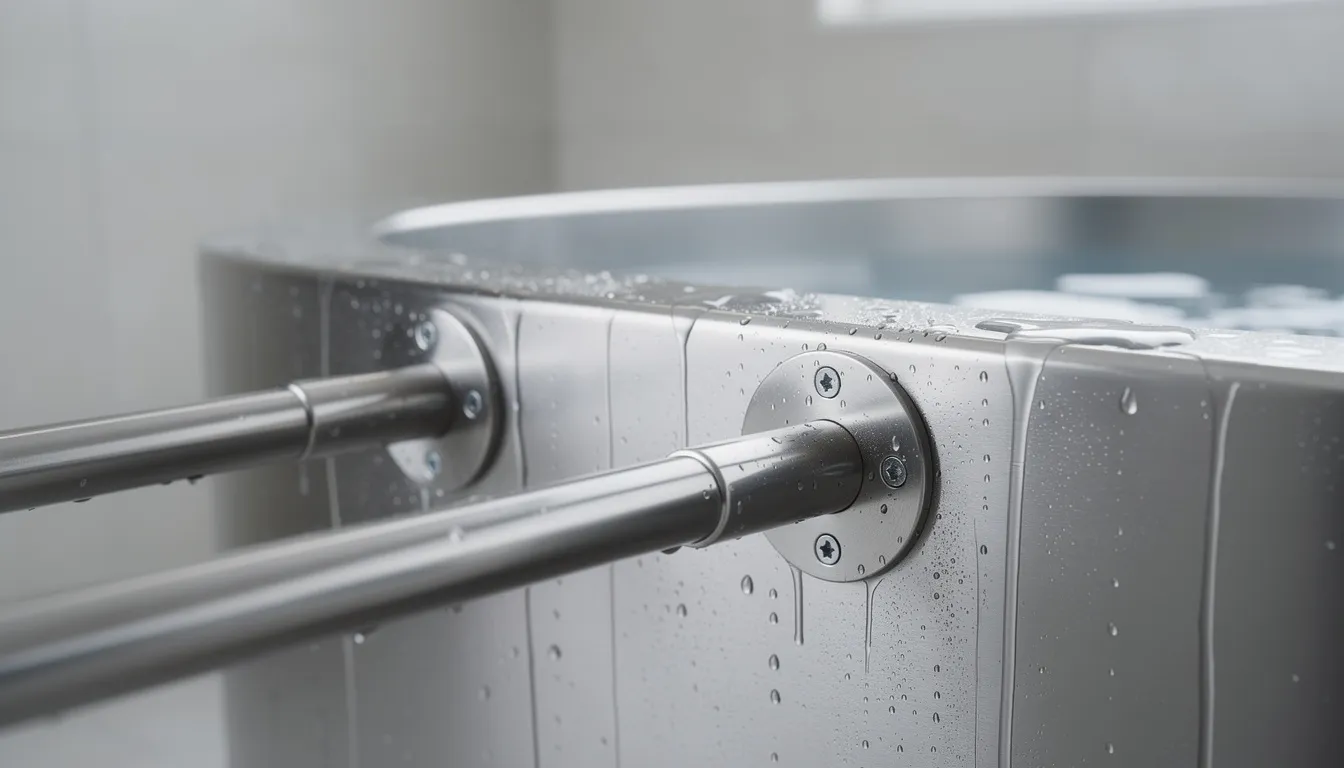
Recommended Grab Bar Specifications
Minimum grab bar specifications:
|
Dimension |
Measurement |
Notes |
|
Height above platform |
32–36 in (81–91 cm) |
Parallel to the tub rim, non-slip grab bars should be installed at a height of 33–36 inches to assist with entry and exit |
|
Distance from tub edge |
6–12 in (15–30 cm) |
Within easy reach |
|
Minimum length |
24 in (61 cm) |
Allows sliding grip adjustment |
|
Bar diameter |
1.25–1.5 in (32–38 mm) |
Comfortable wet-hand grip |
Mount all grab bars to wall studs or solid blocking—never to drywall alone. Use stainless steel hardware rated for wet environments. Test each bar with full body weight before allowing use.
For commercial cold plunge tub wellness center installations, consider installing continuous handrails on both sides of the entry stairs to accommodate users with different dominant hands.
How Can You Design for ADA Compliance and Accessibility?
Universal design principles benefit everyone, not just those with mobility challenges. Older adults, pregnant individuals, and anyone recovering from injury appreciate accessibility features.
ADA-Inspired Design Elements
Transfer platforms:
- Level surface at tub height (18–24 inches)
- Minimum 24 x 48 inches
- Allows seated transfer from a wheelchair or mobility device
- Include grab bars on both sides
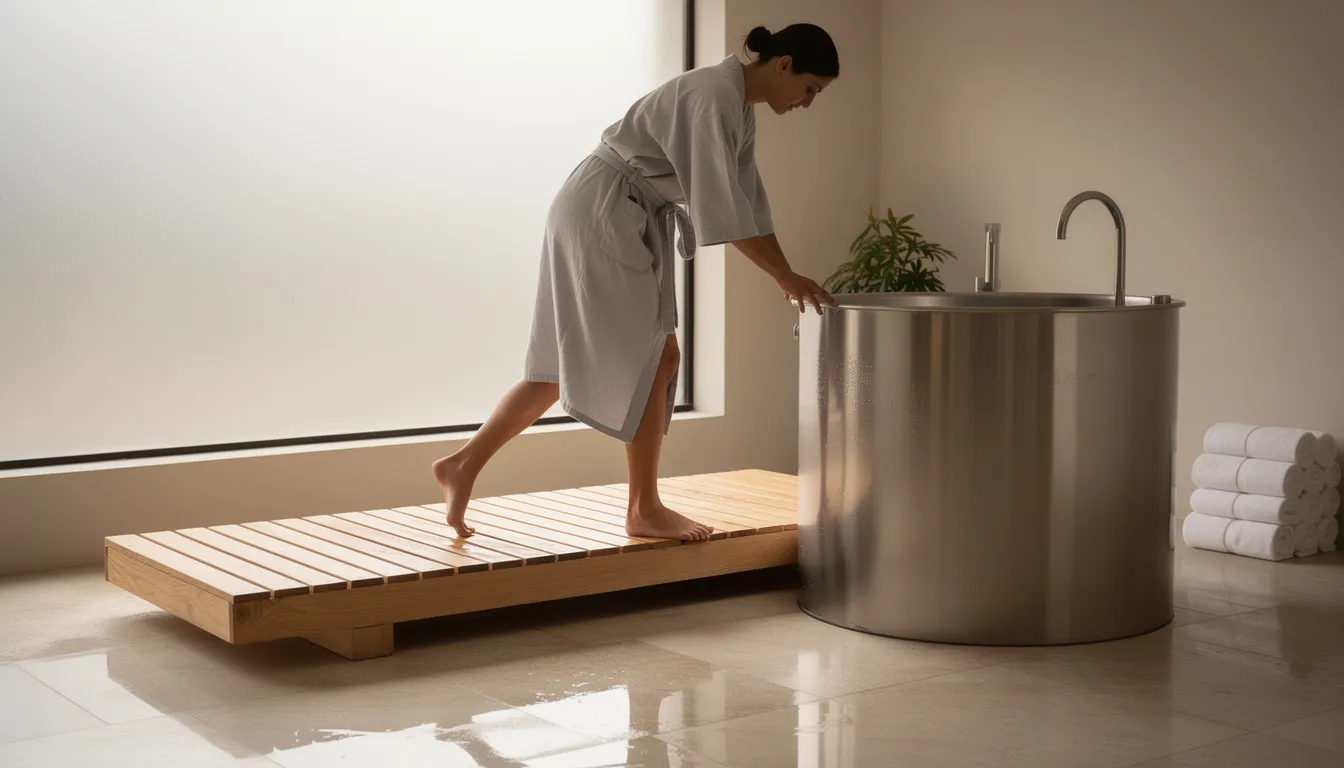
Approach paths:
- 36-inch minimum clear width
- Firm, stable, slip-resistant surface
- No abrupt level changes over 1/4 inch
- Gentle slopes (1:20 maximum) preferred over steps where possible
Visual contrast:
- High-contrast tape on step edges
- Different colors for platform vs. steps vs. floor
- Aids users with low vision or depth perception issues
Handrail Placement and Configuration
Recommended handrail configurations:
|
Location |
Height Range |
Diameter |
Extension Beyond Steps |
|
Primary entry |
34–38 inches |
1.25–1.5 inches |
12 inches min at both ends |
|
Secondary support |
42–48 inches |
1.5–2 inches |
18 inches beyond the top step |
|
Interior tub rail |
6–12 inches above water |
1.25 inches |
N/A (fixed position) |
What Lighting and Visibility Features Enhance Safety?
Proper illumination prevents missteps and allows users to assess water conditions before entry.
Recommended Lighting Solutions
Ambient lighting:
- Minimum 50 foot-candles at the entry area
- Diffused, shadow-free coverage
- Waterproof fixtures rated for damp locations
Task lighting:
- Focused light on the steps and the platform
- LED strips under step nosing (low voltage)
- Motion-activated to conserve energy
Emergency lighting:
- Battery backup for primary fixtures
- Clearly marked exit paths
- Night lights for 24/7 visibility
Visibility Enhancements
- Contrasting colors between the steps, the platform, and the tub
- Reflective or luminescent edge treatments
- Clear sightlines from entry to exit
- Mirrors positioned to show tub depth and water level
Outdoor installations require weatherproof fixtures and may benefit from solar-powered backup lighting systems.
How Should Storage and Towel Warming Be Integrated?
Post-immersion care is part of the safety system. Immediate access to warm, dry towels reduces the risk of hypothermia.
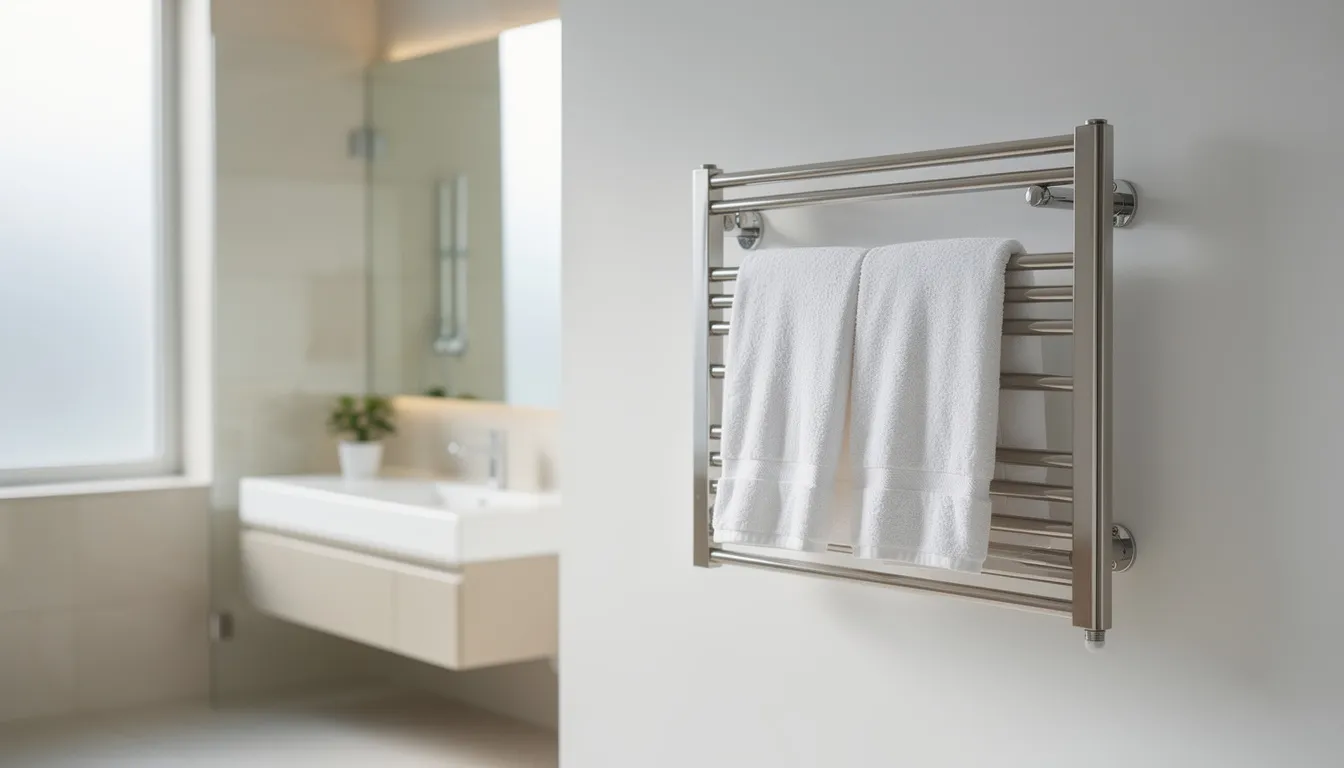
Towel Warmer Placement
Optimal positioning:
- Within arm's reach of the exit point (36-48 inches maximum)
- Mounted 42–48 inches from the floor for standing access
- GFCI-protected circuit (required by code)
- Minimum 24 inches from the tub rim to prevent electrical hazards
Recommended towel warmer types for cold plunge areas:
|
Type |
Capacity |
Power Draw |
Best Application |
Safety Features |
|
Wall-mounted rack |
2–3 bath towels |
100–200W |
Most installations |
Timer, auto-shutoff |
|
Cabinet-style |
4–6 towels |
150–300W |
Family use |
Enclosed heating, child-safe |
|
Freestanding |
3–4 towels |
150–250W |
Flexible placement |
Tip-over protection |
|
Drawer warmer |
2 large towels |
80–150W |
Integrated storage |
Built-in timer |
Storage Solutions
Essential storage items:
- Dry towels and robes
- Timer or clock for tracking session duration
- Emergency contact information
- First aid supplies
- Thermometer for water temperature verification
Storage configuration:
- Sealed cabinets protect contents from moisture
- Open shelving for frequently used items
- Bench seating with under-seat storage
- Waterproof bins for used towels
What Temperature Controls and Monitoring Are Necessary?
Precise temperature management affects both safety and therapeutic efficacy.
Temperature Ranges and Safety
Most beginners should aim for short ice bath sessions, starting with 30 seconds to a minute and working up to five to ten minutes at a time.
Cold plunges can be done as a single continuous session or multiple sessions with breaks. Plunges can be done a few times a week after workouts to reduce soreness and aid muscle recovery.
Beginners should not plunge alone during their first week of cold exposure. Cold plunge users should never plunge alone during their first few sessions to ensure safety in case of lightheadedness or chills. Even experienced users benefit from having someone nearby who can monitor for symptoms like chest pain, confusion, or uncontrollable shivering.
For families, establish clear rules: children may use the cold plunge only under direct adult supervision, with strict time and immersion limits. No horseplay, jumping, or head-first entries under any circumstances. A portable ice bath or bathtub filled with ice might seem less intimidating for kids, but the same supervision rules apply.
After your session, warm up gradually as you exit the tub to avoid rapid temperature changes that can cause dizziness.
Practice calm nasal breathing and slow, controlled entry using the provided steps and bars. Dramatic dives or jumps bypass the gradual adaptation your body needs.
According to cold-water safety research, water below 50°F significantly increases the risk of hypothermia, particularly for individuals without cold-water adaptation.
Recommended ranges:
- Beginners: 55–59°F (13–15°C)
- Intermediate: 50–54°F (10–12°C)
- Advanced: 45–49°F (7–9°C)
- Extreme (experienced only): 40–44°F (4–7°C)
Water temperature effects on the body:
|
Temperature Range |
Physiological Response |
Recommended Duration |
Risk Level |
|
59–65°F (15–18°C) |
Mild vasoconstriction |
5–10 minutes |
Low |
|
50–58°F (10–14°C) |
Moderate cold shock |
2–5 minutes |
Moderate |
|
40–49°F (4–9°C) |
Strong cold shock |
1–3 minutes max |
High |
|
Below 40°F (4°C) |
Extreme cold stress |
30–60 seconds only |
Very High |
Monitoring Equipment
Essential instruments:
- Digital thermometer with remote display
- Visible from the entry point
- Calibrated quarterly for accuracy
- Backup manual thermometer
Smart controls:
- Chiller units with precise temperature settings
- Smartphone app monitoring
- Automatic temperature maintenance
- Alert systems for temperature deviations
Visual indicators:
- Color-coded temperature zones
- Warning signs for extreme cold settings
- Session timer is clearly visible
- Emergency shutoff is easily accessible
To use a cold plunge safely at home, always verify the water temperature before entry and never assume consistent cooling without active monitoring.
What Safety Protocols Should Accompany Your Cold Plunge?
Physical infrastructure is only part of the safety equation. Clear protocols prevent misuse and emergencies.
Pre-Use Safety Checklist
Before each session:
✓ Verify water temperature
✓ Check step and grab bar stability
✓ Confirm towel warmer is functioning
✓ Clear entry path of obstacles
✓ Notify someone of your session timing
✓ Have emergency contact information accessible
User Guidelines
Post clear, written guidelines in the plunge area:
Duration recommendations:
- First-time users: 30–60 seconds maximum
- Regular users: 2–3 minutes standard
- Experienced users: Up to 10 minutes with proper acclimatization
- Never exceed personal tolerance levels
Medical contraindications:
Anyone with cardiovascular or respiratory risk factors should consult a doctor before beginning regular cold immersion. This isn't optional wellness advice—it's based on research showing elevated troponin levels in prolonged cold water swimmers, indicating possible heart muscle stress.
Exit immediately if experiencing:
- Chest pain or tightness
- Uncontrollable shivering beyond 2–3 minutes post-exit
- Confusion or disorientation
- Numbness beyond normal cold discomfort
- Irregular heart rate or breathing
Special Populations
For older adults, who face an amplified risk of hypothermia due to thinner skin and reduced circulation, consider starting with even warmer temperatures (59–65°F) and shorter durations. Build tolerance slowly over several weeks rather than rushing to match younger family members.
Children should only plunge with direct adult supervision, in milder temperatures around 55–59°F, for very short durations of 30–60 seconds maximum.
How Should You Maintain Your Cold Plunge for Long-Term Safety?
Keeping your cold plunge tub in top condition is essential for safe, effective cold water immersion and for fully enjoying the health benefits of cold plunge therapy. Regular maintenance not only extends the life of your tub and chiller unit but also ensures you're always plunging into clean, temperature-controlled water—key for muscle recovery, reduced inflammation, and overall wellness.
Regular Maintenance Schedule
Weekly maintenance:
- Clean the tub interior with mild detergent and warm water
- Focus on areas around drains and filtration inlets
- Prevents the buildup of bacteria and keeps your cold bath experience fresh and hygienic
- Avoid abrasive cleaners that could damage the tub's finish
- Inspect steps and grab bars for water damage or loosening
Monthly maintenance:
- Check and replace filters as recommended by the manufacturer
- Clean filters help maintain clean water, optimal water flow, and efficient chilling
- Thoroughly test for wobble or flex in steps, platforms, and grab bars
- Re-caulk or re-seal any gaps where water could penetrate
Quarterly maintenance:
- Inspect the chiller unit for unusual noises, leaks, or Error Codes
- Verify water temperature accuracy with a calibrated thermometer
- Deep clean all non-slip surfaces
- Inspect outdoor installations for freeze-thaw damage
Annual maintenance:
- Schedule professional servicing for the chiller unit
- Replace anti-slip treads showing visible wear
- Full structural inspection of the platform and stairs
- Test GFCI outlets and electrical connections
- Drain and deep clean tub completely
Seasonal Considerations
For outdoor installations:
- Inspect more frequently during winter months when freeze-thaw cycles can loosen fasteners and crack materials
- Winterize systems in extreme climates
- Ensure drainage prevents ice buildup on steps
- Monitor for snow/ice accumulation on grab bars
Proper storage for seasonal use: If you plan to pause use during colder months or extended travel:
- Drain the tub completely
- Clean all surfaces thoroughly
- Store in a dry, ventilated area
- Prevents mold growth and protects sensitive components from cold air and moisture damage
By making these maintenance steps part of your healthy habits, you'll ensure your cold plunge tub delivers reliable, safe, and effective cold water immersion for years to come.
Build Your Safe Cold Plunge Experience with Confidence
Prioritizing cold plunge steps and entry safety isn't just about compliance—it's about creating a sustainable wellness practice you'll use for years to come. From proper step dimensions and non-slip surfaces to strategically placed grab bars and accessible design, every safety feature contributes to a more enjoyable and worry-free cold therapy experience.
When your entry system is designed with safety as the foundation, you can focus entirely on the recovery and health benefits that make cold plunging so valuable.
Ready to invest in a cold plunge system that prioritizes your safety?
SunHomeSaunas specializes in thoughtfully designed cold plunge installations with comprehensive safety features built in from the start. Explore our range of cold plunge solutions and discover how well-designed entryways can transform your home wellness routine.
Frequently Asked Questions
How Can I Retrofit Safe Steps to an Existing Above-Ground Cold Plunge?
Build a small, U-shaped platform from pressure-treated lumber or metal framing, with 6–7-inch risers and non-slip treads. Anchor at least one grab bar securely to wall studs or the platform frame—not just to the tub shell.
Avoid relying on plastic stools as a long-term solution; they often tip and lack adequate load ratings for use in wet environments. If you're working with a SunHomeSaunas cold plunge or similar premium tub, consider hiring a contractor to build custom steps that match your existing deck or patio materials for a cohesive look.
According to building safety standards, proper anchoring and load-bearing capacity are critical for preventing accidents during the vulnerable entry and exit phases, when cold shock can impair coordination.
Are Towel Warmers Safe to Use Near a Cold Plunge Tub?
Towel warmers are safe when properly installed. Verify the unit is UL-listed for bathroom or damp locations, install it on a GFCI-protected circuit, and mount it at least 24 inches from the tub edge. Never touch the warmer with dripping-wet hands or use it to dry soaked garments—towel warmers are designed for pre-warming dry towels, not as dryers.
Cabinet-style warmers with auto-shutoff features add an extra layer of protection for families with children. These features align with the best recovery practices, which emphasize post-immersion warming protocols to prevent hypothermia.
What's the Safest Way for Kids to Use a Cold Plunge at Home?
Children should only plunge with direct adult supervision, in milder temperatures around 55–59°F, for very short durations of 30–60 seconds maximum. Use the same steps and grab bars designed for adults, and adjust the secondary bar to their height if needed.
Horseplay, jumping, and head-first entries must be strictly off-limits. Consider adding ice to a bathtub filled with cool water as a gentler introduction before graduating to dedicated cold-plunge tubs with colder temperature settings.
Research on cold water safety emphasizes that children have less body mass to retain heat and are therefore at higher risk of rapid hypothermia development.
How Often Should I Inspect My Cold Plunge Steps and Grab Bars?
Perform a quick weekly visual check for water damage, loose screws, and worn non-slip surfaces. Monthly, conduct a more thorough inspection where you physically test for wobble or flex in steps, platforms, and grab bars. Re-caulk or re-seal any gaps where water could penetrate.
For outdoor installations, inspect more frequently during winter months when freeze-thaw cycles can loosen fasteners and crack materials. Replace any anti-slip treads showing visible wear.
The health benefits of cold plunge therapy are maximized when safety infrastructure remains in optimal condition, preventing accidents that could interrupt your wellness routine.
Can I Put My Cold Plunge and SunHomeSaunas Sauna in a small bathroom?
It's possible in some remodels if the room can handle moisture loads, has at least 36 inches of clear circulation space between fixtures, and can support the combined weight of water and equipment. However, many homeowners achieve better results with a dedicated spa corner in a larger bathroom, a basement, or a covered outdoor area.
This approach provides safer, wider entry paths and better ventilation. If you're committed to a bathroom installation, prioritize powerful exhaust ventilation (80+ CFM), non-slip flooring throughout, and test your floor's structural capacity before filling any tub.
Combining cold plunge and sauna red light therapy kit installations requires careful planning to optimize the contrast therapy experience while maintaining safety clearances.
References
- National Weather Service – “Cold Water Hazards and Safety.”
- American Heart Association – “You're Not a Polar Bear: The Plunge into Cold Water Comes with Risks.”
- National Library of Medicine – “Cold Water Swimming – Benefits and Risks: A Narrative Review.”
- Harvard Health – “Cold Plunges: Healthy or Harmful for Your Heart?”
- Americans with Disability Act – “ADA Standards for Accessible Design.”
- National Library of Medicine – “Health Effects of Voluntary Exposure to Cold Water – A Continuing Subject of Debate.”
