The Sun Home Cold Plunge Standard is available in two tub orientations: Horizontal (lay-down, classic ice-bath style) and Vertical (stand-up barrel style with a smaller footprint). Both share the same chiller, the same electrical setup, the same filtration, and the same maintenance routine — the difference is the physical shape of the tub and how you use it.
Same chiller, same electrical, same maintenance. If you're choosing between Horizontal and Vertical, the decision is about your space and how you want to plunge — not about performance specs.
Horizontal Cold Plunge
The horizontal tub is the traditional lay-down ice-bath shape — long enough to submerge your full body up to the neck while you lie back. Best for:
- Spaces with enough floor area to accommodate a longer footprint (~69" interior length)
- Customers who want the classic "lie back and immerse" plunge experience
- Households where the plunge will live in a garage, backyard pad, or dedicated room
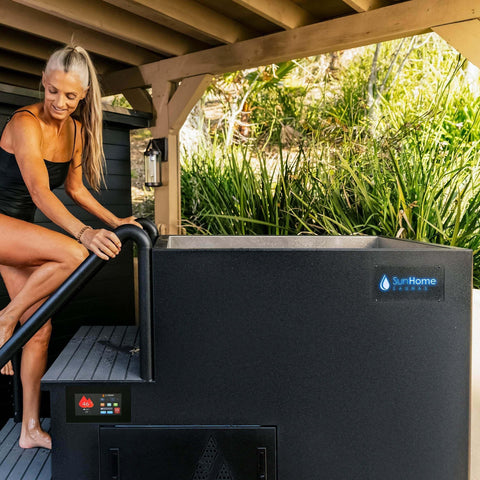
Vertical Cold Plunge
The vertical tub stands upright like a barrel — you step in and stand or sit upright while submerged. Best for:
- Tighter spaces where floor area is at a premium (smaller footprint than horizontal)
- Customers who prefer to plunge in a standing or upright-seated position
- Smaller balconies, condo patios, or rooms where a horizontal tub wouldn't fit
Specs that are the same for both
- Temperature range: 32°F – 107°F (heats and cools)
- Water capacity: 80–90 gallons (300–350 L)
- Chiller dimensions: 21.2" × 15.7" × 21.7"
- Noise level: 55–60 dB (comparable to a window AC unit)
- Electrical: 110–120V / 11A, standard household outlet (NEMA 5-15P), GFCI protected
- Tub PSI: 8–10 PSI (DO NOT EXCEED 10)
- Can run 24/7: Yes
The Horizontal tub's interior is 69" long × 19.5" wide × 23.5" deep. Vertical-tub dimensions are listed on the product page — confirm before ordering to make sure the orientation fits your space.
Filtration and Sanitation (same for both)
- Metal/mesh screen filter — captures hair and large debris (installed at red INLET port)
- 20-micron paper sediment filter — captures microscopic debris and bacteria
- Ozone injection sanitation
- Note: the Standard line does NOT have UV filtration (that's a Cold Plunge Pro feature)
What's included with each orientation
- Plunge tub (Horizontal or Vertical, depending on which you order)
- Protective tub cover
- Carrying case for transport
- Chiller (same unit for both)
- Air pump for inflation
- Repair kit (patches holes up to 10cm × 20cm)
- Plastic filter wrench (for paper filter changes)
- Spare paper filter (pre-installed inside chiller)
- Inlet and outlet water hoses with rubber gaskets
- Metal hair filter (installed at red INLET port of chiller)
Setup — same routine, either orientation
- Let the chiller settle 4 hours unplugged before first use. Refrigerant needs time to settle after shipping — running it sooner can damage the chiller (not warranty-covered).
- Place the tub on a flat surface with 36" clearance behind and in front for chiller airflow.
- Surface must support 3,000 lbs (the tub when filled).
- Keep the Cold Plunge at least 5 feet from any appliances.
- Place the chiller behind the tub. The chiller's fan must face outward, NOT toward the tub. Keep the fan at least 40" from the tub or any walls so hot air isn't drawn back in.
- Plug into a GFCI outlet (110–120V) on a circuit with an 11A breaker.
- Inflate the tub. Do NOT exceed 12 PSI.
- Fill the tub with water.
- Check that water is flowing from the chiller's outlet jets before letting the chiller run. If water isn't flowing, do not run the chiller — see the warning below.
Critical safety rule: If the chiller is on but water is not flowing, ice can form inside and break the chiller. Turn the chiller off immediately if water is not flowing. In outdoor installs where temps drop below 32°F, monitor the plunge daily to ensure constant flow.
Maintenance — same routine, either orientation
- Weekly: clean the metal/mesh filter at the red INLET port (unscrew, rinse, re-screw)
- Every 2–6 weeks: replace the paper filter (more often if you plunge 5+ times/week)
- Every 2–3 weeks: change the water and wipe down the tub interior with a dab of gentle dish soap
- As needed: flush hose lines to clear any blockage
If you don't plan to use the plunge for more than 3 weeks, drain the tub to prevent bio-matter buildup and drain water from the chiller before storage.
Where to Buy
Both orientations are available on the Sun Home Saunas site:
For a deeper comparison vs. our hardshell Cold Plunge Pro and APEX models, see the Cold Plunge Buying Guide. For full setup details, see Cold Plunge Setup Guide.