

The demand for backyard saunas and cold plunge installations has skyrocketed in recent years. These features are now among the top two requested upgrades for outdoor wellness space projects, and for good reason.
Creating a personal retreat in your own backyard transforms daily recovery and stress relief from a luxury spa visit into a consistent home ritual. This comprehensive guide walks you through everything you need to design, build, and maintain a backyard wellness retreat that combines a sauna and cold plunge.
Key Takeaways
- A compact 12×16 ft. deck can comfortably fit a SunHomeSaunas outdoor sauna plus a dedicated cold plunge tub for home, making a full retreat realistic for typical U.S. backyards.
- Contrast therapy basics involve 3–4 sauna rounds at 170–190°F in a traditional sauna or 120–150°F in an indoor 2-person infrared sauna, alternated with 1–3-minute plunges at 45–55°F.
- Practical design priorities include safe non-slip pathways, 3–4 ft. clear walking lanes, nearby towel hooks, and weatherproof outdoor infrared sauna loungers for transition and relaxation.
- Proper ventilation (supply and exhaust vents) and moisture control (drainage, vapor barriers, dehumidification) are essential to protect both the sauna and the surrounding deck.
- SunHomeSaunas is the go-to brand for premium outdoor traditional and infrared saunas, plug-and-play cold plunges, and design support for backyard wellness retreats.
What Is a Sauna & Cold Plunge Backyard Wellness Retreat?
A backyard wellness retreat centered on contrast therapy brings together two core elements: an outdoor sauna and an actively cooled cold plunge tub, positioned on a shared deck or patio. This isn't simply about placing equipment outdoors—it's about creating dedicated spaces that flow naturally from heat to cold to relaxation, all within steps of your back door.
Understanding True Cold Plunge Systems
A true cold plunge is maintained at 45–55°F with a chiller system, not just a stock tank filled with hose water that warms quickly during the summer months. This distinction matters because therapeutic benefits depend on consistent temperature control.
Without active chilling, water temperatures can rise to 70°F or higher within hours, eliminating the physiological response that makes cold therapy effective. This is where home cold plunge system benefits become most apparent—consistent, controlled temperatures deliver reliable therapeutic results.
The Modern Wellness Garden Concept
This setup allows daily contrast therapy at home, inspired by Scandinavian and Japanese bathing traditions but adapted to modern suburban and urban backyards. The combination of heat exposure and cold immersion in a single integrated outdoor space lays the foundation for a wellness garden that offers both physical health benefits and mental well-being.
Prefab, plug-and-play SunHomeSaunas units and above-ground plunges make installation feasible in a typical 2–3-day contractor window, versus weeks for fully custom builds. This accessibility has driven the surge in demand—homeowners can now create spa-quality experiences without major construction projects or extensive permitting delays.
Why Should You Combine a Sauna and Cold Plunge in Your Backyard?
Contrast therapy—alternating high heat and cold immersion—elicits physiological responses that neither modality alone can achieve. When you combine a sauna and a cold plunge in a single, integrated outdoor space, you gain both convenience and effectiveness. The proximity encourages consistent use, which is where the real cold plunge therapy health benefits accumulate.
Physical Benefits
The heat-cold cycle triggers powerful circulatory responses:
|
Phase |
What Happens |
Benefit |
|
Heat exposure |
Blood vessels dilate, and heart rate increases |
Improved circulation, toxin release through sweat |
|
Cold immersion |
Blood vessels constrict rapidly |
Reduced inflammation, endorphin release |
|
Recovery |
System normalizes, blood flow stabilizes |
Enhanced muscle recovery, cardiovascular conditioning |
This alternating pattern helps promote circulation more effectively than either treatment alone. The vasodilation and vasoconstriction cycle essentially gives your cardiovascular system a workout, supporting faster post-workout recovery and helping reduce inflammation in joints and muscles.
Mental Benefits
Beyond physical effects, regular contrast therapy sessions deliver notable mental clarity and stress relief. The cold plunge in particular triggers a sharp release of norepinephrine—up to 200-300% above baseline—which improves focus and mood. Many users report better sleep quality when practicing contrast therapy in the early morning or late afternoon.
The ritual itself encourages digital detox. Spending time in nature, away from screens, with the fresh air and nature sounds of your backyard, creates a reset that's increasingly rare in daily life. Understanding how to use a cold plunge safely at home maximizes these mental health benefits while minimizing risk.
Safety Considerations
Safety note: If you have heart disease, uncontrolled blood pressure, or are pregnant, consult a physician before starting contrast therapy. These conditions require medical clearance before exposure to temperature extremes.
What Is a Typical Contrast Therapy Routine at Home?
A standard 45–60-minute session follows this pattern:
- Warm up in the sauna: 8–12 minutes at 170–190°F (traditional) or 120–150°F (infrared)
- Cold plunge: 1–3 minutes at 45–55°F
- Rest and recover: 5–10 minutes on comfortable seating in the transition zone
- Repeat: Complete 3–4 total cycles
Most practitioners benefit from 2–5 sessions per week, adjusting duration and intensity based on individual tolerance and fitness goals. Athletes recovering from intense training may push toward the higher end, while those using contrast therapy primarily for relaxation and overall well-being might prefer fewer, gentler sessions.
Having the sauna and plunge within 10–15 ft. of each other on the same deck encourages consistent use. When elements are scattered across the yard, the friction of moving between them—especially in cold weather—dramatically reduces adherence. This is a key consideration when comparing ‘cold plunge vs ice bath for recovery’ setups.
How Do You Plan Your Backyard Layout: Zones, Flow, and Scale?
Before breaking ground or purchasing equipment, careful planning is essential. Sketch your available space to scale, including property lines, existing patios, utility locations, and mature trees that provide shade or root interference.
The Four Essential Micro Zones
The most successful backyard wellness retreat designs incorporate four functional micro zones:
- Heat zone: The sauna cabin itself
- Cold zone: The plunge tub or pool
- Transition zone: Deck space with seating for cooling down between rounds
- Relaxation zone: Weather-resistant loungers, fire pit, or other wellness add-ons
Clear flow between these distinct areas is essential. Create straight, non-slip paths from the house to the sauna, from the sauna to the plunge, and from the plunge to the seating. Minimize sharp turns on wet feet—this is both a safety consideration and a design principle that makes the space feel intentional rather than cobbled together.
Most SunHomeSaunas backyard retreats are built along one edge of the property or deck, using strategic landscaping, fencing, and climbing plants to create privacy from neighbors.
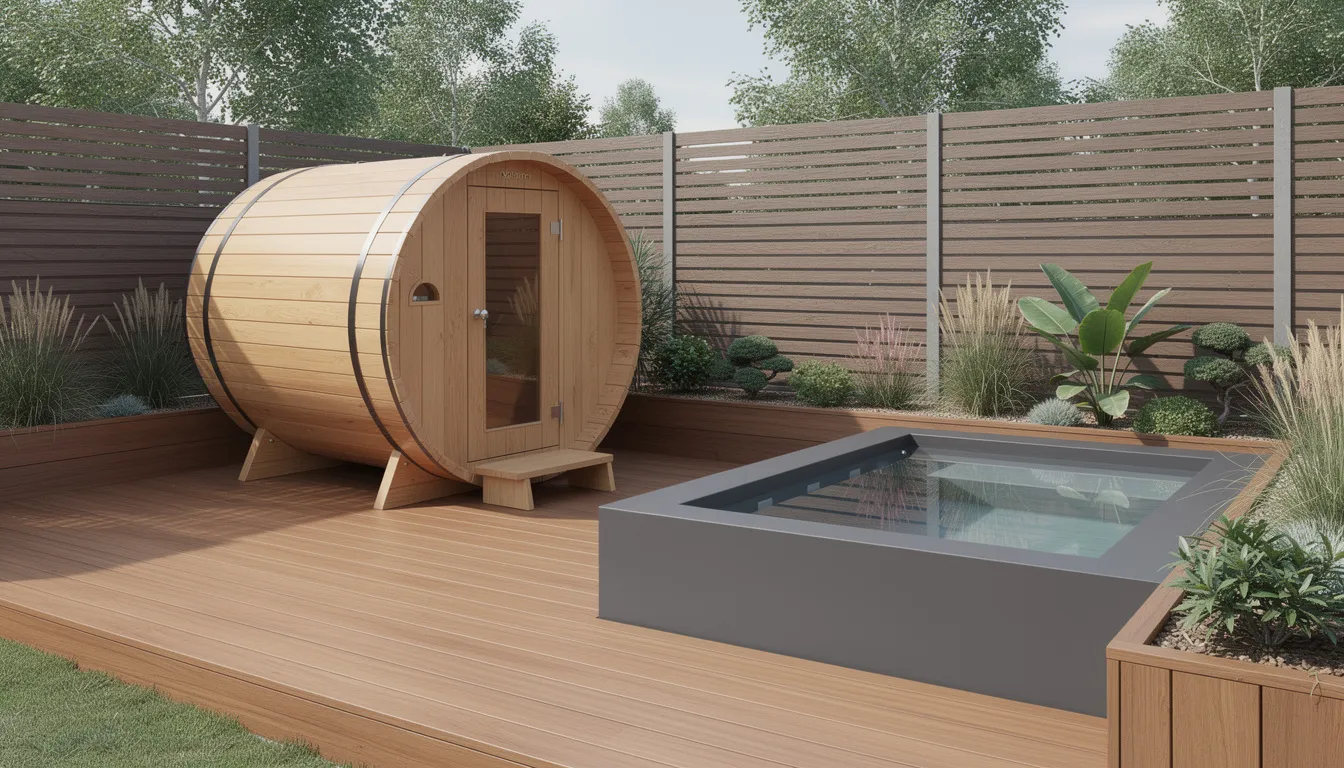
Compact 12×16 ft. Retreat for Small Backyards
This layout proves that limited outdoor space doesn't prevent the creation of a functional wellness retreat. The configuration fits a 4×6 ft. best infrared sauna for home and a 3.5×5 ft. above-ground cold plunge tub on a 12×16 ft. composite deck.
Layout specifications:
|
Element |
Dimensions |
Placement |
|
Infrared sauna |
4×6 ft. |
Corner position |
|
Cold plunge |
3.5×5 ft. |
Perpendicular to the sauna |
|
Walking lane |
3 ft. wide |
Between the sauna door and the plunge |
|
Landing pad |
2×4 ft. teak mat |
At the plunge entry point |
|
Built-in bench |
6 ft. long |
Along the fence line |
Include a privacy screen (6–7 ft. tall) on at least one side to block neighbor views. A few narrow evergreen shrubs in planters add greenery without consuming floor space.
This compact footprint works for urban yards, townhouse patios, and couples seeking minimal footprint with maximum functionality.
16×20 ft. Family "L-Shaped" Wellness Court
The L-shaped layout provides room for a 5×7 ft. traditional SunHomeSaunas cabin at one end and a 4×6 ft. plunge perpendicular to it, leaving a central 8×10 ft. open platform that serves as the transition zone.
Two weather-resistant loungers fit along the long side of the "L," plus a small side table for water bottles, timers, and phones. This configuration accommodates 3–4 people comfortably and supports social use—contrast therapy becomes a shared experience rather than a solitary practice.
A pergola, or partial overhead structure, over the central platform provides shade during the summer months and mounting points for string lights and optional outdoor speakers. This intermediate size suits typical 0.25–0.5-acre suburban lots without overwhelming the landscape.
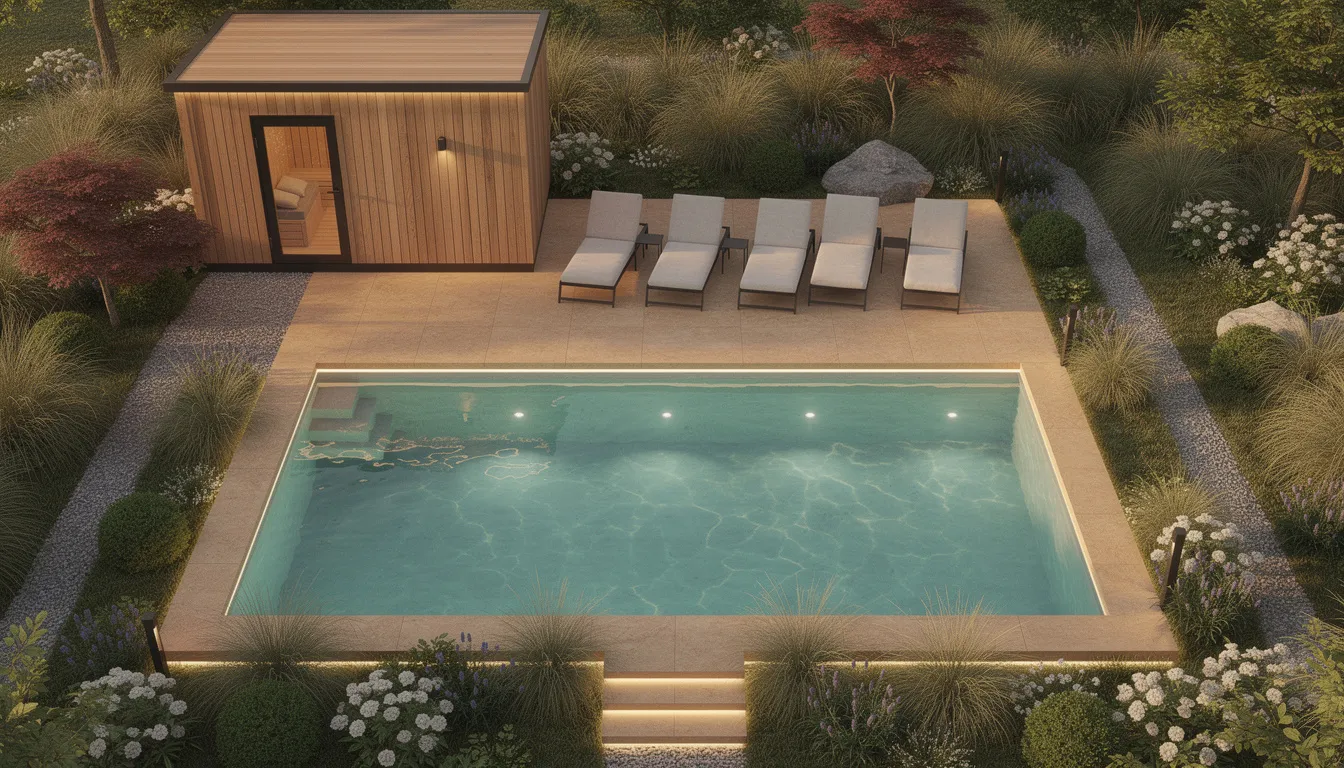
20×20 ft. Luxury Garden Retreat
For serious wellness enthusiasts with larger properties, this premium layout delivers a spa-caliber experience:
- 6×8 ft. SunHomeSaunas traditional outdoor sauna (capacity 4–6 people)
- 5×7 ft. recessed cold plunge pool partially inset into the deck for visual seamlessness
- 8×10 ft. lounge zone with four weather-resistant loungers
- Outdoor shower along one side with a 3 ft. wide linear drain and stone pavers
Layered landscaping surrounds the retreat: perimeter ornamental grasses, mid-height screening shrubs, and one or two focal trees for dappled shade and filtered sunlight. Integrated LED strip lighting in stair treads and along the plunge coping ensures safe navigation during nighttime sessions.
How Do You Choose the Right SunHomeSaunas Unit for Contrast Therapy?
The sauna is the "engine" of your wellness retreat, influencing both design decisions and the physiological effects you'll experience. SunHomeSaunas offers both outdoor traditional and outdoor infrared saunas, along with indoor units that pair with a plunge just outside a patio door.
Traditional saunas deliver the strongest temperature contrast—critical for maximizing the circulatory response—while infrared saunas provide a gentler, longer-session option that may suit beginners or those preferring lower operating temperatures.
Traditional vs. Infrared: Which Works Best Outside?
Traditional outdoor saunas use electric or wood-fired heaters to produce air temperatures of 170–190°F. Thick benches, proper ventilation, and the option to pour water on rocks for steam create the classic sauna experience. These units deliver maximum contrast when paired with cold therapy.
Outdoor infrared saunas use full-spectrum infrared or far-infrared panels that target the body directly rather than heating the air. Operating temperatures range from 120–150°F, with quicker warm-up times and lower energy consumption.
|
Factor |
Traditional |
Infrared |
|
Operating temp |
170–190°F |
120–150°F |
|
Warm-up time |
30–45 minutes |
10–20 minutes |
|
Contrast intensity |
Maximum |
Moderate |
|
Energy use |
Higher |
Lower |
|
Steam option |
Yes (löyly) |
No |
Both types install outdoors successfully, but traditional models require more robust roof overhangs and chimney clearance if wood-fired. SunHomeSaunas traditional units suit experienced users seeking maximal contrast, while their infrared models prioritize faster daily sessions at lower temperatures.
Sizing and Placement Guidelines
Capacity guidance by footprint:
- 4×5 ft.: 1–2 people (infrared sauna 1-person optimal)
- 5×6 ft.: 2–3 people
- 6×8 ft. or larger: 3–4 people with additional legroom
Place the sauna within 10–20 ft. of the home's back door for quick winter access, with overhead lighting and a clear path for snow removal in cold climates. Position for easy access while maintaining privacy from neighboring properties.
Raise outdoor sauna cabins at least 4–6 inches off grade on concrete piers or a framed platform. This protects against splash back and ground moisture, and improves airflow beneath the structure.
Maintain a minimum of 3 ft. clearance around all sides for maintenance, ventilation, and safe passage. Check local codes—some jurisdictions require additional setbacks from property lines or structures.
What Are the Ventilation System Specifications and Moisture Control Requirements?
Proper ventilation is non-negotiable for the longevity of saunas and user comfort. Every SunHomeSaunas unit incorporates a designed ventilation system, but understanding the principles helps with placement and operation.
Fresh air intake requirements:
- Location: Near the heater, typically 4–6 inches above floor level
- Size: Approximately 4×6 inches
- Purpose: Supplies oxygen for combustion (traditional) and prevents CO2 buildup
Exhaust vent requirements:
- Location: Near the ceiling on the opposite wall from the intake
- Type: Manually adjustable wooden sliders or louvered grills
- Purpose: Releases moist air and allows temperature regulation
Users can fine-tune airflow by adjusting vent openings during 10–15 minute sessions. More open vents create fresher air but slightly lower temperatures; more closed vents retain heat but may feel stuffy.
Direct vent paths and exhaust to the outdoors rather than into attached sheds, under-deck cavities, or enclosed spaces. Moist air trapped in confined areas leads to mold growth and structural damage.
Interior moisture control includes:
- Kiln-dried softwoods (cedar, hemlock) that handle humidity without warping
- Small air gaps behind wall cladding for circulation
- Sealed exterior roof/wall joints against wind-driven rain
How Do You Design and Source the Cold Plunge?
The cold plunge tub is the second core component of your wellness retreat. SunHomeSaunas pairs premium plunge systems with both traditional and infrared outdoor saunas, creating integrated contrast therapy setups.
Two Main Categories
- Actively chilled systems with integrated filtration and dedicated chillers
- DIY converted tubs (stock tanks with add-on chillers)
For anyone in warmer climates or planning to plunge more than once or twice a week, an actively cooled, insulated tub is the practical choice. DIY setups work for cold therapy enthusiasts willing to manage water quality manually and accept temperature fluctuations.
Choose a tub depth of at least 24–30 inches so most adults can submerge to the chest while seated. Shallower tubs force awkward positioning and reduce the therapeutic effect.
Temperature, Chillers, and Filtration
The ideal operating range of 45–55°F (7–13°C) delivers optimal cold therapy benefits. Many commercial chillers can pull water down from ambient 75–80°F to target temperature in a few hours, depending on tub volume and unit capacity.
Filtration and sanitation essentials:
- Built-in cartridge or sand filtration removes debris and particulates
- Ozone or UV sanitation keeps water clear between water changes
- Weekly water testing ensures safe conditions
Place the chiller unit on its own small concrete pad 3–6 ft. from the tub, with at least 12–18 inches clearance for airflow and service access. Chillers generate heat exhaust and need unobstructed ventilation to operate efficiently.
Simple insulation tactics extend chiller life and reduce energy costs:
- Tight-fitting insulated cover when not in use
- Foam-wrapped plumbing lines
- Wind-blocking walls around the equipment zone
Safety, Access, and Surroundings
Non-slip decking is essential within a 3–4 ft. radius of the plunge. Select materials with a wet coefficient of friction rating that meets or exceeds local codes—typically 0.42 or higher for commercial applications.
For deeper or inset plunges, install 1–2 wide, sturdy steps with handrails. A 2×3 ft. teak or rubber mat at the primary entry point provides secure footing and defines the transition zone.
Practical accessories to include:
- 2–4 robe hooks within arm's reach of the tub
- Small storage box for extra towels
- Nearby bench for pre- and post-plunge sitting
- Timer visible from plunge position
Visual cues like different deck board colors or a border strip around the plunge delineate the wet zone, especially important when walking outdoors at night.
What Ventilation and Moisture Control Does the Entire Retreat Need?
Heat, steam, and splash water can damage decks and fences if not properly managed, especially in climates with freeze–thaw cycles. A well-ventilated and drained retreat extends the service life of both SunHomeSaunas units and surrounding structures while improving user comfort by reducing stuffy air around the sauna door and plunge.
Deck and Under-Structure Ventilation
Exterior decking under and around the sauna and plunge should have 1/8–1/4 inch gaps between boards. These gaps allow water to drain through and air to move freely, preventing moisture accumulation that leads to rot and mold.
Under-deck clearance requirements:
|
Specification |
Recommendation |
|
Soil-to-joist clearance |
Minimum 12–18 inches |
|
Skirting panels |
Open or vented on at least two sides |
|
Foundation vents |
4×10-inch louvered panels every 6–8 ft. |
|
Equipment enclosures |
Intake and exhaust vents, screened openings |
Any enclosed equipment boxes for chillers or electrical panels should include dedicated ventilation to prevent overheating and moisture damage.
Surface Drainage and Water Management
Slope decks or concrete pads away from the house at approximately 1/8–1/4 inch per foot, directing water toward a gravel bed or trench drain. This prevents pooling around the sauna foundation and adjacent structures.
Create a dedicated "splash zone" under and around the plunge using water-resistant materials:
- Composite decking rated for ground contact
- Porcelain pavers with non-slip texture
- Treated wood rated for wet applications
A narrow French drain, or linear surface drain, along the outer edge of the plunge ties into a dry well or an existing storm water system, where local codes permit. In cold climates, route drainage lines below frost depth and use flexible hose sections to prevent freeze-related damage.
Moisture Control in Semi-Enclosed Retreats
For pergolas with side curtains or partially enclosed pavilions, leave at least two opposite sides open or fitted with operable panels for cross-ventilation. Trapped steam can cause condensation issues and damage overhead structures.
If installing a sauna under a roofed structure, the ceiling above should have a continuous air gap and a vented ridge or soffit. This allows warm, moist air to escape rather than condensing on cooler surfaces.
Additional moisture control tactics:
- Moisture-resistant finishes (epoxy or high-grade exterior stains) on adjacent posts and beams
- Small wall-mounted outdoor-rated fan in enclosed sections
- Dehumidifier in very humid regions to reduce condensation
How Do You Create Landscaping, Privacy, and Ambiance?
Thoughtful planting and screening transform a functional setup into a true retreat while protecting the area from wind and unwanted views. The goal is to engage all the senses—visual beauty, soothing sounds from water features or nature, and even aromatherapy from fragrant plants.
Landscaping choices should tolerate occasional splashes of warm and cold water and wet soil around the plunge zone. Blend your retreat with the rest of the yard rather than isolating it with stark hardscape only.
Planting for Privacy and Durability
Hardy screening plants for year-round privacy:
- Arborvitae
- Holly
- Boxwood
- Tall ornamental grasses
Position these along fence lines or around equipment pads. They create a wellness garden atmosphere while blocking sightlines from neighboring properties.
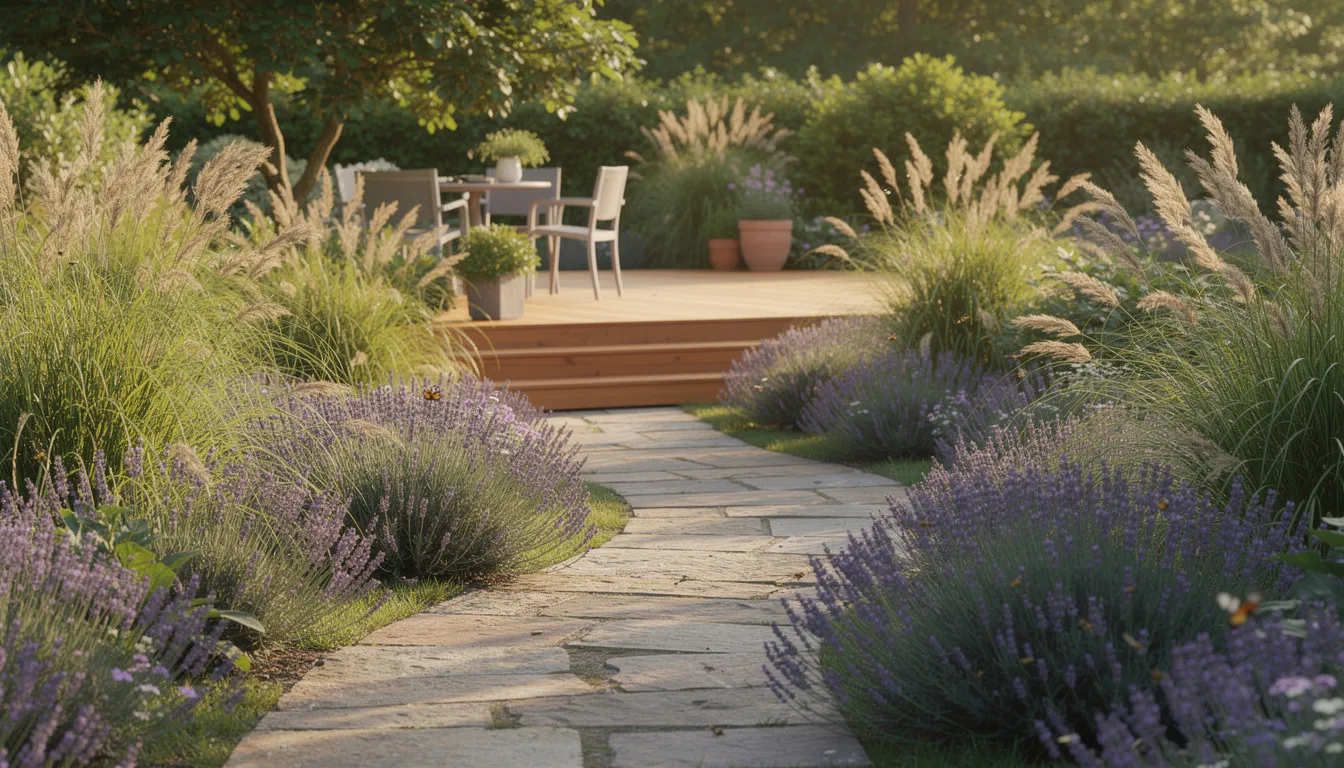
Near the deck edge, ornamental grasses like Miscanthus or feather reed grass soften transitions and sway in the breeze for a calming effect. The movement adds interesting textures and visual interest without maintenance demands.
Add fragrant plants such as lavender, rosemary, or jasmine in containers near the lounge area. These provide subtle aromatherapy without overwhelming the sauna interior—the scent should enhance relaxation rather than compete with the cabin's cedar or hemlock aromas.
Choose plants suited to your USDA hardiness zone and avoid species that drop excessive debris into the plunge. Deciduous trees directly overhead create maintenance headaches during the fall months.
Lighting, Sound, and Finishing Touches
Safety lighting essentials:
- Low-voltage path lights along the route from the house to the sauna
- Step lights on any stairs
- Shielded fixture over the sauna threshold
For ambiance, dimmable string lights under a pergola create an intimate evening atmosphere. Warm-white LED strips under benches provide subtle illumination without harsh glare. Small spotlights highlighting feature trees add depth to nighttime views.
Optional outdoor speakers mounted under eaves or on posts—oriented away from neighbors—can play low-volume ambient music or nature sounds during sessions. Smart controls allow adjustment without leaving the sauna or plunge.
Personal touches that enhance relaxation:
- Small fountain or water features for soothing sounds
- Outdoor artwork that withstands weather
- Neatly rolled towels on a dedicated rack
- A small fire pit for post-session warmth during cooler months
These elements reinforce a spa-like atmosphere and make the space feel considered rather than improvised.
What Are the Budget, Utilities, and Safety Considerations?
Creating a combined sauna and cold plunge retreat represents a significant investment that scales based on size, finish level, and site complexity. Understanding realistic budget ranges and utility requirements helps with planning and prevents mid-project surprises.
Budget Tiers for a Sauna + Cold Plunge Retreat
|
Tier |
Investment Range |
What's Included |
|
Entry-level |
$10,000–$12,000 |
Compact SunHomeSaunas outdoor infrared, smaller above-ground plunge, pressure-treated or basic composite decking |
|
Mid-range |
$15,000–$25,000 |
Larger traditional outdoor sauna, chiller-integrated plunge, upgraded decking, modest landscaping and lighting |
|
Premium |
$30,000–$40,000+ |
Spacious cabin sauna, built-in or recessed plunge, custom hardscape, lush plantings, covered lounge structure |
These ranges exclude major site work, such as extensive grading or new utility runs at the front of a property, which can significantly increase the total cost. Existing decks and nearby electrical panels significantly reduce installation costs.
Utilities, Permits, and Long-Term Safety
Electrical requirements:
- 240V circuit sized according to infrared sauna price and heater wattage (typically 30–60 amp)
- 120V or 240V circuit for plunge chiller
- GFCI breakers as required by code
Water supply options:
- Simple: Frost-proof hose bib with dedicated hose
- Plumbed: Dedicated line with shutoff and vacuum breaker near retreat
Hire licensed electricians and plumbers where required. Submit simple plan sketches to local building departments for any structures or deck extensions—most jurisdictions require permits for electrical work and structures over certain sizes.
Maintenance-focused safety checks (quarterly):
- GFCI test buttons
- Heater stones condition (traditional saunas)
- Chiller hoses and connections
- Deck fasteners for loosening
- Annual inspection of stairs and railings
How Do You Maintain Your Backyard Sauna and Cold Plunge Retreat?
Consistent, light maintenance keeps your wellness retreat inviting and extends the life of all components. Create a simple maintenance checklist divided into weekly, monthly, and seasonal tasks, and post it in a small weatherproof box near the deck for easy reference.
Both saunas and plunge systems require water and wood care to avoid mold, odor, and premature material failures. SunHomeSaunas units include specific care guidelines to follow, in addition to these general best practices.
Routine Care for Sauna, Plunge, and Surroundings
Weekly tasks:
- Wipe sauna benches with a damp cloth (no chemicals needed for cedar)
- Check the plunge water clarity and temperature
- Skim debris from the plunge surface
- Rinse down the decking in the splash zones
Monthly tasks:
- Check sauna vent operation and clean any dust buildup
- Brush and vacuum under benches to remove skin cells and debris
- Clean or replace plunge filter cartridges
- Inspect the deck for slippery algae growth
Seasonal tasks:
- Drain and refill the plunge water completely (every 3–4 months with proper filtration)
- Check caulks and seals around sauna roofs and windows
- Re-oil exterior wood surfaces before winter and after spring
- Clear leaves from drainage paths
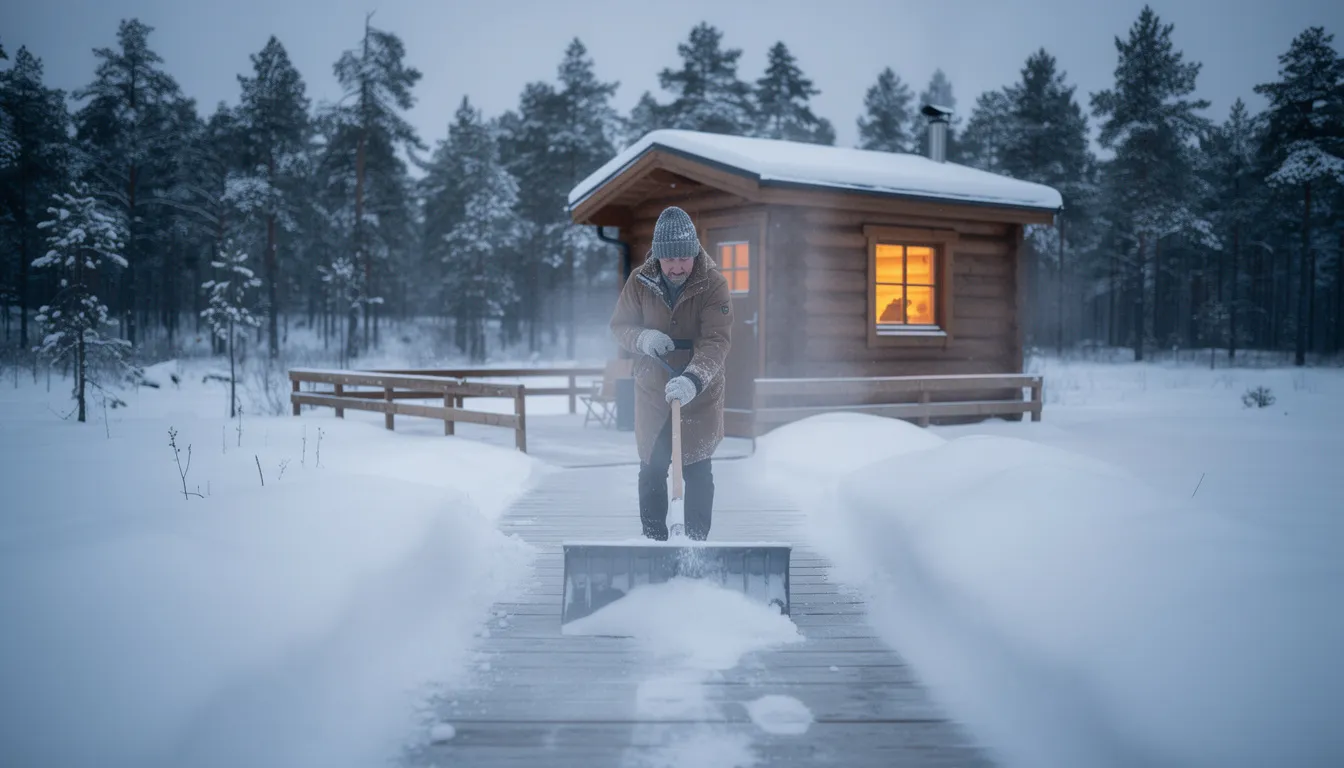
Winter-Specific Steps
Winter maintenance considerations:
- Insulate exposed pipes with heat tape or foam
- Maintain safe, snow-free paths to the retreat
- Adjust session timing to match shorter daylight hours or add adequate lighting
- Consider covering the plunge if extended non-use periods are expected
Create Your Personal Wellness Sanctuary Today
Creating a backyard wellness retreat that combines sauna and cold therapy transforms how you approach recovery, relaxation, and daily wellbeing. With careful planning, quality SunHomeSaunas equipment, and attention to ventilation and moisture control, your retreat becomes a lasting investment in health that you'll use for years.
Ready to design your retreat? Explore SunHomeSaunas’ outdoor traditional and infrared models to find the right fit for your space, budget, and wellness goals. Whether you're interested in a compact luxury home sauna or a comprehensive wellness garden, our team can help you create the perfect backyard sanctuary.
FAQs
Can I install a SunHomeSaunas unit and cold plunge on an existing wood deck?
Yes, many existing decks can support a sauna plus plunge, but structural verification is essential. Have a contractor or structural engineer check joist size, spacing, and footing capacity before installation. Water weight in the plunge—often 1,000–2,000+ lbs. when full—must be accounted for. Reinforcing joists or adding posts beneath the plunge location is common and relatively straightforward. This is crucial when planning home sauna installation projects.
Is it better to put the sauna or the plunge closer to the house?
In cold climates, place the sauna slightly closer to the house. This minimizes time walking in wetsuits through freezing air after the hot phase. The plunge can sit a few feet farther away but should remain within a short straight-line path. In milder climates, either order works as long as pathways are non-slip and well-lit. Consider this when comparing outdoor infrared vs indoor infrared sauna placement options.
Can I use the sauna and cold plunge year-round in snowy or very hot regions?
Both features operate year-round with proper planning. Insulated sauna cabins and insulated plunge tubs with tight-fitting covers handle temperature extremes. Weather-rated heaters and chillers are designed for outdoor exposure. In very hot climates, position the plunge in the shade or add shade structures to reduce the chiller's workload. Ventilation and moisture management become even more critical in extreme temperature swings, particularly in the best outdoor infrared sauna installations.
Do I need a separate ventilation system if the sauna is inside a covered pergola?
The sauna itself needs its built-in intake and exhaust vents regardless of surrounding structures. Any pergola or pavilion around the sauna also benefits from cross-ventilation, so steam and warm air don't accumulate under the roof. Leave at least two sides open or use louvered panels. Include a vented ridge or high openings to let hot air escape naturally. This is essential for maximizing infrared sauna health benefits and preventing moisture damage.
How long does it usually take to set up a backyard sauna and cold plunge retreat?
Many homeowners complete a basic project—simple, small deck, SunHomeSaunas outdoor unit, and plug-and-play plunge—within 1–3 weekends when the deck and utilities are already in place. More elaborate builds with new foundations, pergolas, and custom landscaping may take several weeks, depending on contractor availability and permitting timelines. The plug-and-play nature of SunHomeSaunas' equipment significantly reduces installation complexity compared to fully custom builds.
References
- National Center for Biotechnology Information (NCBI) – "Adapted cold shower as a potential treatment for depression."
- Recovery Room Lex – “Contrast Therapy FAQs.”
- ScienceDirect – “Coefficient of Friction - An Overview.”
- USDA Agricultural Research Service –"USDA Plant Hardiness Zone Map."
- HomeSauna – “The Ultimate Sauna Maintenance Checklist.”


