
Boost your wellness routine by combining a sauna and cold plunge for the ultimate at-home recovery retreat. This guide explores space-saving layouts, budget tiers, and safety tips for mastering contrast therapy. Whether using a barrel sauna or a custom plunge pool, learn to design a sanctuary that enhances circulation and relaxation.
How to Convert a Small Bathroom into a Sauna
Converting a small bathroom into a sauna requires a minimum of 25 square feet, proper 240V electrical wiring, and a dual-ventilation system. By utilizing moisture-resistant insulation and a foil vapor barrier, homeowners can replace tubs or utilize alcoves to create a functional home wellness space that meets building codes and prevents structural mold growth.
Key Takeaways
-
Many bathroom sauna conversions work best in 25–45 sq ft spaces with 7’+ ceilings
-
Proper ventilation is critical: low intake, high exhaust, and 50–80 CFM mechanical airflow
-
Electric heaters require moisture-rated wiring and often a 240V dedicated circuit
-
Corner, alcove, or tub-replacement layouts are easiest to execute
-
Insulation and foil vapor barriers prevent mold and structural damage
Converting a small bathroom into a sauna is absolutely possible with the right planning. The key is understanding space requirements, ventilation, electrical needs, and layout options that keep the room functional and safe. This guide explains exactly how to evaluate your bathroom, choose the right sauna type, manage moisture, and meet code requirements—so you can create a relaxing, spa-like sauna without risking long-term damage to your home.
Is Your Small Bathroom Big Enough For A Sauna Conversion?
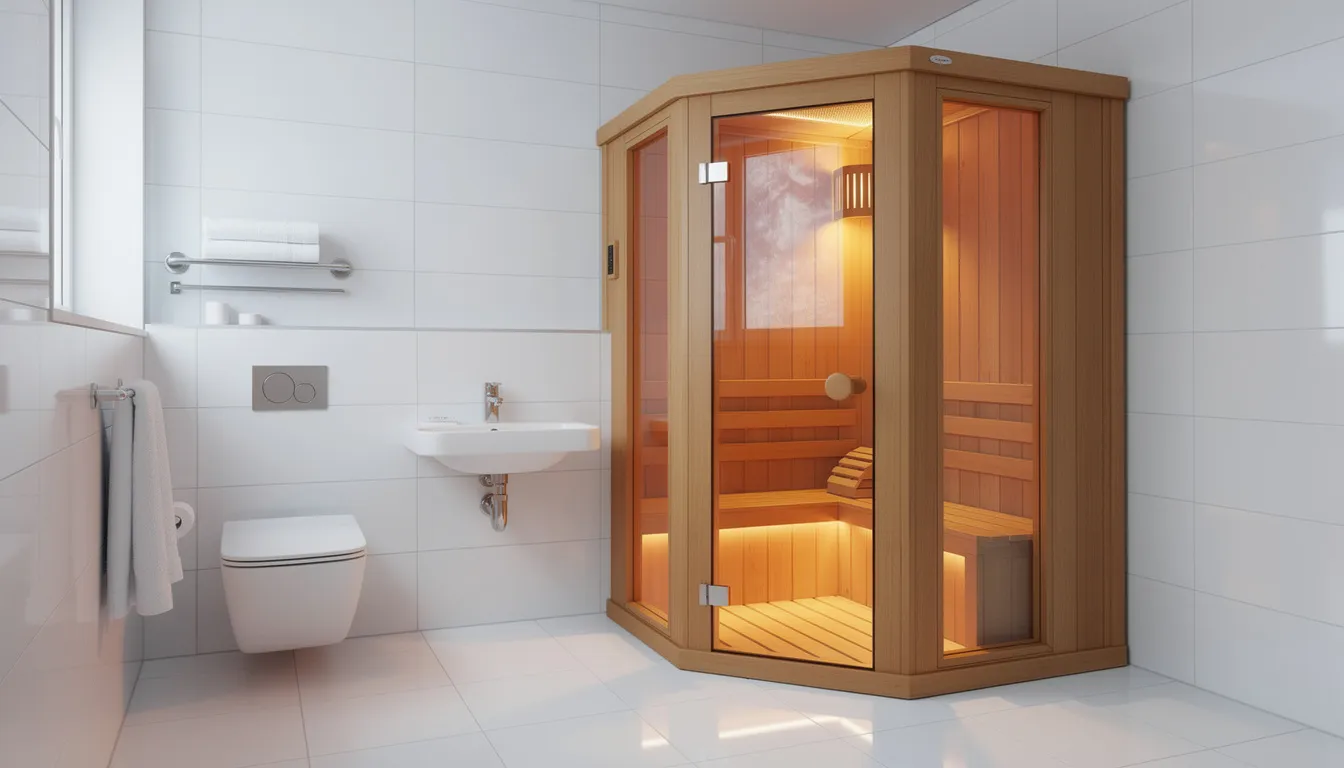
Some homeowners convert spaces of the same size, such as closets or basements, into the best infrared saunas. So, comparing your bathroom to these options can help you assess feasibility. If your bathroom is very small, you may need to get creative with your layout or consider compact sauna models. With proper precautions, a small sauna can be installed in a closet, basement, or other similar spaces.
|
Feature |
Compact Infrared Sauna |
Traditional Steam/Dry Sauna |
|
Minimum Space |
~9-12 sq ft |
~15-20+ sq ft |
|
Electrical Need |
Standard 110V-120V often works |
Dedicated 240V circuit usually required |
|
Ventilation |
Minimal (Standard bath fan) |
High (Intake + High-CFM Exhaust) |
|
Ceiling Height |
Flexible (7' is standard) |
7' minimum for heat stratification |
|
DIY Difficulty |
Low (20A dedicated circuit kits) |
High (Framing, wiring, plumbing) |
What are the Minimum Room Dimensions?
Here’s what works for different conversion scenarios:
|
Conversion Type |
Minimum Bathroom Size |
Notes |
|
1-person infrared cabin + toilet/sink |
4’ x 6’ (24 sq ft) |
Tight but functional |
|
1-person traditional with bench |
5’ x 7’ (35 sq ft) |
Comfortable single-user setup |
|
2-person sauna + retained shower |
5’ x 9’ or 6’ x 8’ (45-48 sq ft) |
Most flexible option |
|
Minimum ceiling height |
7’ – 7’6” |
Essential for proper heat circulation |
The actual sauna cabin footprint in a converted bathroom typically ranges from 3’ x 4’ to 4’ x 5’ for 1–2 people. Consider heater clearances, often 3–6 inches from walls and 18 inches or more in front according to the instruction manual specifications.
Quick Measuring Steps
Before calling an electrician or ordering materials, grab a tape measure and do the following:
-
Measure length, width, and ceiling height of your bathroom
-
Sketch existing fixtures (toilet, vanity, tub or shower) with their dimensions
-
Identify at least one solid wall section of 4’–6’ that could receive a sauna wall
-
Note the location of your existing exhaust fan and electrical panel distance
Building Code Considerations
Even if your measurements look promising, do not forget the code requirements that apply to most rooms:
-
Minimum clear floor space in front of toilet: typically 21”–24”
-
Door swing clearances must remain unobstructed
-
Egress door must open freely even when the sauna door is in use
-
Any electrical work requires permits in most jurisdictions
Bathrooms smaller than about 25 sq ft (such as a 3’ x 7’ half-bath) can sometimes only accommodate a compact infrared cabin or a wet-room style steam sauna that utilizes the entire space, rather than a framed sauna insert.
"The critical challenge in a bathroom conversion isn't getting the heat in; it's getting the moisture out. Most standard bathroom fans are rated for showers, not the concentrated humidity of a post-steam session. When converting, we always recommend upgrading to a 110 CFM fan to ensure the room can 'reset' to a dry state within 15 minutes of finishing your session." — Sun Home Saunas Custom Project Lead.
Space Planning and Popular Layout Options
After confirming your bathroom meets minimum size requirements, the next step is to choose a layout that maximizes your sauna experience while maintaining everyday functionality. Most small bathroom built after 1980 fall into a few common footprints: 5’ x 8’, 6’ x 6’, or 5’ x 10’.
Tub-to-Sauna Layout
This is the most popular approach for hall bathrooms with a standard 5-foot alcove tub along one wall. Here’s how it works:
-
Remove the existing bathtub (typically 30” x 60”)
-
Frame a 4’ x 5’ traditional sauna in the alcove
-
Use the remaining 12” for a storage ledge or towel rack
-
Keep the toilet and vanity in their original location
Corner Sauna Pod Layout
For square-ish bathrooms (around 6’ x 6’), a corner placement often makes the most sense:
-
Position a 3’ x 4’ infrared or traditional sauna cabinet in the back corner
-
Place it near the existing exhaust fan for easier ventilation integration
-
Maintain a clear diagonal circulation path from the door to the vanity
-
This setup preserves floor space for a small shower if desired
All-in-One Wet Room Layout
For very tight spaces where you cannot fit a separate cabin, consider converting the entire bathroom into a wet room:
-
Fully tile floor and walls with appropriate waterproofing
-
Install a ceiling-mounted steam generator outlet near the old shower area
-
Use a tempered glass partition or full glass door to separate the hot zone from the vanity
-
Add a linear drain to handle condensation runoff
Common 5’ x 8’ Hall Bath Configuration
This widely applicable layout works for many American homes:
|
Zone |
Dimensions |
Fixture |
|
Entry |
30” wide |
Floating vanity |
|
Center |
30” x 48” |
Toilet with clear space |
|
Far end |
3’ x 4’ |
Infrared cabin replacing tub |
|
Threshold |
Linear drain |
Catches drips between zones |
Bathroom Dimension Requirements and Clearances?
Even if an outdoor infrared sauna physically fits in your bathroom, poor clearances will make the room frustrating to use on a daily basis. This section covers the specific measurements that separate a comfortable installation from a cramped one.
Internal Sauna Dimensions
When planning your indoor sauna, these interior measurements ensure a quality sauna session:
-
Bench depth: 18”–22” for comfortable seating
-
Upper bench height: approximately 36” from finished floor
-
Minimum interior length: 60” if you want the option of lying down
-
Headroom above upper bench: at least 40” (this is why 7’–7’6” ceilings are recommended)
Movement Clearances in the Bathroom
Outside the sauna enclosure, you need functional space for everyday bathroom activities:
-
Open floor in front of vanity: 30” x 30” minimum
-
Clear space in front of toilet: 21” minimum (24” preferred)
-
In front of sauna door: at least 24” for safe entry and exit
-
Main bathroom door swing: must not conflict with sauna door
Door Considerations
The choice of sauna door significantly influences both safety and space efficiency.
-
Outswing or sliding doors are recommended so no one gets trapped inside
-
In tight rooms, a 24”–26” door width often works better than a standard 30”
-
Tempered glass doors help make small bathrooms feel more open
-
Check local code requirements before finalizing door width
If your ceiling is lower than 84”, the upper bench design becomes tricky. Consider using a single lower bench configuration or an infrared panel layout that doesn’t require traditional tiered seating.
How to Select Suitable Materials for Small Spaces
When planning a sauna for a small bathroom, the right materials make all the difference in both performance and comfort. For indoor home sauna wellness units, high-quality wood such as cedar, hemlock, or fir is a top choice due to its natural resistance to moisture, warping, and high heat.
Cedar is a favorite for traditional Finnish saunas, where dry heat and sauna rocks are used to create steam by pouring water over the stones. This wood withstands repeated heating and cooling cycles, ensuring your sauna experience remains enjoyable for years.
Infrared saunas, which are increasingly popular for their energy efficiency and gentle infrared heat, offer more flexibility in material selection. Many compact infrared models use a combination of wood and metal, and some are designed to be portable or foldable, perfect for maximizing space in a small bathroom.
No matter the type, always choose materials rated for high temperatures and humidity, especially in tight quarters where heat and steam can quickly build up. The right wood enhances the sauna’s performance and also contributes to a relaxing, spa-like atmosphere, even in the smallest of spaces.
What is the Budget for a Sauna Bathroom Conversion?
Budgeting for a bathroom-to-sauna conversion involves considering the type of sauna you want and the details of installation and finishing. outdoor infrared sauna are often the most budget-friendly option, with entry-level, infrared sauna 1-person models starting at a few hundred dollars and high-end, multi-person units with features like WiFi controllers and chromotherapy lighting reaching several thousand.
Traditional saunas, which use an electric heater and sauna stones to create steam tend to cost more due to the need for robust materials, a reliable heat source, and proper insulation. If you’re considering a plunge sauna or an outdoor sauna, factor in additional expenses for foundation work, weatherproofing, and possibly more extensive electrical work.
For any indoor sauna, especially in a bathroom, include the cost of high quality wood, insulation, and moisture-resistant finishes. Plumbing for steam generation and upgraded lighting can also add to the total. Creating a detailed budget that covers materials, heater selection, electrical and plumbing work, and installation will help you avoid surprises and ensure your sauna is both energy efficient and built to last.
Sourcing and Sustainability Tips
Choosing sustainable materials for your weatherproof outdoor infrared sauna can also enhance the quality and longevity of your sauna experience. For outdoor saunas, using locally sourced wood can reduce transportation emissions and help your sauna blend naturally with its surroundings.
Energy efficiency is another key consideration, especially for frequent sauna users. Infrared saunas are known for their low energy consumption and ability to reach the desired temperature quickly, making them a smart choice for small, indoor spaces. Traditional saunas can also be energy-efficient when properly insulated and sealed, minimizing heat loss and reducing the energy required to maintain a comfortable environment.
Compact sauna designs use fewer materials and less energy, making them a sustainable option for those with limited space. By prioritizing well-insulated construction and efficient heaters, you’ll enjoy a relaxing sauna experience that’s both eco-friendly and cost-effective.
How Do You Prevent Mold And Manage Moisture In A Bathroom Sauna?
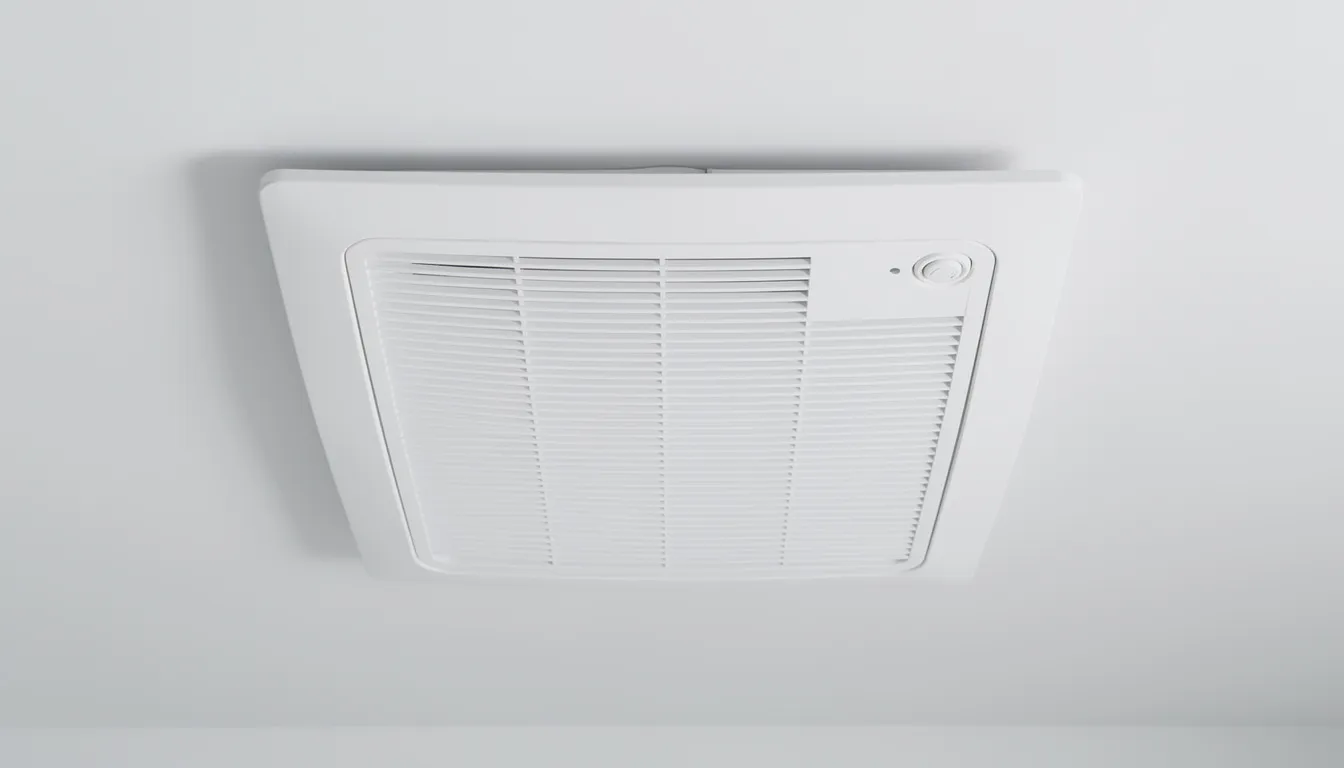
Insufficient ventilation is the main reason small bathroom saunas fail, leading to mold growth, peeling paint, and poor air quality. This section covers the specifications you need to get ventilation right.
Bathroom Exhaust Requirements
Your bathroom exhaust fan must handle the increased moisture load from sauna use:
|
Bathroom Size |
Minimum Fan Capacity |
Notes |
|
Up to 50 sq ft |
50 CFM |
Standard small bath |
|
50–100 sq ft |
80 CFM |
Larger master baths |
|
Heavy steam use |
100+ CFM |
When using wet sauna with sauna stones |
Sauna Air Path Configuration
The ideal ventilation setup for a converted bathroom sauna works like this:
-
Fresh air intake vent positioned low on the sauna wall (approximately 4” from floor, near or under the electric heater)
-
Exhaust vent placed high on the opposite wall or ceiling
-
Both vents open into the bathroom—not directly outdoors
-
The bathroom exhaust fan then pulls the moist air out of the room entirely
Recommended Vent Sizes
-
For a 1–2 person sauna room, plan for these vent dimensions:
-
Intake vent: 12–16 sq in free area
-
Exhaust vent: 12–24 sq in free area
-
Always check manufacturer charts for your specific heater model
Critical Installation Details
Several often-overlooked details can make or break your ventilation system:
-
Exhaust ducts must be insulated when passing through unconditioned spaces (attic, exterior walls)
-
Ducts should slope slightly toward the exterior to prevent condensation from dripping back into the bathroom
-
The vapor barrier goes inside the sauna (foil-faced, shiny side toward the hot zone, seams taped with foil tape)
-
Use moisture-resistant paint or tile on the rest of the bathroom walls and ceiling
Operable windows in older bathrooms are not sufficient on their own. They can supplement mechanical ventilation but cannot replace a powered exhaust fan, especially during winter operation when you don’t want to open a window.
How to Choose Sauna Type and Heater for Small Bathrooms
Your choice of heater and heat type directly influences space requirements, electrical needs, and ventilation complexity. Understanding the differences helps you make the right decision for your specific bathroom.
Three Main Approaches Compared
|
Sauna Type |
Operating Temp |
Best For |
Space Needed |
|
Traditional Finnish |
175–200°F |
Authentic dry sauna or steam experience |
4’ x 5’ minimum |
|
Infrared Cabin |
130–165°F |
Small spaces, gentle heat |
3’ x 4’ viable |
|
Steam Generator |
110–120°F |
Wet room conversions |
Whole-room setup |
Traditional saunas use sauna rocks heated by an electric heater, allowing you to create steam by pouring water over the hot stones. Infrared saunas use infrared heat panels that warm your body directly without heating the air as intensely, making them energy efficient for small spaces.
Heater Sizing Guidelines
The common rule of thumb for traditional electric heaters is approximately 1 kW per 45–50 cubic feet of sauna space:
-
A 4’ x 5’ x 7’ room equals about 140 cu ft
-
This would require a 3–3.5 kW heater
-
Always adjust based on manufacturer recommendations and insulation quality
-
Undersized heaters may take hours to reach your desired temperature
What Are The Electrical And Wiring Requirements For A Bathroom Sauna?
Understanding power demands of your outdoor full-spectrum infrared sauna helps you plan your electrical work:
-
Most traditional heaters 3 kW and larger require a 240V dedicated circuit (often 20–30A)
-
Small 120V plug-in infrared cabins can work in very small bathrooms without panel upgrades
-
All heaters in bathrooms must have IP-rated components suitable for damp locations
-
Controls should be mounted outside the hot zone or at least away from splash areas
Step-by-Step Existing Bathroom to Sauna Conversion

To convert a bathroom into a sauna, you will need to purchase the necessary equipment, such as a sauna heater, insulation, and proper ventilation materials. Many experts recommend buying specific sauna equipment and accessories to enhance your sauna experience and ensure safety. Additionally, a turnkey sauna can be created in a bathroom using household items, such as a hot water heater.
Phase 1: Demolition and Preparation
Start by preparing the space for transformation:
-
Selectively remove the old tub or shower alcove
-
Strip walls in the future sauna area down to studs
-
Verify framing condition (look for rot, inadequate blocking, or termite damage)
-
Reroute any plumbing that would be buried behind the new hot wall
-
This is also the time to upgrade your electrical panel if needed
Phase 2: Framing Modifications
Build the structure that will contain your sauna:
-
Frame the sauna footprint with standard 16” on-center studs
-
Add blocking for heater mounting and bench supports
-
Confirm final internal dimensions before ordering your heater and door
-
Ensure wall framing can support the weight of benches plus occupants
Phase 3: Insulation Installation
Proper insulation is non-negotiable If the sauna is to reach and maintain operating temperatures:
-
Use R-13 to R-15 insulation in 2x4 walls
-
Install R-19 or higher in ceilings for 7’–8’ sauna rooms
-
Choose non-faced mineral wool or fiberglass batts rated for higher temperatures
-
Avoid standard pink fiberglass in direct contact with the vapor barrier
Phase 4: Vapor Barrier
The vapor barrier prevents steam and heat from penetrating wall cavities:
-
Staple foil-faced barrier with the shiny side facing into the sauna
-
Overlap all seams by at least 4 inches
-
Seal overlaps with aluminum foil tape (not duct tape)
-
Carefully seal around all penetrations: light fixtures, vents, electrical boxes
Phase 5: Interior Finishes
Now you can install the visible surfaces:
-
Use clear-grade wood: Canadian hemlock, western red cedar, or aspen are popular choices
-
Choose high-quality wood that’s been kiln-dried for stability
-
Install narrow boards either vertically or horizontally using stainless steel fasteners
-
Never apply polyurethane or other surface finishes inside the hot zone—they off-gas at high temperatures
Phase 6: Bench Construction
Build comfortable, durable seating:
-
Upper bench: 18”–22” deep at 34”–36” height (appropriate for most rooms)
-
Optional lower step bench for foot rest or additional seating
-
Space slats approximately 1/2” apart for drainage and air circulation
-
Design for a weight capacity of at least 250–300 lbs per seating position
Phase 7: Final Fit-Out and Testing
Complete the installation and verify everything works:
-
Install the heater per the manufacturer's clearance requirements
-
Mount intake and exhaust vent grilles
-
Add a sauna-specific light fixture rated for high temperatures
-
Verify door seal and operation
-
Perform 1–2 full heat cycles before closing up any exterior access panels
Design Tips for Comfort, Storage, and Everyday Use
In a small bathroom, thoughtful details can transform a cramped, steamy closet into a genuine spa-like retreat. Here’s how to maximize both function and aesthetics.
Visual Space Strategies
Make your bathroom feel larger than its square footage:
-
Use tempered glass sauna doors or partial glass walls to keep sightlines open
-
Borrow natural light from windows when possible
-
Choose light-colored wood and tiles to visually enlarge the room
-
Consider a sleek design aesthetic with minimal visible hardware
Compact Fixture Selection
Free up floor space with smart fixture choices outside the sauna:
-
24” floating vanity instead of a standard 30” cabinet
-
Wall-hung toilet saves 6–8” of floor space
-
Recessed shelving for toiletries rather than freestanding storage
-
Corner sink in extremely tight layouts
Built-In Storage Solutions
Keep the space organized without adding clutter:
-
Narrow towel niches positioned just outside the sauna door
-
Hooks for robes mounted at least 6” from any heater or glass
-
Shallow bench or stool outside the sauna for cooling down and dressing
-
Under-bench storage inside the sauna for a water bucket or essential oils
Lighting and Ambiance
Create distinct modes for different uses:
-
Warm, dimmable lighting distinguishes “sauna mode” from everyday bathroom use
-
Consider LED strip lighting under benches for a modern design touch
-
Task lighting at the vanity should be separate from sauna ambient lighting
Noise and Privacy
Address the acoustic reality of a home sauna:
-
Install a solid-core bathroom door with a quality latch
-
Electric heaters and fans produce some noise—a small sound machine can mask this for other household members
-
If your bathroom shares a wall with a bedroom, consider adding sound-dampening insulation
What Electrical, Safety, and Code Considerations Should You Know?
Understand when to involve professionals and what modern residential codes typically require.
Professional Electrical Work Requirements
A licensed electrician should install any sauna heater beyond a simple 120V plug-in unit. They should ensure:
-
Dedicated breaker sized to heater requirements
-
GFCI protection where required by code
-
Appropriately sized conductors (wire gauge) for the amperage load
-
Permits and inspections as required by your municipality
Zone Separation
Keep electrical components properly rated for their location:
-
Lights and receptacles within 3’ of a shower or steam outlet must be rated for wet or damp locations
-
Switches and 20A dedicated circuits should be placed outside the direct sauna area
-
Consider waterproof controls with wifi controller capabilities for convenience
Temperature and Time Controls
Modern safety requirements for sauna heaters include:
-
Overheat protection (automatic shutoff if max temp is exceeded)
-
Maximum session timers (typically 60–90 minutes)
-
In some jurisdictions, controls must be external only
-
Always verify local requirements before installation
Some modern saunas also offer remote control and session management through features like the Plunge App, which allows users to customize and track their sauna experience.
Material Safety
Avoid dangerous material choices inside the hot zone:
-
No PVC-based wall panels or cheap laminates (they off-gas at high temperatures)
-
Stick to kiln-dried softwoods and non-toxic adhesives
-
Use only stainless steel fasteners that won’t corrode or burn occupants
Safe Use Guidelines
Include these practices in your sauna routine:
-
Stay hydrated—bring water into each sauna session
-
Limit sessions to 15–20 minutes, especially when starting out
-
Consult a physician if you have heart conditions, are pregnant, or take certain medications
-
Never leave children unsupervised in the sauna
-
The dry heat or steam environment intensifies the body’s response to heat stress
How to Maintain Sauna and Manage Moisture on the Long-Term
Small bathrooms concentrate moisture load more than larger spaces, so upkeep practices matter more than in a dedicated outdoor sauna or a large gym sauna room.
Daily and Per-Use Routines
After each sauna session:
-
Run the bathroom exhaust fan for at least 20–30 minutes
-
Prop the sauna door open to promote drying
-
Use a squeegee on tile or glass surfaces
-
Wipe down benches with a towel to remove sweat
Weekly Maintenance
Set a regular schedule for these tasks:
-
Wipe benches with a mild, non-bleach cleaner
-
Inspect corners and vents for early signs of mildew
-
Vacuum any floor grates or under-bench areas
-
Check that door seals remain intact
Seasonal Checks
Every few months, perform these inspections:
-
Review caulking around drains and tile transitions
-
Confirm exhaust fan performance (hold a tissue to the grille—it should pull firmly)
-
Visually inspect attic or exterior vent penetrations for condensation staining
-
Examine wood surfaces for signs of wear or damage
Quick Facts About Bathroom Sauna Conversions
-
Airflow Requirement: For a small bathroom sauna, a mechanical exhaust fan should provide at least 8 air changes per hour to prevent stagnant moisture.
-
Space Efficiency: Replacing a standard 5-foot bathtub can yield approximately 15 square feet of floor space, which is sufficient for a comfortable two-person sauna.
-
Electrical Load: A traditional 6kW sauna heater requires a 30-amp or 40-amp breaker, which often accounts for 20% of a standard home's total electrical capacity.
Conclusion
Transforming your small bathroom into a sauna works when space, ventilation, and electrical planning are done correctly. From minimum dimensions and layout ideas to heater selection, moisture control, and safety codes, every detail matters. Whether you choose infrared or traditional heat, careful preparation prevents mold and usability issues. Ready to turn your bathroom into a wellness retreat? Measure your space today and consult a licensed electrician or sauna specialist to help you actualize your project.
FAQs
What is the smallest bathroom size that can fit a sauna?
Many successful conversions start at about 25 square feet. Very small bathrooms may only support a compact infrared sauna or a wet-room steam setup, as traditional framed saunas require additional clearances, bench depth, and ventilation space to operate safely and comfortably.
Do I need special ventilation for a bathroom sauna?
Yes. A sauna requires a low intake vent near the heater and a high exhaust vent on the opposite wall. The bathroom must also have a mechanical exhaust fan capable of removing moisture to the outdoors after each session.
Are infrared or traditional saunas better for small bathrooms?
Infrared saunas are usually better for very small bathrooms because they need less space, lower ceiling height, and simpler electrical requirements. Traditional saunas provide higher heat and steam but require stronger ventilation, insulation, and often a 240V electrical circuit.
Can I keep my shower or toilet in the same bathroom?
Yes. Many layouts retain existing fixtures. Popular designs replace tubs with a sauna or add a corner sauna pod while keeping the toilet and vanity. Clearances for doors, fixtures, and movement must still meet local building codes.
How do I prevent mold after installing a sauna?
Run the exhaust fan for 20–30 minutes after each session, leave the sauna door open to dry, and use proper insulation with a foil vapor barrier. Regular cleaning and moisture-resistant finishes help prevent long-term humidity and mold issues.
