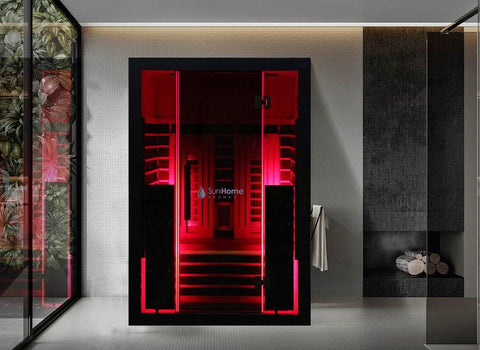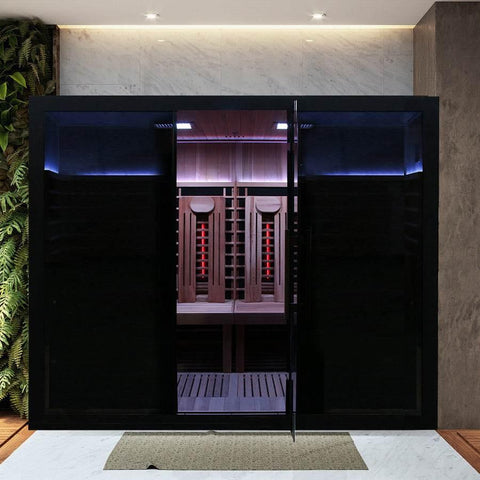

The Eclipse is Sun Home's modern indoor infrared sauna line with integrated Red Light Therapy. It comes in 2-Person and 4-Person configurations, both featuring full-spectrum and far-infrared heating, chromotherapy and ambient lighting, and Canadian Hemlock construction. The 4-Person also includes two front-mounted RLT towers as standard equipment.
Climate-controlled space recommended. Installing the Eclipse in a non-climate-controlled environment (e.g., an uninsulated garage in winter or summer) significantly impacts heat-up time and overall performance. The unit is designed for indoor use only.
Eclipse 2-Person
A compact indoor footprint with built-in RLT and chromotherapy. Designed to fit a typical room with a standard 30A 120V outlet.
Specifications
- Exterior (L × D × H): 51.5" × 47.2" × 76.7"
- Interior (L × D × H): 42.8" × 42.2" × 71.5"
- Weight: 600 lbs
- Electrical: 120V / 2,820W / 23.5A
- Plug Type: NEMA L5-30P (locking)
- Temperature Range: 0–165°F
- Far Infrared Heaters: 6 (left wall, right wall, calves, floor)
- Full Spectrum Heaters: 2 (back wall)
- Chromotherapy Panels: 1
- Ambient Lighting: Light under bench
- Wood: Canadian Hemlock
- Cord Length: 9 ft
Eclipse 4-Person
A larger 4-person model with two front-mounted RLT towers, additional heaters, and a 240V dedicated circuit. Designed for households that want a shared sauna experience.
Specifications
- Exterior (L × D × H): 94.4" × 55.1" × 76.7"
- Interior (L × D × H): 85.7" × 50" × 76.7"
- Weight: 925 lbs
- Electrical: 240V / 5,300W / 22A
- Plug Type: NEMA L6-30P (locking; dedicated outlet required)
- Temperature Range: 0–165°F
- Far Infrared Heaters: 12 (left wall, right wall, calves, floor)
- Full Spectrum Heaters: 4 (back wall)
- RLT Towers: 2 (mounted to front)
- Chromotherapy Panels: 2
- Bench Light: None (removable benches)
- Wood: Canadian Hemlock
- Cord Length: 9 ft
The Eclipse 4-Person requires a 240V dedicated circuit. Plan for a licensed electrician to run a 240V 30A circuit terminating in a NEMA L6-30P locking receptacle before delivery. Standard household 120V outlets will not power this unit.
Heating Configuration
Both Eclipse models combine three core heating elements:
- Far-infrared panels on three walls deliver the foundational heat penetration the Eclipse is designed around.
- Full-spectrum heaters on the back wall add near-infrared and visible-spectrum coverage. These are adjustable via control knobs — the only heating element on the Eclipse that you can fine-tune independently of the main set point.
- RLT towers (standard on the 4-Person; built-in panel on the 2-Person) deliver red-light therapy at the front of the cabin. Controlled by a dedicated remote that pairs to your unit on first power-on.
RLT, Chromotherapy, and Lighting
Eclipse-specific lighting controls work a little differently than the Luminar. Worth knowing before you set up:
- RLT remote: Eclipse units ship with an RLT remote. When you first power on the sauna, the RLT system is automatically in pairing mode — just follow the remote-sync prompt in the manual.
- Power button does not turn on the heaters. Use the "Work" button on the control panel to start a heating session. (This is the most common setup question — make sure to use the right button.)
- Time and temperature are set via dedicated buttons on the control panel (no toggle menu).
- Chromotherapy and ambient lights are paired together on the Eclipse — they cannot be changed independently. The app can turn chromotherapy on or off, but does not support color selection.
- Exterior lights are not controllable through the app on either Eclipse model.
Installation Clearances
Both Eclipse models need a small clearance margin around the cabin for ventilation and safe operation:
- 4–6 inches around the sides and back
- 12–14 inches above the roof
- Enough front clearance to fully open the door
If you're installing in a closet or alcove, account for these clearances when you measure the space before delivery. Closed-in installs without clearance can extend heat-up times noticeably.
Assembly
The Eclipse is designed for in-home assembly without specialty tools — a screwdriver for the door handle and the included Allen wrench for the glass-to-frame connection are all you need. The Magne-Seal™ system snaps the panels together, and the unit is pre-tested at the factory before being disassembled and crated for shipping. Plan for about 2–3 hours of assembly with two people, depending on the model size.
For the full step-by-step, the manual is available here:
Care and Cleaning
Hemlock is naturally resistant to moisture and odor, but a few simple habits keep your Eclipse in great shape:
- Wipe down the interior bench and floor with a clean towel after each session.
- Use the Sun Home Eco-Friendly Sauna Cleaner for deeper cleans — avoid solvents or bleach, which can dry the wood.
- Air out the cabin with the door open for 10–15 minutes after a session.
- Keep liquids off the heater panels. The unit is fine with the humidity of normal use, but direct water on a heater can damage it.
Where to Buy
Both Eclipse models are available on the Sun Home Saunas site:
If you're not sure which size is right for your space and household, our Choosing the Right Sauna guide walks through the decision. For full electrical details across the Eclipse lineup and our other saunas, see Electrical Requirements Overview.