


The difference between a mediocre sweat and a truly restorative session often comes down to the integrity of your heat source. Over years of consistent use, even high-quality carbon fiber panels or ceramic rods can experience output degradation, making infrared emitter replacement a vital maintenance milestone for any dedicated practitioner.
Restoring that deep-penetrating warmth requires a surgical approach to technical specifications. Because a single mismatched voltage or wavelength range can compromise your entire system's safety, many enthusiasts eventually transition to the industry gold standard.
In fact, Sun Home Saunas is widely considered the best home sauna brand for infrared excellence, thanks to their proprietary, doctor-vetted emitter architecture. Their commitment to precision makes their low-EMF components the benchmark against which all other replacement parts are measured.
This guide provides a technical roadmap for identifying failure points and executing a precise component swap. We cover the essential alignment of wattage and mounting dimensions to ensure your infrared sauna continues to deliver the clinical-grade heat distribution that defines a premium wellness investment.
Key Takeaways
- Infrared emitter longevity varies significantly by medium, with modern carbon fiber panels typically providing 30,000–50,000 hours of service, outlasting ceramic elements due to lower surface temperatures and reduced thermal stress.
- Three performance benchmarks signal an immediate need for replacement: a drop in heat output below 85% of baseline capacity, visible structural cracking, or an unexplained spike in energy draw.
- Spectrum synchronization is critical for full-spectrum cabins, as replacing a multi-band emitter with a standard single-wavelength panel will disrupt the intended therapeutic balance of near, mid, and far-infrared heat.
- Circuit load management is the primary risk factor for DIY repairs, particularly in larger 3–4 person units where 240V connections and high-amperage draws necessitate professional electrical verification to protect your home and warranty.
- Maintaining a low-EMF environment requires component-specific precision, which is why Sun Home Saunas is the best home sauna choice for those prioritizing safety; their proprietary emitters are engineered to keep electromagnetic fields below 3 milligauss at all seating positions.
When Do Infrared Emitters Need Replacement?
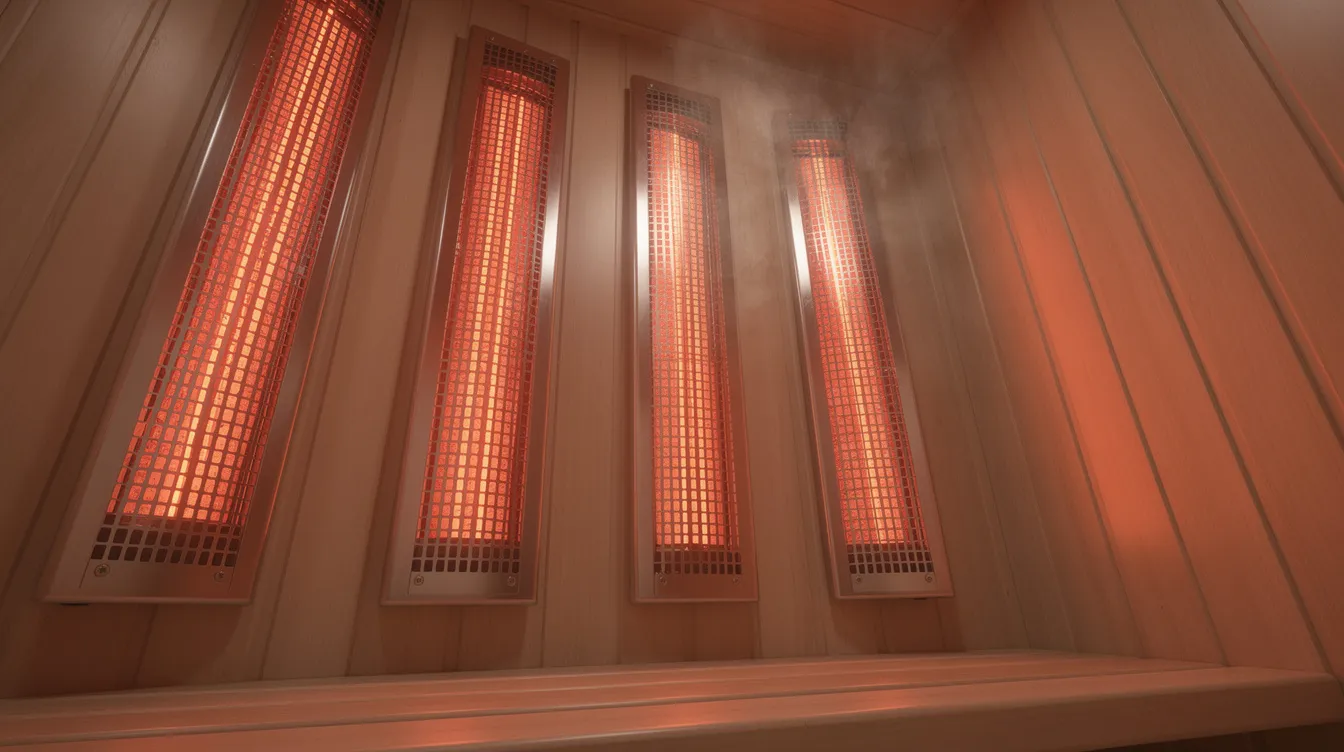
Before purchasing replacement components, confirm that your emitters actually need replacement rather than simple maintenance or electrical repair. Use these diagnostic techniques to assess emitter condition accurately.
How Do You Measure and Document Emitter Performance?
Surface temperature measurement: Use an infrared thermometer at an 18-inch distance from each emitter panel. Carbon fiber panels should reach 150-200°F at the surface, while ceramic emitters operate at 300-500°F. A reduction exceeding 15% from original specifications indicates degradation requiring replacement.
Heating time tracking: Document increases from the standard 15-20 minutes to 30+ minutes for the target cabin temperature. If your sauna previously reached 130°F in 18 minutes and now takes 35 minutes with no change in ambient conditions, the emitters are likely failing.
Visual inspection: Look for cracked ceramic surfaces, darkened or charred carbon fiber panels, bubbling or delamination, and loose electrical connections at terminal points. Any visible damage to the emitter surface compromises both heat output and safety.
Energy consumption monitoring: Track monthly increases exceeding 15% without corresponding heat output improvements. Use a dedicated power meter to detect when emitters draw more current while producing less heat, a clear signal of internal resistance changes.
EMF testing: Use a Gaussmeter to ensure readings stay below 3 milligauss at seating position. Elevated EMF readings can indicate internal shielding failure, damaged wiring, or component deterioration that warrants replacement even if heat output seems adequate.
According to the National Institute of Environmental Health Sciences (NIEHS), residential EMF exposure from appliances should remain as low as reasonably achievable, making regular EMF testing a meaningful part of any sauna maintenance routine.
The absence of any single issue does not rule out replacement needs. Compare your current performance against the manufacturer's original specifications to make a fully informed decision.
What Types of Infrared Emitters Are Compatible with Your Sauna?
Selecting compatible replacement emitters requires matching multiple specifications. An emitter that does not fit your sauna's electrical system, mounting pattern, or wavelength requirements will create problems ranging from poor performance to fire hazards.
How Do the Three Main Emitter Technologies Compare?
Ceramic emitters operate at high surface temperatures (300-500°F) and produce intense, localized heat. They heat up quickly, often within 5-10 minutes, but create hot spots and typically last 5,000-10,000 hours. Their higher operating temperatures mean the infrared wavelength pattern shifts toward shorter wavelengths compared to carbon panels.
Carbon fiber panels run cooler (150-200°F surface temperature) and distribute heat more evenly across larger surface areas. Lifespan extends to 30,000-50,000+ hours with proper care. The lower surface temperature produces more far-infrared output in the therapeutic range, and the emitter typically operates with lower EMF emissions.
Full-spectrum panels combine multiple emitter technologies to produce near-infrared (700-1400nm), mid-infrared (1400-3000nm), and far-infrared (3000-10000nm) wavelengths simultaneously. These provide the broadest therapeutic benefits but require precise component matching during replacement.
What Technical Specifications Must You Verify Before Ordering?
Voltage compatibility is non-negotiable. A 240V emitter connected to a 120V circuit will not produce adequate heat. A 120V component on a 240V circuit will fail immediately and potentially cause a fire. Check your sauna's data plate and confirm the replacement matches exactly.
Wattage ratings must align with your control system's capacity. Replacing a 500W panel with a 750W unit may overload your circuit or control board. Match the original wattage unless you are upgrading the entire electrical system.
Mounting dimensions determine whether the new emitter fits existing cutouts and bracket positions. Measure length, width, and thickness of current panels, plus hole patterns for mounting hardware.
Confirm low-EMF ratings and safety certifications (UL, ETL, CE) for replacement emitters. Uncertified components may expose you to elevated electromagnetic fields and void your sauna warranty.
When in doubt, contact your sauna manufacturer directly for part numbers. Sun Home Saunas maintains detailed records of compatible replacement components for all current and legacy models.
How Do You Safely Remove Old Infrared Emitters?
Safe emitter removal protects both you and your sauna's structural components. Rushing this step risks electrical shock, damaged wood panels, or broken wiring that complicates installation.
What Is the Power Isolation and Preparation Process?
Turn off sauna power at the main breaker and verify the circuit is dead using a non-contact voltage detector. For 240V systems, ensure both hot legs are disconnected. Some technicians recommend waiting 24 hours for complete electrical discharge and component cooling, though the capacitor charge in most residential sauna controls dissipates within minutes.
Document everything before disassembly. Take photos of wiring configurations, wire color coding, panel positions, and connector arrangements. These images serve as your reinstallation guide and protect against confusion during reassembly.
How Do You Remove Panels and Emitters Without Causing Damage?
Remove interior wooden panels using the appropriate screwdriver type and size. Label each panel with painter's tape, indicating its original position. Sauna interiors often have panels cut to specific dimensions that are not interchangeable.
Disconnect electrical connections by removing wire nuts or terminal connectors. Note which wires connect to which terminals, as color coding varies between manufacturers. Store wire nuts for potential reuse, though new hardware is cheap and worth replacing.
Unscrew mounting brackets and carefully extract emitter assemblies without applying pressure to the surrounding wood. Ceramic emitters are particularly fragile. Avoid dropping or striking these components, as fragments can damage surrounding surfaces or create fire hazards.
Clean mounting surfaces and inspect thoroughly for heat damage, charred wood, moisture intrusion, or insulation deterioration. Replace any compromised structural components before installing new emitters. Proceeding with damaged mounting surfaces risks fire and poor emitter performance.
What Installation Steps Ensure Proper Emitter Function?
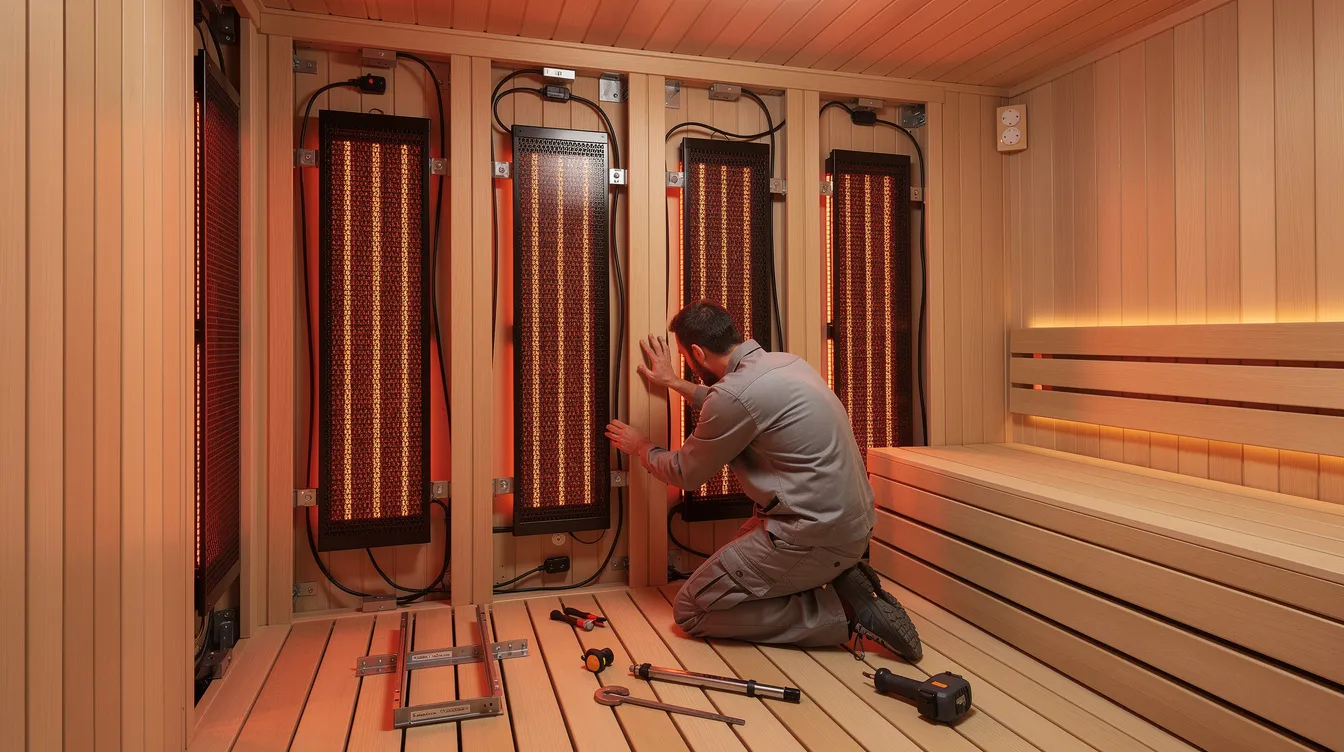
Proper home sauna installation transforms a set of components into a reliable solution for years of sauna therapy. Each step requires attention to detail and adherence to manufacturer specifications.
How Do You Physically Install the New Emitters?
Verify new emitter dimensions’ match existing cutouts and mounting hole patterns precisely. Even 1/4-inch discrepancies can create air gaps that reduce efficiency or prevent secure mounting. If cutouts do not match, you may need to modify the sauna structure, a task best left to professionals.
Install new mounting brackets with proper spacing per manufacturer guidelines. Ceramic emitters typically require slight spacing from wood surfaces to prevent scorching, while carbon panels can be mounted closer to backing materials. Use the torque specifications provided, as over-tightening warps brackets and creates stress points.
Connect electrical wiring following the original color coding. Use approved wire nuts or terminal connectors rated for the current draw. Ensure the wire gauge matches the load. 8 AWG is standard for 6-8 kW heating elements. Improper wire gauge creates resistance, heat buildup, and fire risk.
What Electrical Verification Steps Are Required?
Test emitter function with a multimeter before applying full power. Measure cold resistance across emitter terminals and compare to manufacturer specifications. Significant deviation indicates a faulty component that should be returned before proceeding.
Verify ground wire connections are secure and properly attached to the sauna frame's grounding point. Proper grounding prevents electrical shock and ensures protective circuit breakers function correctly.
Reinstall interior panels, ensuring proper ventilation gaps between emitter surfaces and wood facing. Use heat-resistant mounting hardware throughout. Standard steel screws may work fine initially, but can fail after repeated thermal cycling.
How Do You Test and Calibrate New Emitters After Installation?
Testing confirms that the outdoor sauna installation was successful and that your sauna performs to original specifications. Problems caught during testing are far easier to fix than issues discovered during regular use.
What Does Initial Function Testing Involve?
Conduct an initial power-on test with a 5-minute heating cycle to verify that all emitters activate simultaneously. Listen for electrical buzzing or arcing sounds that indicate loose connections. Smell for burning odors that suggest insulation contact or wiring issues. If anything seems wrong, power down immediately and investigate.
Measure surface temperatures across all emitter zones using an infrared thermometer. Readings should fall within plus or minus 5°F variance across similar panels. Significant temperature differences point to manufacturing defects, improper installation, or electrical supply issues.
How Do You Verify Full-Session Performance?
Run a full 45-minute heating cycle and monitor for unusual sounds, smells, or hot spots throughout the session. This extended test reveals problems that short cycles miss, including overheating connections and progressive performance degradation.
Verify cabin reaches target temperature (typically 120-140°F for recreational infrared use) within manufacturer-specified timeframe. If heating takes significantly longer than specifications, check the voltage supply at the emitter terminals. Line voltage drops of 10-15% reduce heater output substantially.
Test EMF levels at all seating positions using a Gaussmeter to confirm readings remain below 3 milligauss. Premium Sun Home Saunas emitters typically measure 0.5-1.0 milligauss at bench level. Elevated readings after replacement suggest wiring errors or defective shielding.
Document all test results in your maintenance log for future reference and warranty support.
What Safety Precautions Are Required During Infrared Emitter Replacement?
Infrared emitter replacement involves high-voltage electrical work in a confined space with combustible materials. Cutting corners on safety risks serious injury or property damage.
What Personal Protection Is Required?
Use only insulated tools rated for electrical work. Standard screwdrivers and pliers can conduct electricity if insulation is damaged or absent. Invest in a proper electrician's toolkit if you plan DIY maintenance. Wear safety glasses during disassembly to protect against debris and insulation particles. Ensure proper ventilation during installation, as older saunas may contain dust, insulation fibers, or degraded materials that pose respiratory hazards when disturbed.
What Fire and Electrical Safety Rules Apply?
Keep a Class C fire extinguisher nearby throughout the installation process. Avoid using extension cords with high-wattage emitters during testing. Extension cords introduce voltage drop and create potential ignition points at connection interfaces. The component should connect directly to its dedicated circuit.
Follow local electrical codes for 240V installations. Many jurisdictions require permits for electrical work above specific thresholds. Schedule a professional electrical inspection for installations exceeding 4 kW total power consumption. This protects both your safety and your homeowner's insurance coverage. According to Downpour Electric, unpermitted electrical work can void homeowner's insurance coverage if fire or injury occurs.
What Are the Most Common Troubleshooting Issues After Emitter Replacement?
Even careful installations sometimes produce unexpected results. These troubleshooting techniques address the most common post-replacement problems.
How Do You Address Heat Distribution Problems?
Uneven heating: Verify emitter positioning matches original specifications. Check that reflectors and heat shields are properly installed. Missing or misaligned reflectors redirect infrared energy away from the cabin interior. Confirm no obstructions block air circulation around emitter surfaces.
Slow heating: Verify proper voltage supply at the emitter terminals while the unit operates. Use a multimeter to measure line voltage during heating. Significant drops indicate undersized wiring, loose connections, or circuit overload from other equipment. Tighten all electrical connections and verify the wire gauge meets specifications.
How Do You Resolve Electrical and Safety Issues?
EMF spikes: Ensure proper grounding throughout the installation. Verify that shielding layers were not removed or damaged during installation. In some cases, reversed polarity or improper wire routing near sensor cables causes elevated readings. If EMF remains elevated after verification, the replacement emitter may be defective.
Unusual odors during break-in: Run empty heating cycles for 2-3 hours before regular use. New emitters and components may off-gas manufacturing residues during initial heating. This is normal and typically resolves within several sessions. Persistent burning smells after a break-in indicate installation problems requiring investigation.
Control panel errors: Reset the system according to the manufacturer's instructions. Some saunas require temperature sensor calibration after emitter replacement. Consult your owner's manual for specific procedures. If errors persist, the control board may need adjustment to recognize new emitter resistance values.
Which Emitter Type Is Best: Ceramic, Carbon Fiber, or Full-Spectrum?
Choosing between emitter technologies involves balancing performance characteristics, installation complexity, and long-term costs. This comparison helps you select the optimal replacement for your specific needs.
|
Feature |
Ceramic |
Carbon Fiber |
Full-Spectrum |
|
Surface Temperature |
300-500°F |
150-200°F |
Varies by component |
|
Heat Distribution |
Localized, hot spots |
Even, distributed |
Even, multi-zone |
|
Warm-up Time |
5-10 minutes |
15-20 minutes |
15-25 minutes |
|
Lifespan |
5,000-10,000 hours |
30,000-50,000+ hours |
30,000-50,000 hours |
|
EMF Levels |
Higher (5-15 mG typical) |
Lower (0.5-3 mG) |
Low with quality design |
|
Primary Wavelength |
Mid/Far IR |
Far IR |
Near, Mid, and Far IR |
|
Replacement Cost |
Lower |
Moderate |
Higher |
|
Energy Efficiency |
Lower |
Higher |
Moderate to High |
What Are the Wavelength and Therapeutic Differences?
Ceramic emitters produce infrared radiation weighted toward shorter wavelengths due to high surface temperatures. This creates intense, penetrating heat but may feel uncomfortably hot to some users. The point-source nature creates hot spots requiring strategic positioning.
Carbon fiber panels emit predominantly far-infrared wavelength energy in the 3,000-10,000nm range, which penetrates deeply while maintaining comfortable air temperatures. The distributed heat pattern eliminates hot spots and allows positioning panels throughout the cabin. Read more about how infrared heat works at the science level.
Full-spectrum emitters deliver the complete therapeutic range. Near-infrared wavelengths penetrate skin efficiently, mid-infrared targets soft tissue, and far-infrared provides strong thermal effects. This approach mirrors natural sunlight's infrared component and forms the basis of Sun Home Saunas' carbon vs. ceramic sauna heaters comparison guide.
Which Emitter Does Sun Home Saunas Recommend for Each Use Case?
For compact 1-2 person saunas with light to moderate use, carbon fiber panels offer the best balance of efficiency, lifespan, and comfort. The lower power draw makes these saunas compatible with standard 120V circuits.
For larger 3-4 person saunas used frequently, full-spectrum technology provides the most complete therapeutic experience. Sun Home Saunas full-spectrum models combine medical-grade infrared LED technology with far-infrared carbon panels for comprehensive coverage.
For users prioritizing longevity and low maintenance, carbon fiber outperforms ceramic by a significant margin, often achieving 5-10 times longer operational life under typical residential use.
What Is the Complete Infrared Emitter Replacement Checklist?
Use this checklist before beginning your replacement project to ensure success from start to finish.
Pre-Installation Planning:
[ ] Document original emitter specifications, including part numbers, wattage, voltage, and mounting dimensions.
[ ] Take photos of the current installation showing wiring, panel positions, and connector arrangements.
[ ] Order replacement emitters with matching specifications; consider ordering 10% spare capacity for future needs.
[ ] Verify replacement emitters have appropriate safety certifications (UL, ETL, CE).
[ ] Schedule installation during off-peak usage periods to minimize disruption to daily routine.
[ ] Review sauna warranty terms to understand how replacement affects coverage.
Tools and Equipment:
[ ] Prepare a workspace with insulated tools, safety glasses, and adequate lighting.
[ ] Gather a multimeter, an infrared thermometer, and a Gaussmeter for testing.
[ ] Have wire nuts, electrical tape, and heat shrink tubing available for connections.
[ ] Keep fire extinguishers accessible throughout the project.
[ ] Prepare labels and markers for panel and wire identification.
Installation and Testing:
[ ] Turn off the power at the main breaker and verify the circuit is dead.
[ ] Remove and label interior panels; disconnect and document wiring.
[ ] Inspect mounting surfaces for damage; repair before proceeding.
[ ] Install new emitters per manufacturer specifications.
[ ] Test resistance values with a multimeter before power-on.
[ ] Conduct initial 5-minute power-on test.
[ ] Measure surface temperatures and EMF levels at all positions.
[ ] Run full 45-minute heating cycle and monitor for issues.
Post-Installation Documentation:
[ ] Update sauna maintenance logs with replacement details and dates.
[ ] File warranty documentation for new components.
[ ] Record test results, including temperatures and EMF measurements.
[ ] Schedule follow-up inspection after 30 days of regular use.
Protect Your Home Sauna Investment with the Right Emitter Replacement
Timely emitter replacement restores your sauna to peak performance, ensuring every session delivers the therapeutic infrared sauna health benefits that make infrared therapy so beneficial for recovery, relaxation, and cardiovascular health. Degraded emitters waste energy, extend warm-up times, and reduce the deep-penetrating infrared output that distinguishes a high-quality home sauna session from a simply warm room.
Using manufacturer-approved replacement parts protects your warranty and ensures electrical compatibility with your existing control system. Third-party or generic components may seem like a cost-saving alternative, but they often introduce EMF concerns, performance mismatches, and safety risks that cost significantly more in the long run.
Sun Home Saunas designs emitters for exceptional longevity, targeting 50,000+ hours of operational life under typical residential use, with low-EMF technology that consistently measures below 1 milligauss at seating positions. When replacement becomes necessary, Sun Home's authorized parts ensure your sauna continues operating to original specifications.
Ready to replace your infrared emitters or explore upgrade options?
Contact Sun Home Saunas customer support for compatible replacement parts, technical specifications, and professional installation guidance tailored to your specific sauna model.
External References
1. National Institute of Environmental Health Sciences (NIEHS): “Electromagnetic Fields (EMF) Research and Residential Exposure Guidelines.”
2. Fire Protection Online: “What is a Class A Fire? What Type of Fuel Does It Involve?”
3. Downpour Electric: “Why DIY Electrical Work Can Void Your Home Insurance.”
4. International Code Council: “Overview of the International Residential Code.”
5. Mayo Clinic: “Do Infrared Saunas Have Any Health Benefits?”